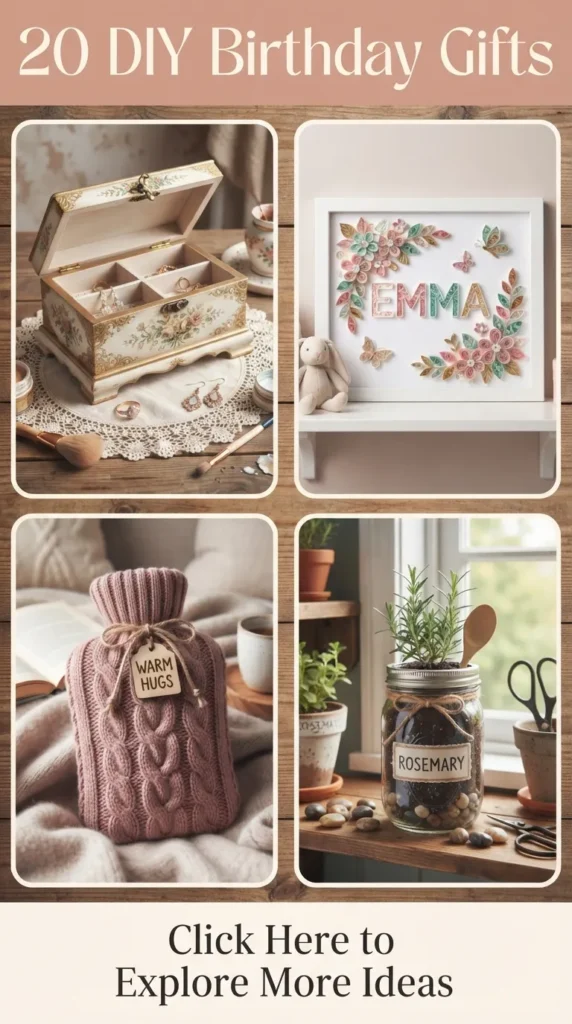
Handmade gifts carry an intrinsic warmth that store-bought luxury items simply cannot replicate. When thoughtfulness merges with modern aesthetics, minimalism, and high-end materials, DIY gifts transform into cherished keepsakes. Whether celebrating a milestone birthday or wanting to brighten someone’s everyday space, these 20 modern DIY birthday gift ideas blend functionality, beauty, and refined craftsmanship.
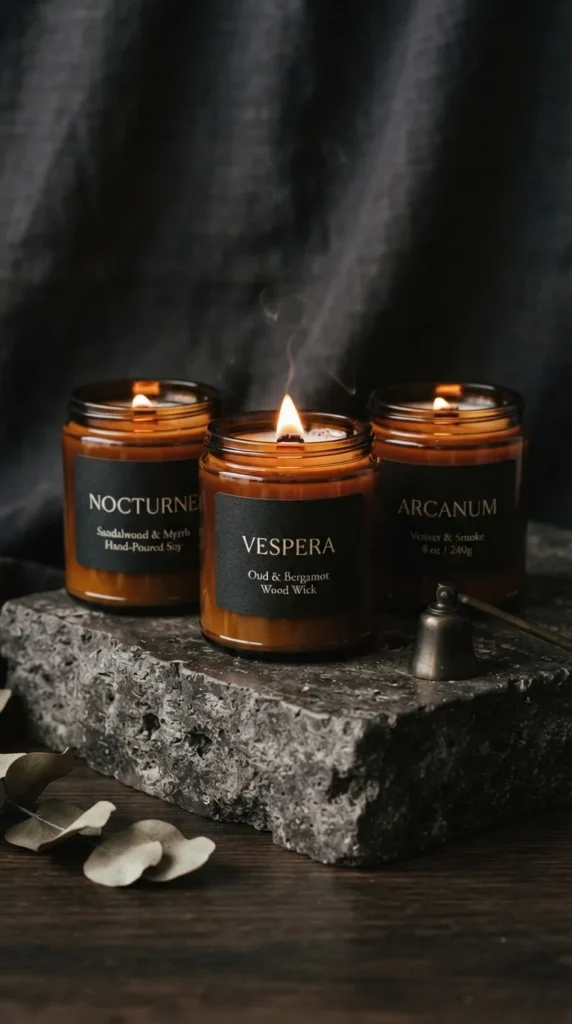
1. Hand-Poured Botanical Soy Wax Amber Jars
Introduction
A beautifully scented candle poured into a minimalist vessel brings an instant touch of comfort and elegance into any home. Scented candles evoke memories, calm the senses, and double as aesthetic home decor accessories.
What This Idea Means
This idea elevates basic candlemaking into an artisanal studio piece. By using pure soy wax, wooden crackling wicks, bespoke essential oil blends, and vintage-style apothecary amber jars with custom typography labels, you present a clean, non-toxic luxury gift.
Materials Needed
- 100% natural golden soy wax flakes (464 or coconut-soy blend)
- 8 oz or 12 oz amber glass straight-sided jars with black metal lids
- Natural booster crackling wooden wicks with metal sustainers
- Clean fragrance or pure essential oils (such as bergamot, cedarwood, amber, or black fig)
- Metal wax pouring pitcher and digital kitchen thermometer
- Wick glue dots and safety labels
How to Make It
- Prepare the Vessel: Clean the amber jars thoroughly and dry them. Secure the wooden wick in its metal clip, add a glue dot to the bottom, and firmly center it at the base of the jar.
- Melt the Wax: Measure the soy wax flakes based on your jar capacity. Heat the wax in a double boiler until it reaches 85°C (185°F).
- Add Fragrance: Allow the wax to cool down slightly to 75°C (167°F) before adding your essential oil blend at a 8–10% fragrance load. Stir gently for two full minutes to fully bind the oil with the wax.
- Pour and Cool: Slowly pour the melted wax into the amber jar at 55–60°C (130–140°F) to prevent surface sinkholes or frosting. Leave 1/2 inch of space at the top.
- Cure and Trim: Allow the candle to cool at room temperature undisturbed for 48 hours. Trim the wooden wick to 1/8 inch above the wax surface before packaging.
Tips and Variations
- Tips: Never cure candles in drafty or cold rooms, as rapid cooling causes surface cracking.
- Variations: Replace amber glass with matte ceramic pots, or top the dried surface with dried botanical elements like jasmine buds or crushed rose petals.
2. Minimalist Ceramic Arch Vase
Introduction
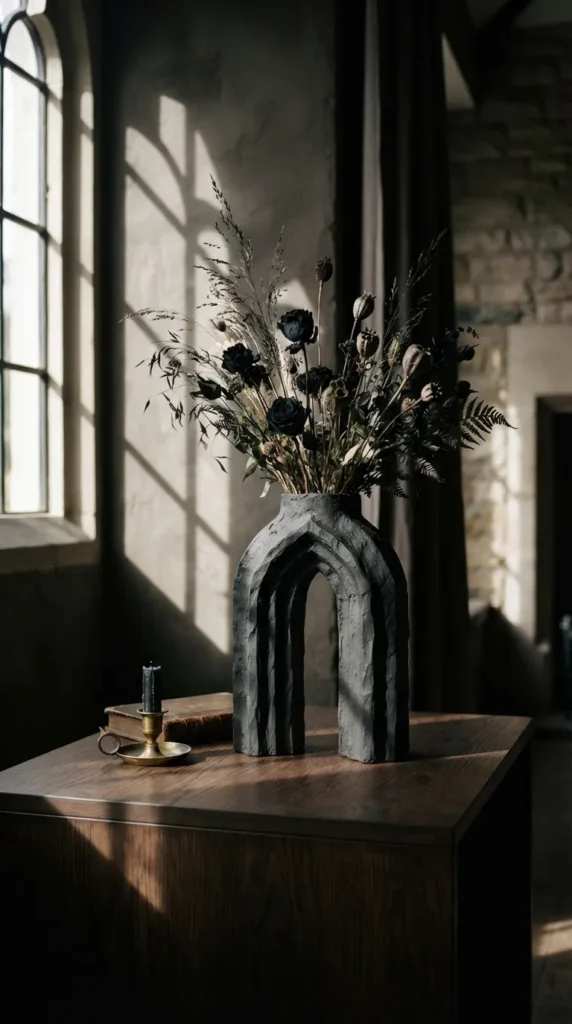
Architectural silhouettes and soft earth tones dominate modern interior styling. An arch-shaped, textured ceramic vase brings sculptural elegance to a nightstand, bookshelf, or vanity.
What This Idea Means
This project turns air-dry clay into an organic ceramic centerpiece. It reflects intentionality and architectural balance without requiring an expensive kiln or pottery wheel.
Materials Needed
- Premium white or terracotta air-dry modeling clay
- Clay rolling pin with thickness guide rings (1/4 inch)
- Plastic piping or glass test tube (for holding real water)
- Clay knife, modeling tools, and sponge
- Liquid slip (clay mixed with water)
- Acrylic textured stone spray or matte ceramic sealer
How to Make It
- Form the Internal Water Chamber: Embed a narrow glass cylinder or test tube inside a core clay column to ensure the finished vase can hold fresh floral stems safely.
- Roll and Shape the Arch: Roll out clay slabs to a uniform 1/4-inch thickness. Cut two identical arch silhouettes with hollow inner loops using a stencil.
- Assemble the Structural Walls: Score the edges of the arch slabs with a crosshatch pattern, apply wet clay slip, and connect the sides using 1-inch clay strips to create depth.
- Smooth and Dry: Blend all joined seams with a damp sponge. Let the piece air-cure slowly under a light plastic cover for 3 to 4 days to prevent warping.
- Finish and Seal: Sand out any uneven bumps with fine 400-grit sandpaper, apply a stone texture spray, and finish with two coats of matte acrylic sealer.
Tips and Variations
- Tips: Slow drying is vital; fast drying in direct sunlight causes structural cracks.
- Variations: Add raw grog or fine sand directly into the wet clay for a tactile, wabi-sabi stone texture.
3. Artisanal Cold-Process Oat & Honey Soap Bars
Introduction
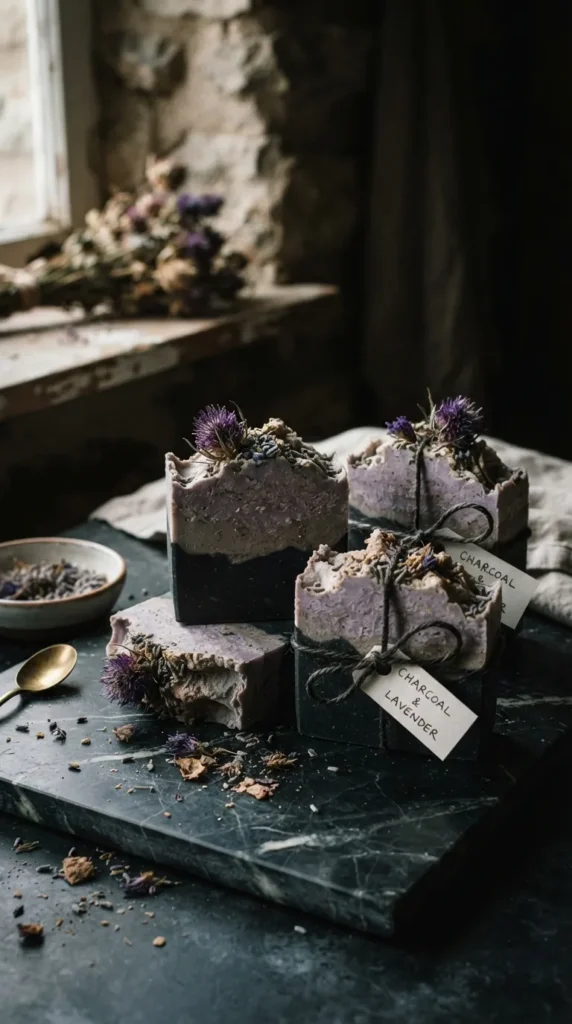
Artisanal soap bars curated with organic oils, botanical infusions, and rich clays offer a luxurious, spa-like experience directly at home.
What This Idea Means
Making custom botanical soap signifies personal care and wellness. It demonstrates a conscious focus on clean skincare, aesthetic earth tones, and gentle natural ingredients.
Materials Needed
- Olive oil, unrefined coconut oil, shea butter, and sweet almond oil
- Sodium hydroxide (lye) and distilled water
- Colloidal oatmeal, raw wildflower honey, and French pink clay
- Silicone rectangular soap loaf mold with wavy/smooth cutters
- Stainless steel stick blender and digital safety gear (goggles, gloves)
- Kraft paper wrap and cotton twill ribbon for packaging
How to Make It
- Mix the Lye Solution: Wearing safety gear in a ventilated area, slowly dissolve lye crystals into cold distilled water. Set aside to cool to 40°C (104°F).
- Melt the Base Oils: Melt the solid butters and combine them with liquid carrier oils in a stainless steel bowl until the temperature matches the lye solution.
- Blend to Trace: Slowly pour the lye water into the oils and pulse with an immersion stick blender until the mixture reaches a light trace.
- Incorporate Botanicals: Whisk in the colloidal oatmeal, raw honey, and natural clay. Pour the batter into the rectangular silicone mold.
- Texturize and Cure: Texture the top surface with a mini palette knife. Insulate for 24 hours, unmold, slice into 1-inch thick bars, and let them cure on wooden racks for 4 to 6 weeks.
Tips and Variations
- Tips: Honey heats up the soap batter quickly; avoid excessive insulation to prevent caramelization cracks.
- Variations: Swirl in activated charcoal powder for a dramatic monochromatic marbling effect.
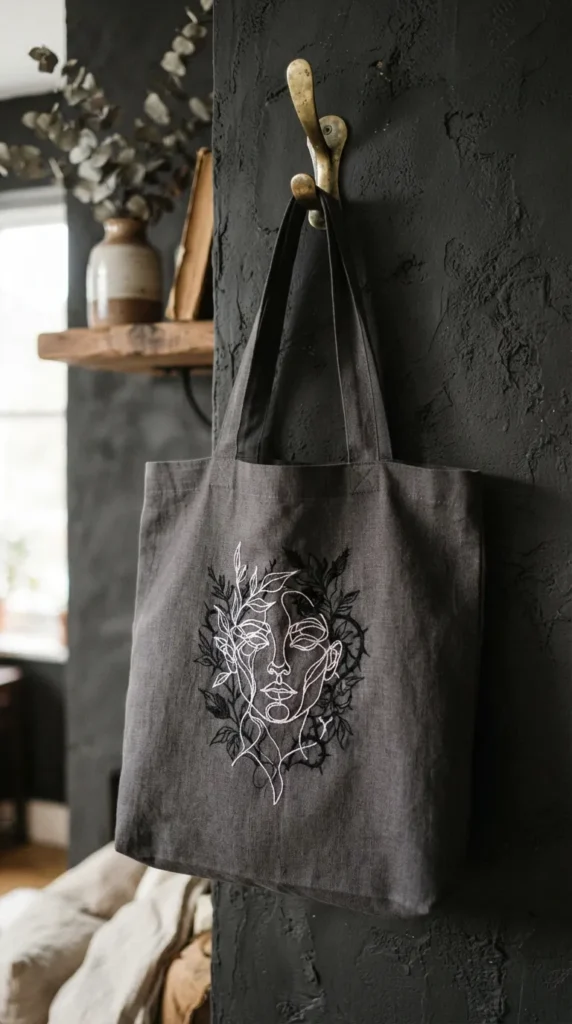
4. Custom Embroidered Modern Linen Tote
Introduction
Linen tote bags are timeless, eco-friendly daily companions. Adding clean, modern line-art embroidery turns a practical canvas bag into a custom wearable fashion piece.
What This Idea Means
This project moves away from traditional floral embroidery, embracing minimalist continuous line drawings, celestial outlines, or personalized architectural sketches.
Materials Needed
- Heavyweight natural unbleached linen or structured cotton canvas tote bag
- DMC stranded cotton embroidery floss (black, muted sage, or antique brass)
- Water-soluble embroidery transfer paper
- 6-inch wooden embroidery hoop
- Sharp embroidery needles (Size 5–7)
- Tailor’s fine-point snips
How to Make It
- Transfer the Pattern: Print a minimalist single-line portrait or botanical contour onto water-soluble transfer film, peel the backing, and adhere it directly onto the tote bag center.
- Hoop the Fabric: Stretch the linen tautly inside the wooden hoop, tightening the brass screw so the fabric sounds like a drum when tapped.
- Stitch the Design: Use a clean stem stitch, split stitch, or backstitch with 2 strands of floss to trace the continuous contour lines evenly.
- Dissolve the Backing: Once stitching is finished, immerse the embroidered tote in lukewarm running water to completely dissolve the stabilizer film.
- Press and Package: Allow the tote to dry flat on a towel, then press from the reverse side with a warm steam iron to set the embroidery stitches crisply.
Tips and Variations
- Tips: Keep thread tension consistent to avoid puckering the flexible linen cloth.
- Variations: Incorporate delicate French knots at specific branch tips to add subtle 3D texture.
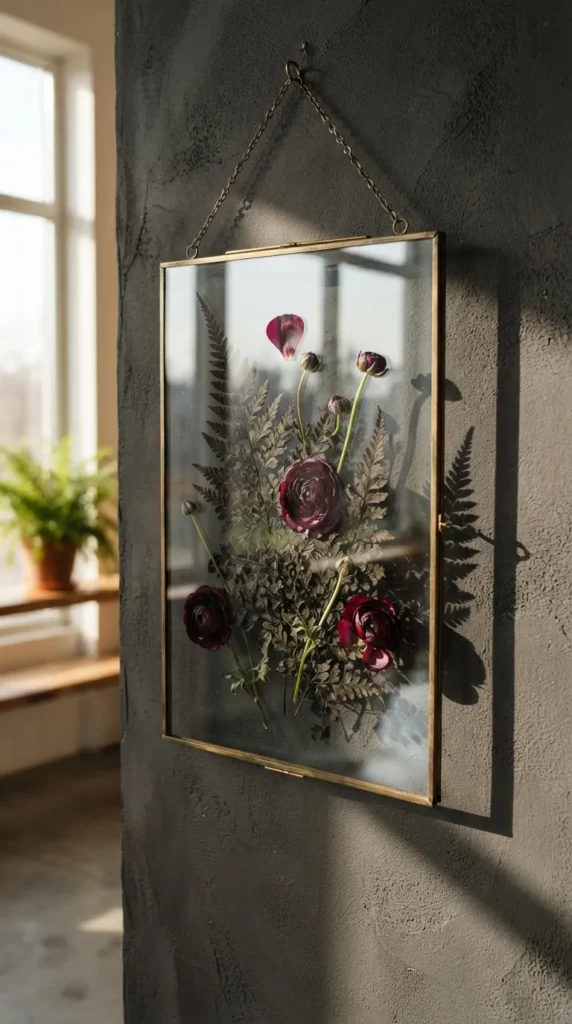
5. Floating Glass Pressed Botanical Frame
Introduction
Preserving botanical flora between two sleek panes of floating glass captures natural beauty in a modern, suspended gallery format.
What This Idea Means
A pressed floral frame represents longevity and frozen time. Using real flowers, ferns, and greenery collected from meaningful locations turns botanical preservation into sentimental modern wall decor.
Materials Needed
- Double-glass metal floating frame (brass, matte black, or brushed gold)
- Fresh flowers and botanicals (pansies, fern fronds, baby’s breath, ranunculus petals)
- Hardwood flower press with blotting sheets and corrugated cardboard
- Precision craft tweezers
- Clear micro-dot adhesive or transparent botanical glue
How to Make It
- Press the Botanicals: Arrange freshly picked petals and leaves between porous blotting sheets in your wooden press. Fasten tightly and leave for 2 to 3 weeks until all moisture evaporates.
- Clean the Frame: Disassemble the floating brass frame. Polish both sides of the glass panes meticulously using a microfiber cloth to eliminate dust and fingerprints.
- Arrange the Composition: Using precision tweezers, arrange the completely dried flowers on the base glass pane, prioritizing balanced negative space.
- Secure the Placement: Apply an imperceptible pinprick drop of clear botanical glue behind the central petals to prevent slipping.
- Enclose and Seal: Carefully lower the top glass pane, lock the metal frame clasps into place, and affix a hanging silk ribbon.
Tips and Variations
- Tips: Pick flowers on a dry afternoon when morning dew has evaporated completely to prevent mold during pressing.
- Variations: Include a small slip of handmade deckle-edge paper with a calligraphy birthday quote nestled among the stems.
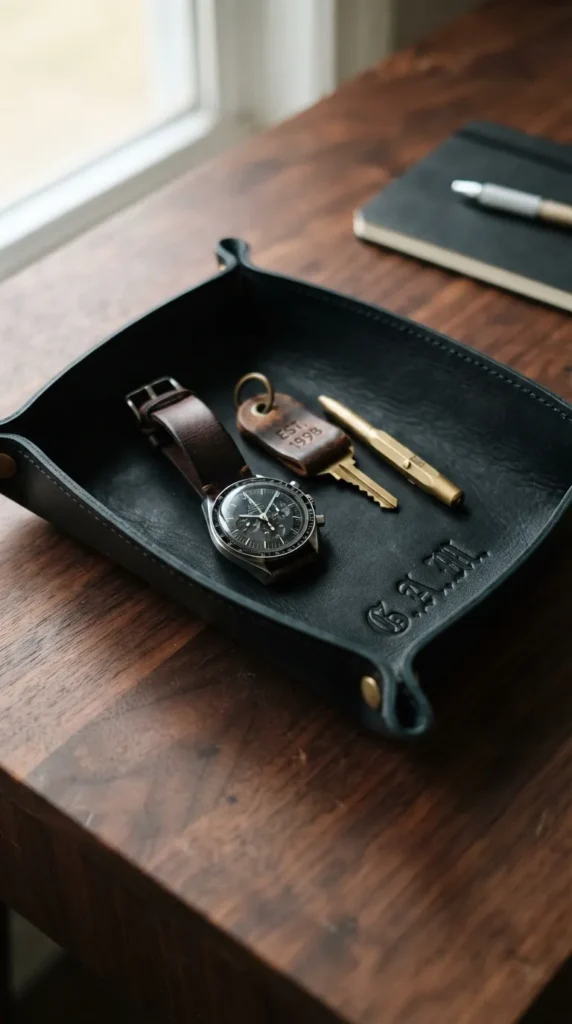
6. Monogrammed Full-Grain Leather Valet Tray
Introduction
A refined catchall tray placed on a desk or entryway console keeps watches, keys, and accessories organized within rich, handcrafted leather.
What This Idea Means
Leathercraft represents durability, masculine or unisex elegance, and timeless utility. This item ages gracefully, developing a rich, unique patina over years of use.
Materials Needed
- 5–6 oz vegetable-tanned full-grain leather piece (8×8 inches)
- Solid brass heavy-duty screw rivets (Chicago screws) or snap setting kits
- Leather hole puncher (rotary or drive punch)
- Edge beveler, wood slicker, and natural gum tragacanth/Tokonole
- Brass letter stamping set and mallet
How to Make It
- Cut the Base Square: Precision-cut an 8×8-inch square from premium vegetable-tanned leather using a steel ruler and rotary cutter. Round off the sharp corners.
- Bevel and Burnish: Bevel the top and bottom edge perimeter. Apply Tokonole burnishing gum and rapidly rub the edges with a wooden slicker until smooth and glossy.
- Stamp the Monogram: Lightly dampen the center surface with water, align the brass letter stamps, and strike cleanly with a wooden mallet to emboss the recipient’s initials.
- Punch Corner Holes: Measure and punch matching holes 1 inch inward from each corner tip to form the fold-up catchall corners.
- Assemble the Tray: Insert solid brass Chicago screws through each corner pair and tighten securely to raise the perimeter walls into a structured catchall tray.
Tips and Variations
- Tips: Always stamp on a solid granite or quartz slab beneath your cutting mat to ensure clean, bounce-free stamp impressions.
- Variations: Dye the natural leather a rich walnut, oxblood, or forest green tone before burnishing the edges.


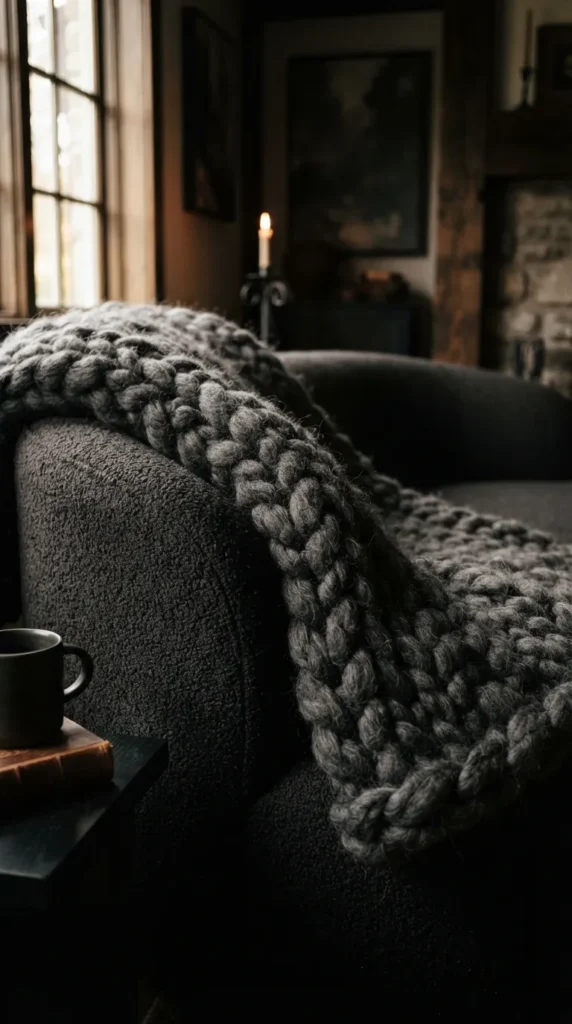
7. Chunky Hand-Knitted Merino Wool Blanket
Introduction
An ultra-plush, cloud-soft chunky knit blanket is the ultimate cozy interior accessory for sofa lounges, readings nooks, or bedding layers.
What This Idea Means
This project transforms arm-knitting and massive yarn loops into tactile warmth. It communicates pure pampering, restful luxury, and modern Scandinavian hygge vibes.
Materials Needed
- 3 to 4 kg of unspun giant jumbo merino wool roving or tube cotton-filled chunky yarn
- Smooth flat working surface (such as a large dining table or clean floor)
- Sharp textile scissors
- Large wool felting needle (for joining ends smoothly)
How to Make It
- Cast On the Foundation: Make a slipknot with a 4-inch loop. Reach through the loop to pull yarn from the working strand, forming a chain of approximately 20–25 loose stitches.
- Form the First Row: Working from right to left without needles, pull working yarn loops upward through each foundation chain stitch, maintaining a uniform 3-inch loop height.
- Weave Consecutive Rows: Continue weaving back and forth, pulling yarn up through the previous row’s open loops without twisting the wool fiber.
- Maintain Tension: Step back periodically to inspect tension uniformity, ensuring loops do not become overly tight or saggy.
- Cast Off and Tuck: When desired length is reached, pass the first loop over the adjacent loop across the edge. Weave the tail end through the border securely using a felting needle.
Tips and Variations
- Tips: Use jumbo tubular vegan cotton yarn if the recipient suffers from wool sensitivities or requires machine-washable care.
- Variations: Experiment with a subtle moss-stitch or two-tone horizontal color block transition.
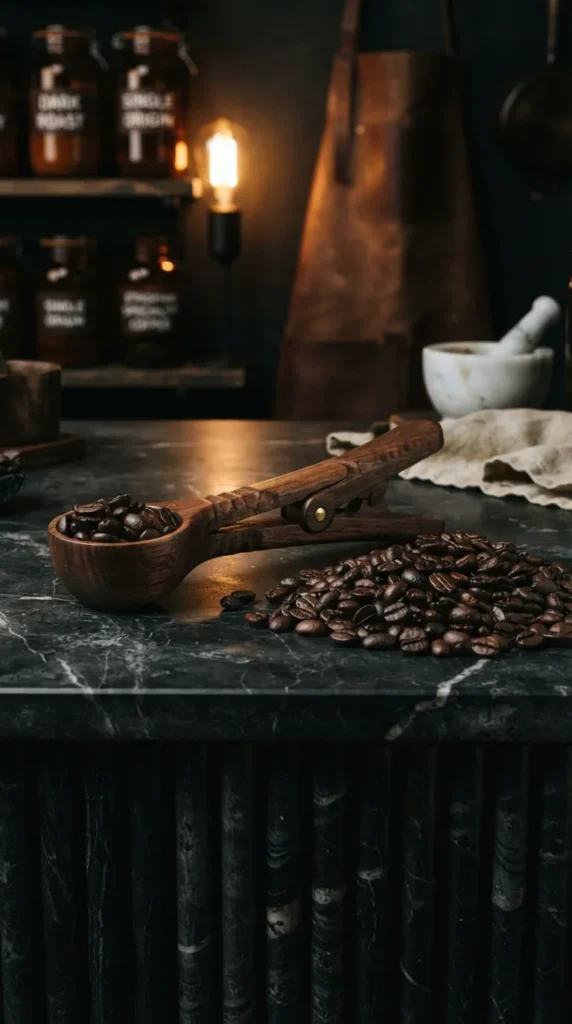
8. Hand-Carved Wooden Coffee Scoop & Clip
Introduction
Carved from a single piece of dense hardwood, a combined coffee scoop and bag-sealing clip adds artisan ritual to every morning brew.
What This Idea Means
Green woodworking and hand-carving showcase traditional handcrafting patience. It creates an organic, functional culinary utensil that bridges natural wood grains with modern kitchen aesthetics.
Materials Needed
- Hardwood carving blank (walnut, cherry, or hard maple – 2x2x7 inches)
- Carving hook knife (spoon knife) and straight sloyd whittling knife
- Coping saw or Japanese pull saw
- Sandpaper grits: 80, 120, 220, 400, and 600
- 100% food-grade mineral oil and organic beeswax wood butter
How to Make It
- Sketch the Profile: Draw the scoop bowl and handle clip profile onto both sides of the wood block using a graphite pencil.
- Hollow the Spoon Bowl: Clamp the wood blank firmly. Use the hook knife with smooth rotating wrist cuts to hollow the round coffee bowl to a 1-tablespoon depth.
- Cut the Bag Clip Slot: Use a fine-kerf Japanese pull saw to slice a clean longitudinal opening along the center of the handle to form the bag clip.
- Carve the Outer Contours: Shave away excess exterior wood using the straight sloyd knife, following grain directions to prevent tear-out.
- Sand and Condition: Progressively sand the carved scoop through grits from 80 up to 600. Immerse in food-grade mineral oil, allow to absorb overnight, and buff with beeswax.
Tips and Variations
- Tips: Wet the wood with water between higher sandings (grain popping) to achieve a glass-smooth final finish.
- Variations: Add geometric carved patterns (chip carving) along the spine of the handle for enhanced tactile grip.
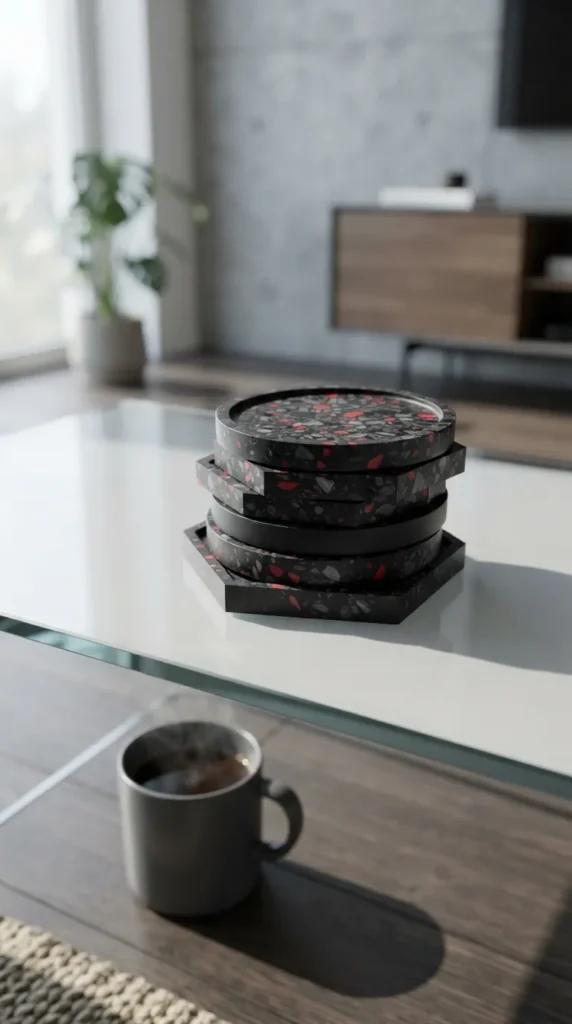
9. Terrazzo Jesmonite Coaster & Trinket Set
Introduction
Terrazzo patterns offer playful yet sophisticated graphic textures. Made using composite resin, these coasters and dishes make modern statement pieces for coffee tables and vanity tops.
What This Idea Means
This project captures mid-century Venetian design reimagined with eco-resin materials. It is durable, non-toxic, heat-resistant, and visually engaging.
Materials Needed
- Jesmonite AC100 (or high-grade eco-resin acrylic composite)
- Liquid pigment dispersions (terracotta, charcoal black, sage green, and ochre)
- High-grade silicone coaster molds (hexagon or circle) and oval tray molds
- Mixing cups, wooden spatulas, and precision kitchen scale
- Waterproof wet/dry sandpaper sheets (120, 240, 400, and 800 grit)
- Food-safe stone wax sealer or acrylic protective coating
How to Make It
- Create the Color Chips: Mix small batches of Jesmonite with distinct pigments. Pour thin layers onto a flat plastic sheet. Once cured (25 mins), crush them into colorful irregular chips.
- Mix Base Matrix: Weigh out the liquid base and mineral powder in exact recommended ratios (usually 1:2.5). Blend thoroughly until lump-free and silky.
- Blend the Terrazzo: Fold the crushed color chips into the wet base mixture, ensuring chips distribute evenly throughout the liquid.
- Pour and Tap: Pour the mixture into silicone molds. Tap the mold edges repeatedly on your work surface to release trapped air bubbles. Let cure for 2 hours.
- Wet Sand to Reveal: Submerge the cured pieces in water and sand with 120-grit paper to grind away the top layer, revealing the colorful embedded chips beneath. Progress to 800 grit and apply wax.
Tips and Variations
- Tips: Sanding underwater completely eliminates airborne mineral dust and extends sandpaper life significantly.
- Variations: Integrate flakes of genuine gold or copper leaf along with the colored chips for metallic sheen.
10. Hand-Marbled Silk Twill Hair & Neck Scarf
Introduction
Flowing silk scarves with organic water-marbled swirls bring haute-couture expression to everyday wardrobes and accessories.
What This Idea Means
Ebru and water-marbling arts rely on fluid dynamics to make one-of-a-kind wearable art. No two scarves can ever be identical, ensuring absolute exclusivity.
Materials Needed
- 100% Habotai or Mulberry silk scarf blank with hand-rolled edges
- Marbling size (Carrageenan or methylcellulose dissolved in water)
- Suminagashi or acrylic marbling paint set
- Surfactant (ox gall or drop spreaders)
- Marbling comb, rakes, and stylus pins
- Large shallow plastic marbling tray fitting scarf dimensions
How to Make It
- Prepare the Size and Silk: Dissolve carrageenan powder in water using a blender 24 hours prior to create a smooth, viscous liquid base. Pre-treat the silk with an alum mordant bath.
- Drop the Colors: Fill the shallow tray with the size solution. Gently touch drops of paint to the liquid surface with brushes or droppers, watching the circular color rings expand.
- Comb the Patterns: Use styluses, rakes, and custom marbling combs to draw through the floating surface pigments, creating intricate feathers, swirls, or nonpareil waves.
- Print the Silk: Hold the silk scarf by diagonal corners in a gentle U-shape. Lower the center onto the liquid surface smoothly without trapping air bubbles, then let the rest drop.
- Rinse and Heat-Set: Lift the silk off the marbling bath after 5 seconds, rinse off excess viscous size under cold running water, hang dry, and iron on silk setting to fix colors.
Tips and Variations
- Tips: Avoid sudden air movements near the marbling tray, as drafts can distort floating pigments.
- Variations: Use a monochrome palette of varying indigo and slate gray tones for a moody modern finish.
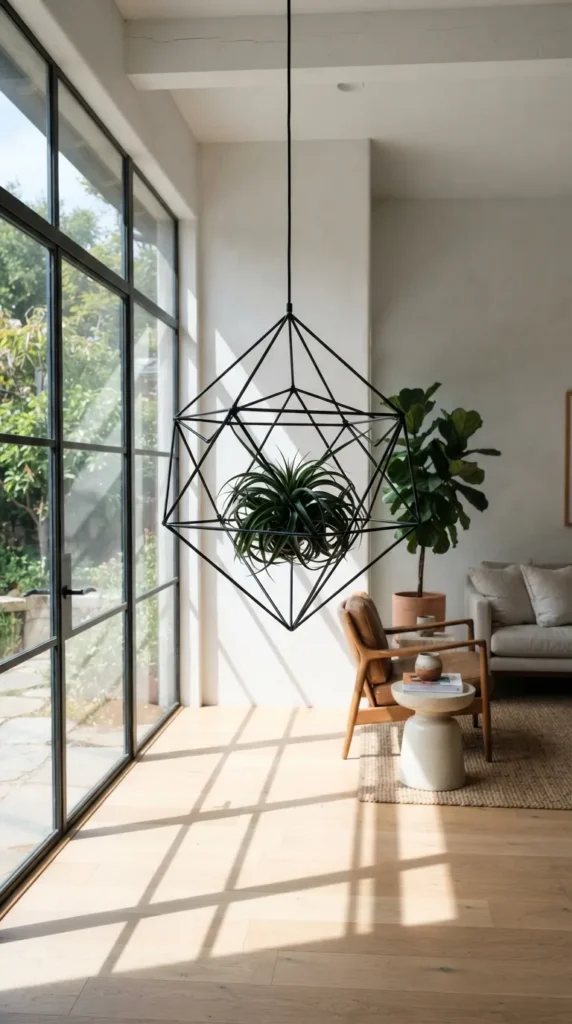
11. Minimalist Brass & Air Plant Geometric Chandelier
Introduction
Suspended brass air plant mobiles combine geometric modern metalwork with living indoor greenery, creating a striking kinetic hanging sculpture.
What This Idea Means
Inspired by traditional Finnish himmeli structures and modern kinetic mobiles, this craft brings dynamic dimension and organic vitality to modern living spaces.
Materials Needed
- Precision brass hollow round tubing (3/32 or 1/8 inch diameter)
- Miniature tubing pipe cutter
- 24-gauge brass jewelry wire or strong nylon thread
- Healthy Tillandsia air plants (Ionantha, Xerographica, or Stricta)
- Metal hanging ring and ceiling hook hardware
How to Make It
- Measure and Cut Tubes: Cut the brass tubing into uniform geometric lengths (e.g., 12 pieces of 4 inches for an octahedron) using the rotary tube cutter.
- Thread the Core Base: String three brass tubes onto the wire, loop back through, and pull tightly into an equilateral triangle.
- Build the Prism Geometry: Continue adding tube pairs, interlocking wire passes to build outward into a three-dimensional geometric octahedron or diamond prism.
- Anchor the Plant Base: Construct a smaller cradle at the lower center point to securely seat the base of your Tillandsia air plant.
- Balance and Hang: Secure top suspension wires to a solid brass ring, ensuring the structure hangs plumb, and position the air plant inside.
Tips and Variations
- Tips: Air plants require indirect bright light and weekly misting; ensure the plant is easily removable for soaking.
- Variations: Combine raw copper tubes with polished brass for a contrasting multi-metallic visual balance.
12. Dipped Stoneware Pour-Over Coffee Dripper
Introduction
A hand-built stoneware coffee dripper elevates morning coffee into a slow, mindful, and artisanal brewing experience.
What This Idea Means
This piece merges kitchen utility with ceramic modernism. Giving a handcrafted pour-over cone represents the gift of peaceful mornings and quality daily rituals.
Materials Needed
- Mid-fire or high-fire ceramic stoneware clay (speckled buff or dark brown)
- Ceramic cone shaping template (compatible with V60 #02 paper filters)
- Clay modeling loop tools, ribs, and rolling pins
- Potter’s needle tool
- Food-safe matte white or speckled satin glaze
How to Make It
- Roll the Slabs: Roll out clay to a consistent 5mm thickness. Cut out the conical funnel template and a circular flat base ring sized to rest securely atop a mug.
- Assemble the Cone: Join the cone seams together using crosshatch scoring and slip. Pierce a 3/4-inch extraction hole in the base center.
- Carve Internal Spiral Ribs: Use a rounded carving tool to carve shallow spiral grooves inside the cone walls to facilitate smooth air release and water flow during brewing.
- Join the Base Plate: Score and adhere the conical body onto the circular drip tray base, smoothing the joint securely with a damp wooden rib tool.
- Bisque and Glaze: Fire in a ceramic kiln to bisque cone 04. Dip halfway into a matte chalk-white glaze for a stylish half-raw clay finish, and glaze fire to cone 6.
Tips and Variations
- Tips: Ceramic shrinks roughly 10–12% during drying and firing; factor scale enlargement into your paper templates.
- Variations: Hand-build a matching ceramic saucer and mug set to turn it into a complete specialty barista gift kit.
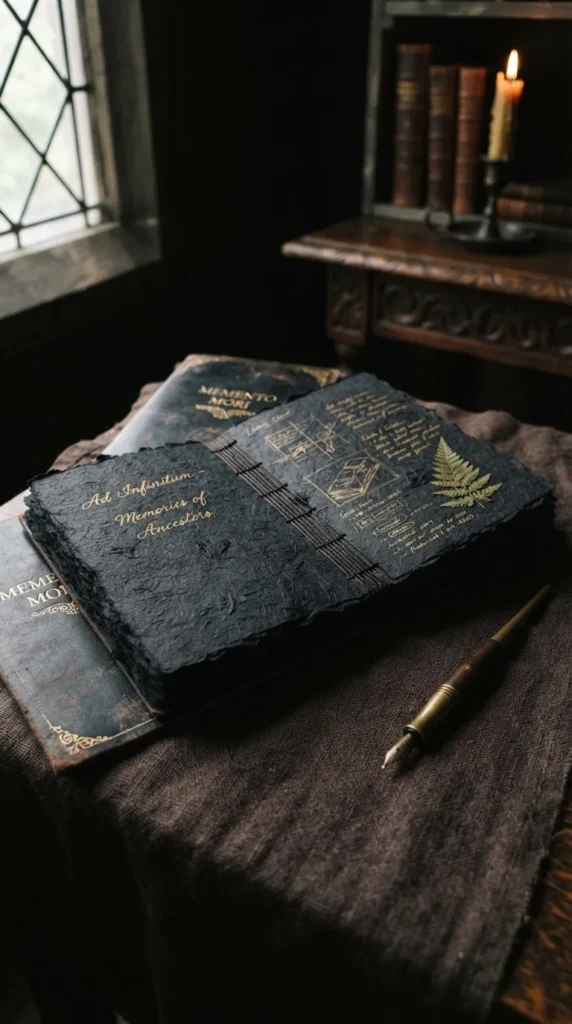
13. Personalized Deckle-Edge Linen Paper Memory Journal
Introduction
A custom-bound journal crafted with textured deckle-edge paper and hand-stitched open spine bindings makes a deeply intimate, heirloom-worthy keepsake.
What This Idea Means
In an era dominated by screens, a tactile journal celebrates analog expression, sketching, reflective writing, and thoughtful craftsmanship.
Materials Needed
- Handmade deckle-edge cotton rag paper sheets (150–200 GSM)
- Stiff bookbinding bookboard and natural bookcloth or Italian bookbinding leather
- Waxed linen bookbinding thread
- Heavy-duty bookbinding awl and bone folder
- Curved bookbinding needles
How to Make It
- Fold the Signatures: Fold deckle-edge sheets in half using a bone folder, nesting 4–5 folded sheets inside each other to create 6 distinct signatures.
- Punch Sewing Stations: Align the folded signatures against a punching template. Use the awl to pierce clean holes along the spine folds.
- Perform Coptic Stitching: Stitch signatures together through the spine holes using a flexible Coptic open-spine stitch, locking each consecutive section with looping chain links.
- Attach Hardcover Boards: Cut front and rear bookcloth-covered bookboards. Weave the first and last stitches through the hardcover boards to integrate the covers.
- Press and Finish: Press the bound book lightly under heavy weights for 24 hours to ensure firm, flat structural stability.
Tips and Variations
- Tips: Wax the thread thoroughly to prevent friction knots and paper tears during tensioning.
- Variations: Embed gold leaf flecks or personalized blind debossing onto the front fabric cover for subtle detailing.
14. Modernist Textured Plaster Minimalist Canvas
Introduction
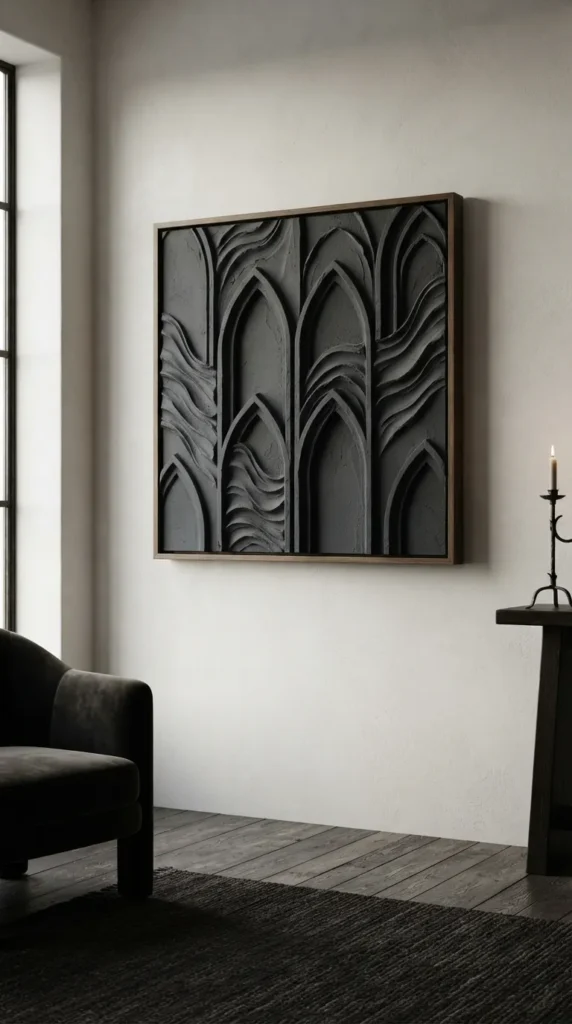
Monochromatic, tactile 3D relief canvas artwork adds understated gallery-grade luxury to modern interiors and neutral-toned living spaces.
What This Idea Means
This project embraces sculptural simplicity, geometric arches, and subtle play of shadows, proving that art does not need bright color to make a strong design statement.
Materials Needed
- Heavy-duty stretched primed gallery-depth cotton canvas (16×20 or 20×24 inches)
- Lightweight joint compound, structural modeling paste, or plaster
- Notched trowels, flexible palette knives, and silicone clay ribs
- Premium matte white wall paint or warm linen mineral paint
- Floating natural wood canvas frame
How to Make It
- Prep the Canvas: Lay canvas flat on a level, protected workspace. Ensure the canvas drum surface is clean and firm.
- Apply Plaster Base: Scoop generous mounds of modeling paste onto the canvas and spread evenly with a wide putty spatula to a 1/4-inch thickness.
- Sculpt 3D Contours: Pull a notched trowel or flexible comb through the wet plaster in broad sweeping arcs, concentric rings, or clean geometric ridges.
- Cure Fully: Let the plaster dry naturally for 24 to 48 hours away from direct heat to prevent thermal shrinkage cracks.
- Coat and Frame: Roll two coats of ultra-matte chalk or mineral paint over the dry relief surface. Mount canvas inside an unstained raw oak floating frame.
Tips and Variations
- Tips: Avoid laying plaster thicker than 1/2 inch in a single pass to minimize curing shrinkage.
- Variations: Mix fine sand or natural mica flakes directly into the plaster for an earthy stone finish.
15. Infused Artisan Botanical Culinary Oil Set
Introduction
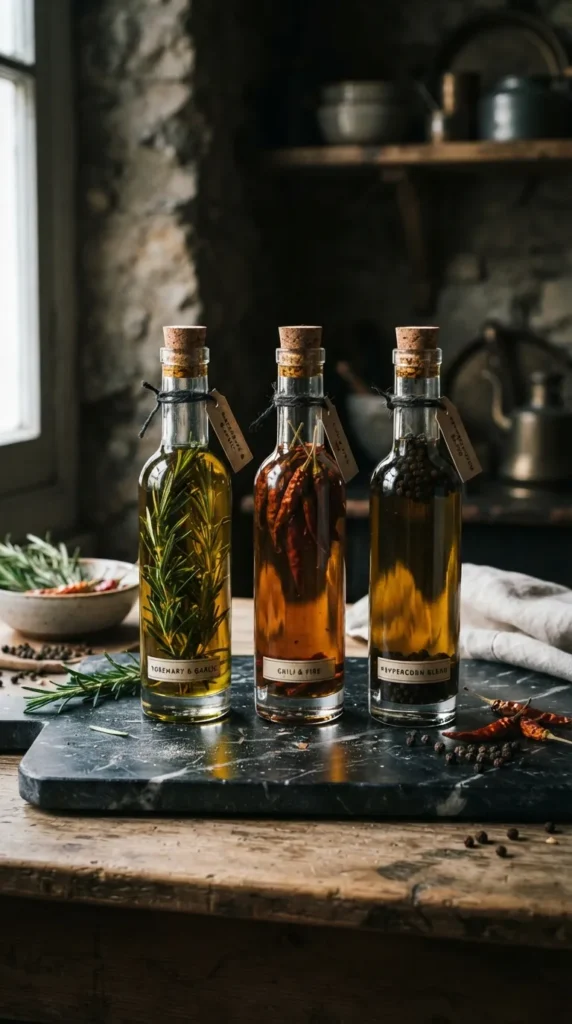
A curated trio of crystal glass bottles filled with herb-infused extra virgin olive oil delivers culinary elegance to any kitchen counter or dinner table.
What This Idea Means
This gift represents the warmth of hospitality, shared gourmet meals, and refined culinary passion. It combines vibrant garden aesthetics with gourmet functionality.
Materials Needed
- Cold-pressed single-estate extra virgin olive oil
- Dehydrated whole aromatics (rosemary sprigs, bird’s eye chili, garlic flakes, dried peppercorns, dried lemon peel)
- Elegant slim 250ml glass apothecary cruets with stainless steel pour spouts
- Waterproof kraft labels and natural jute twine
How to Make It
- Sterilize the Glassware: Boil glass cruets in hot water and dry completely in an oven at 100°C (212°F) to ensure no moisture remains.
- Prepare Fully Dried Botanicals: Use exclusively dried or dehydrated herbs and spices to completely avoid moisture contamination.
- Infuse the Base Oil: Gently heat extra virgin olive oil in a saucepan to 60°C (140°F) with your selected flavor profiles (e.g., Rosemary-Garlic, Chili-Peppercorn, Lemon-Thyme) for 30 minutes.
- Bottle the Blends: Strain the oil or pour it directly with decorative dried botanicals into the sterile glass cruets.
- Seal and Label: Insert weighted pour spouts, wrap twine around the bottle necks, and affix minimalist labels noting tasting notes and bottling dates.
Tips and Variations
- Tips: Always use fully dehydrated herbs; fresh, water-rich herbs can cause spoilage.
- Variations: Pair with an artisan loaf of sourdough bread and a dish of Himalayan flake salt for a complete gourmet basket.
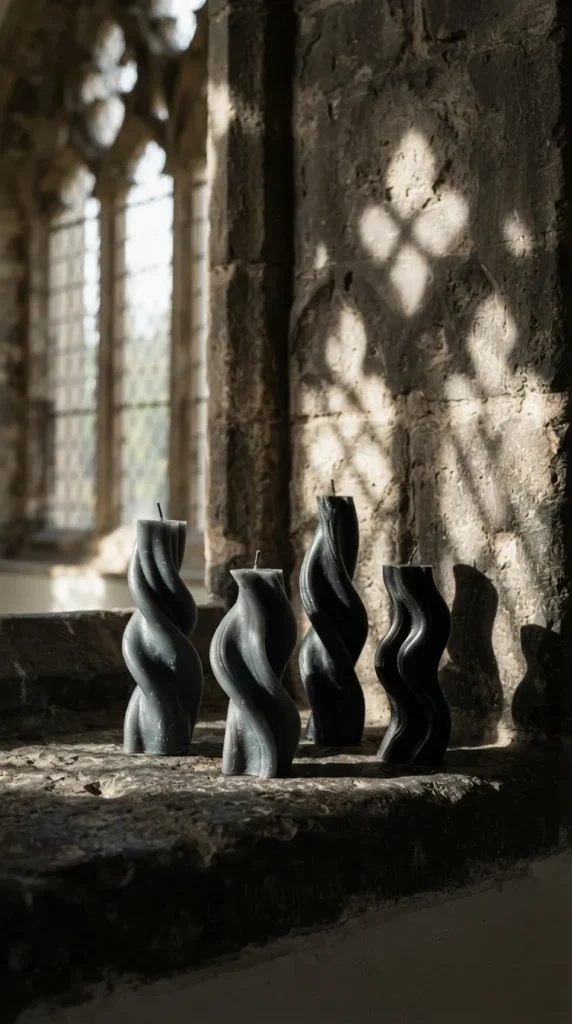
16. Sculptural Wavy Pillar Candles
Introduction
Curved, wavy, and ribbed pillar candles bring kinetic silhouettes and playful sculptural forms to dinner tables, fireplace mantels, and sideboards.
What This Idea Means
Moving away from classic cylindrical candles, sculptural shapes double as non-burning decorative art objects that reflect modern aesthetic trends.
Materials Needed
- High-melting pillar wax blend (such as beeswax, paraffin-soy pillar blend, or rapeseed wax)
- Silicone sculptural multi-curve/wave pillar molds
- Braided cotton wick #2 or #3 with wick needles
- Natural candle dye chips (warm cream, soft sage, mocha, or blush)
- Mold sealer putty and digital scale
How to Make It
- Wick the Mold: Thread the braided cotton wick through the bottom hole of the silicone wave mold. Seal tightly with mold putty to prevent leaks.
- Melt and Color Wax: Heat the pillar wax to 85°C (185°F). Dissolve chosen dye chips thoroughly until an even pastel hue is achieved.
- Pour with Precision: Slowly pour the wax into the mold at 75°C (167°F). Tap the sides gently to release internal bubbles trapped inside the curves.
- Top Off Shrinkage: As pillar wax cools, it creates an internal contraction hole around the wick. Pour a second small batch of wax at the same temperature to level the base.
- Demold and Straighten: Allow to cool for 12 hours. Peel the flexible silicone mold away gently from the curved edges and level the base.
Tips and Variations
- Tips: Never use standard container soy wax for free-standing pillars; container wax is too soft to hold structural curves cleanly.
- Variations: Dip half the cured wavy candle into a darker complementary dye bath to create a clean angled color-block look.
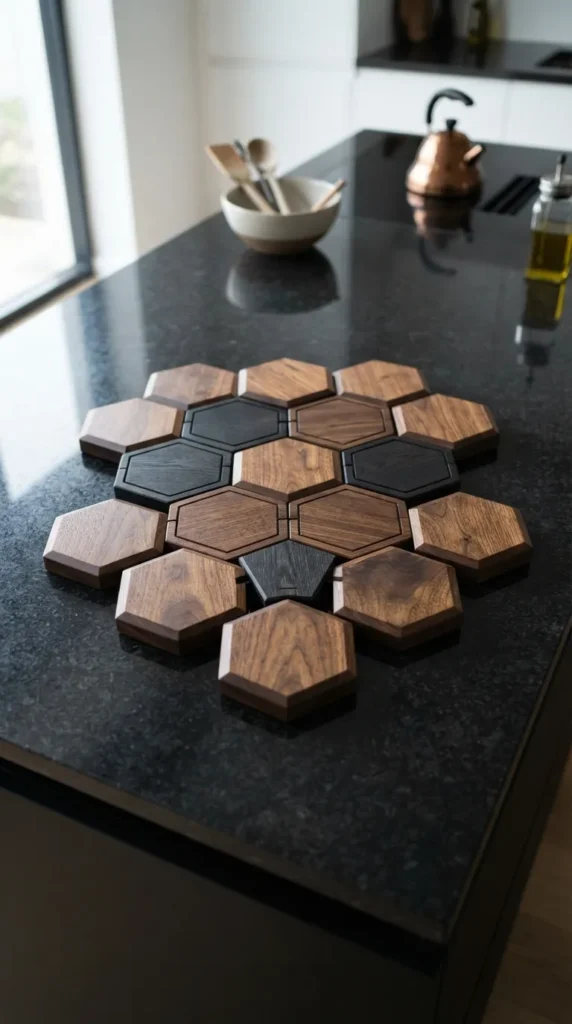
17. Handcrafted Solid Hardwood Hexagon Trivets
Introduction
Geometric, interlocking solid hardwood trivets protect kitchen countertops from heat while acting as modular table art when not in use.
What This Idea Means
Precision woodworking combined with geometric patterns celebrates symmetry and functionality. This gift is durable, clean, and seamlessly complements modern kitchens.
Materials Needed
- Contrasting hardwood strips (American walnut, white oak, hard rock maple)
- Mitre saw or hand miter box
- Waterproof wood glue (Titebond III)
- Clamps (band clamps or spring clamps)
- 100% natural pure Danish oil or tung oil finish
How to Make It
- Cut Hexagon Slats: Cut multiple precise 60-degree segments from hardwood strips to form modular matching geometric units.
- Dry Fit Layout: Arrange contrasting hardwood species side by side to verify tight, gap-free joint connections.
- Glue and Clamp: Apply thin, uniform coats of wood glue between mating joints. Clamp together firmly and wipe away squeezed-out glue immediately with a damp rag.
- Surface Sanding: Once cured (24 hours), sand surfaces thoroughly using 120, 220, and 320-grit sandpaper until all joints align flat and silky.
- Apply Protective Oil: Rub three coats of pure Danish oil into the wood grain, allowing 12 hours between coats, then buff with a soft microfiber rag.
Tips and Variations
- Tips: Precise 60-degree cuts are essential; test angles on scrap wood first to ensure airtight joints.
- Variations: Embed miniature neodymium magnets inside the hidden edges so multiple hexagon trivets snap together modularly.
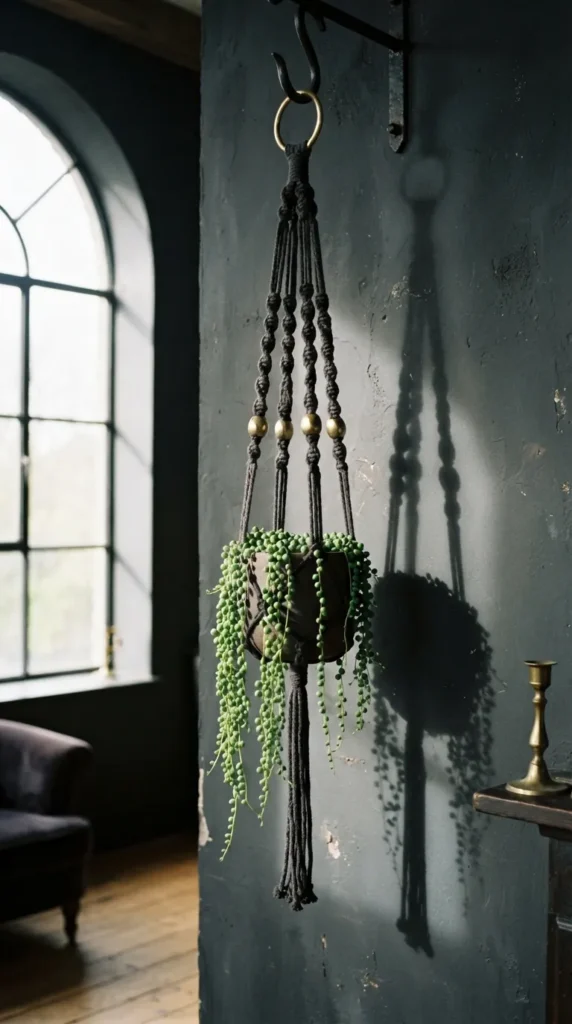
18. Modern Macramé Plant Pod with Matte Brass Accents
Introduction
Clean rope weaves combined with gleaming metallic hardware bring a refined, mid-century modern update to traditional bohemian plant hangers.
What This Idea Means
This craft replaces overly busy fringe with minimal, structured square knots and sleek metallic elements, offering a tailored home for trailing indoor foliage.
Materials Needed
- 4mm single-strand unbleached natural cotton rope
- 2-inch solid brass suspension ring
- 4 to 6 solid brass cylindrical jewelry slider beads (10mm inner diameter)
- S-hook for hanging while knotting
- Measuring tape and fabric scissors
How to Make It
- Measure and Mount: Cut 8 cords to 4 meters each. Fold in half and loop through the solid brass top ring using a clean gathering knot.
- Knot the Upper Columns: Separate cords into four sets of four strands. Tie neat sequences of continuous square knots or half-knot spirals for 6 inches.
- Add Metallic Accents: Thread thick solid brass cylindrical beads onto the leading middle core cords to add weight and modern shine.
- Form the Plant Basket: Measure 10 inches down, cross neighboring cord pairs, and tie secure alternating square knots to form an interlocking cradle for the plant pot.
- Secure the Base: Gather all hanging cords 4 inches beneath the basket base and bind tightly using a 2-inch wrapped gathering knot. Trim the tassel ends squarely.
Tips and Variations
- Tips: Keep uniform downward pulling tension across all knots to maintain symmetric hanging balance.
- Variations: Dye the bottom tassel tips with an ombré dip bath of muted charcoal or terracotta textile dye.
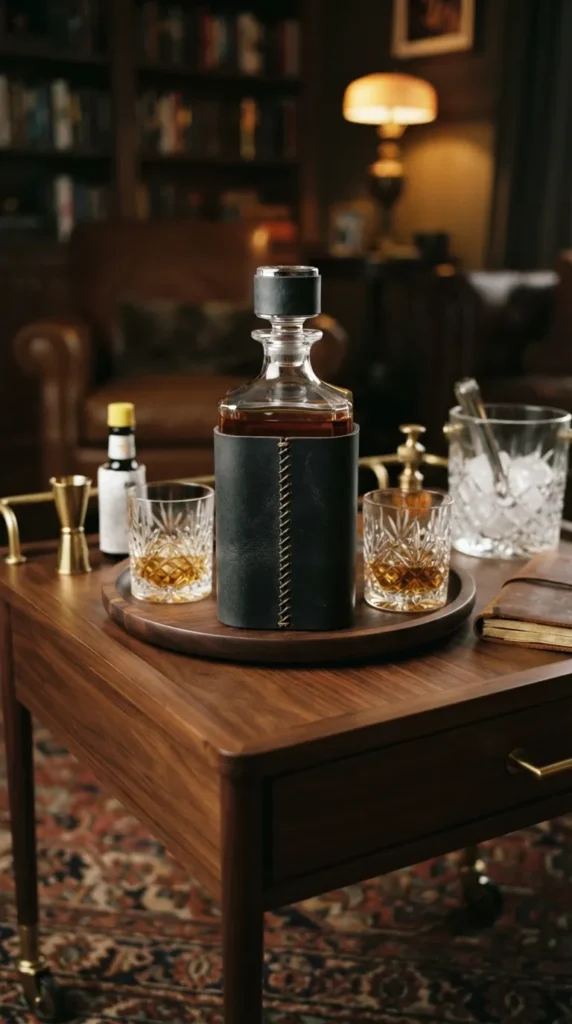
19. Bespoke Leather Bound Modern Glass Flask / Decanter
Introduction
A hand-stitched leather wrap wrapped around a sleek glass carafe or hip flask transforms an ordinary barware piece into an elegant travel companion.
What This Idea Means
This project blends vintage distillery heritage with refined modern leatherwork, making it a sophisticated gift for spirits connoisseurs and design lovers alike.
Materials Needed
- 6 oz to 8 oz stainless steel or clear glass pocket flask / decanter
- 3–4 oz vegetable-tanned leather sleeve blank
- Waxed saddle stitching thread and two harness needles
- Pricking irons (4mm spacing) and stitching pony
- Leather conditioner and edge beveler
How to Make It
- Fit the Pattern: Wrap the leather around the glass flask snugly, marking exact overlapping seam lines to ensure a skin-tight friction fit.
- Punch Stitching Holes: Lay the cut leather flat on a cutting mat and punch aligned holes along the seam borders using multi-prong pricking irons.
- Cross-Stitch the Sleeve: Position the leather over the flask and stitch the edges using a traditional baseball stitch or saddle cross-stitch with two needles.
- Tension and Knot: Pull stitches firmly as you climb the height of the flask, securing the final threads with double back-stitches inside the seam.
- Burnish and Condition: Smooth the top and bottom leather collars with Tokonole gum, let dry, and massage the leather sleeve with rich beeswax conditioner.
Tips and Variations
- Tips: Dampen the leather slightly before wrapping; as vegetable-tanned leather dries, it contracts to form a tight, custom fit.
- Variations: Personalize with hand-stamped initials or coordinates of a memorable shared location along the front.
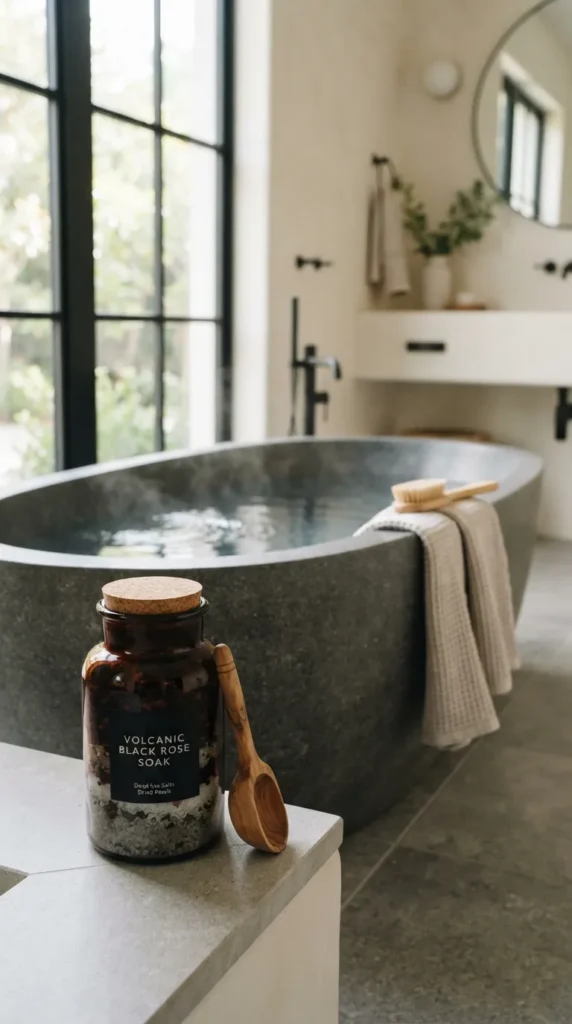
20. Luxury Handcrafted Botanical Bath Truffles & Salts
Introduction
Formulated with mineral-rich salts, therapeutic essential oils, and organic butters, this artisanal bath soak turns any bathroom into a luxury wellness spa.
What This Idea Means
Self-care gifts communicate relaxation, mindfulness, and comfort. Packaging homemade botanical bath formulations inside reusable glass jars feels indulgent and deeply considerate.
Materials Needed
- Coarse Dead Sea salt, Epsom salt, and pink Himalayan rock salt
- Organic shea butter and cocoa butter
- Essential oils (lavender, sweet orange, roman chamomile, or eucalyptus)
- Dried whole botanicals (calendula petals, blue cornflower, lavender buds)
- Straight-sided apothecary glass jars with cork or wooden clamp lids
How to Make It
- Blend the Mineral Salts: In a wide glass bowl, thoroughly mix the Dead Sea salt, Epsom salt, and coarse Himalayan pink salt crystals.
- Disperse Essential Oils: In a small glass beaker, blend essential oils into a splash of fractionated coconut oil, then toss slowly through the salt matrix to coat every grain evenly.
- Melt Bath Truffle Bases: For bath truffles, gently melt shea butter and cocoa butter, blend with baking soda and citric acid, press into small spherical molds, and let harden.
- Layer with Botanicals: Layer the fragrant salt mixture with vibrant dried calendula and cornflower petals inside sterilized glass apothecary jars.
- Garnish and Seal: Top the jar with a few solid butter bath truffles, seal with a cork stopper, and tie a wooden measuring scoop to the neck with linen cord.
Tips and Variations
- Tips: Use pure essential oils instead of synthetic fragrance oils for genuine aromatherapy benefits.
- Variations: Add fine colloidal oat powder for an ultra-soothing, milky hydration soak.