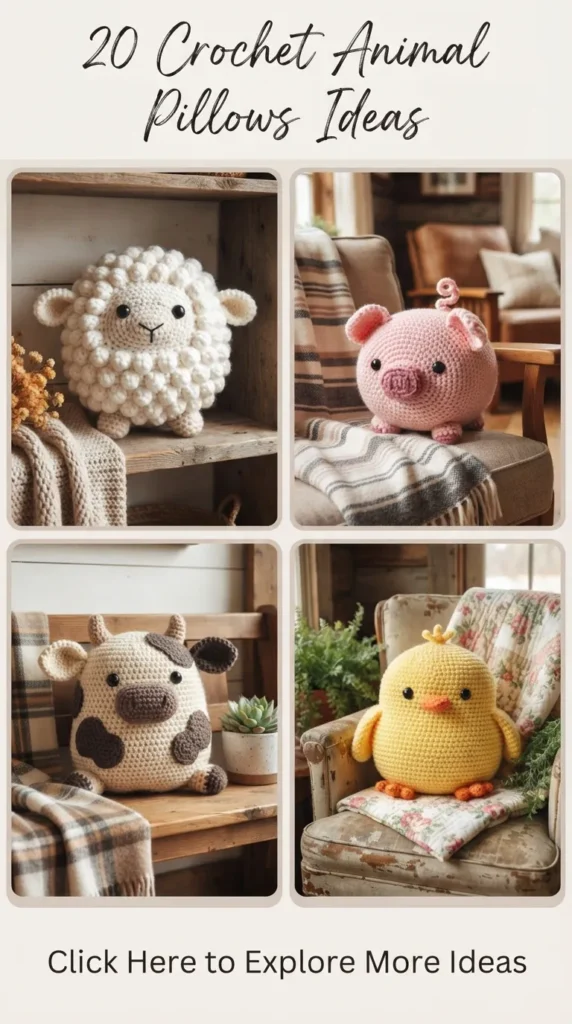
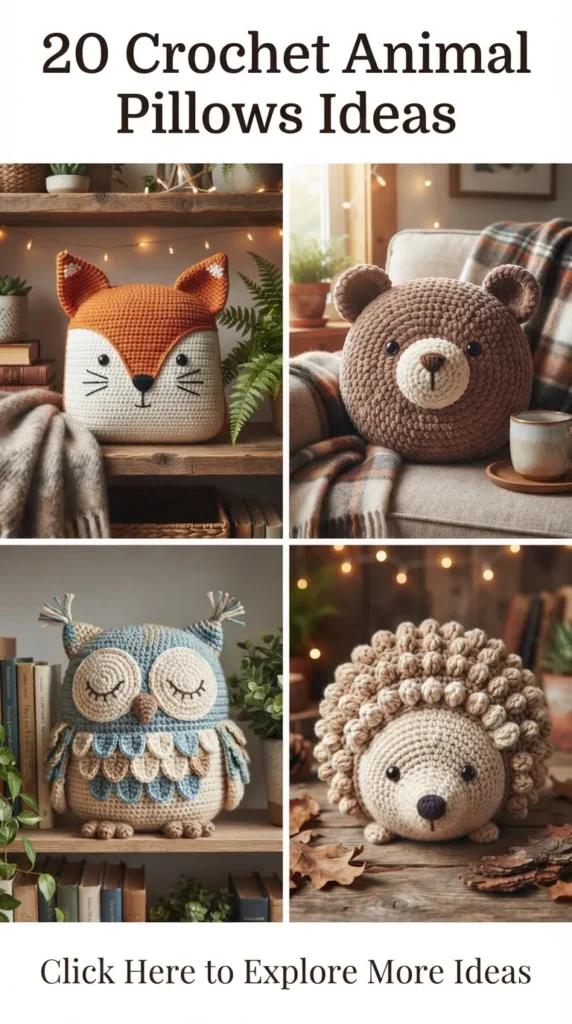
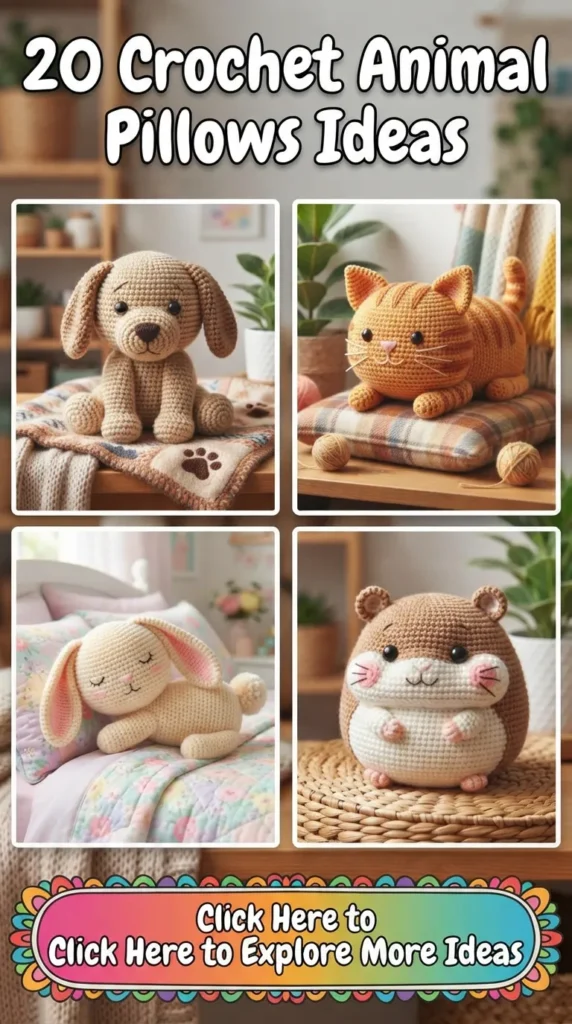
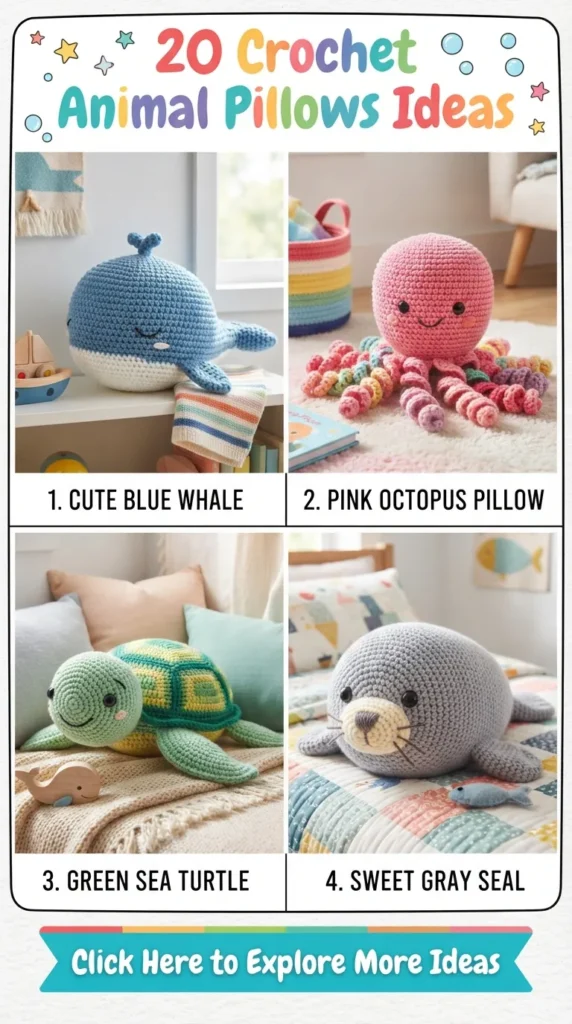
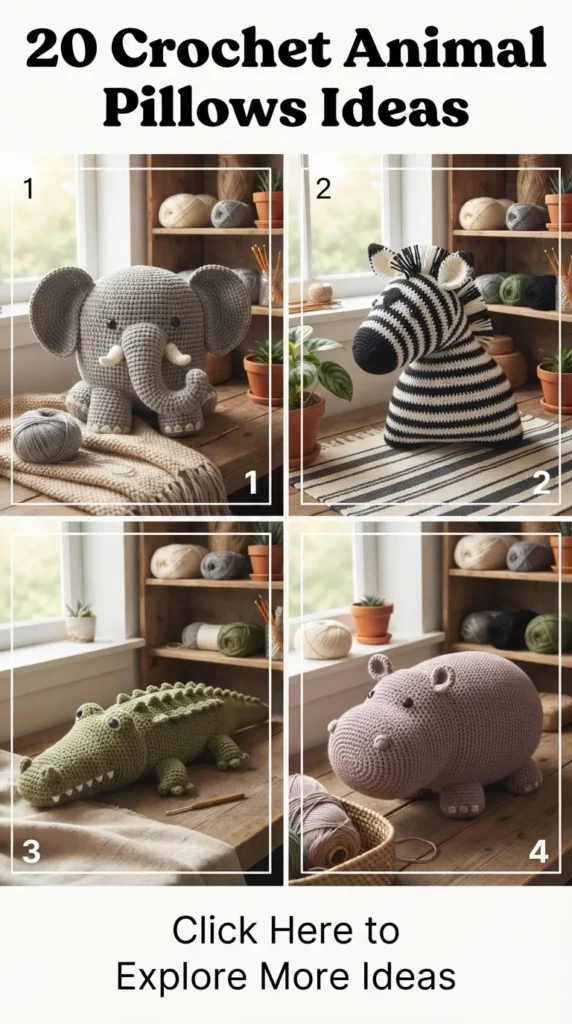
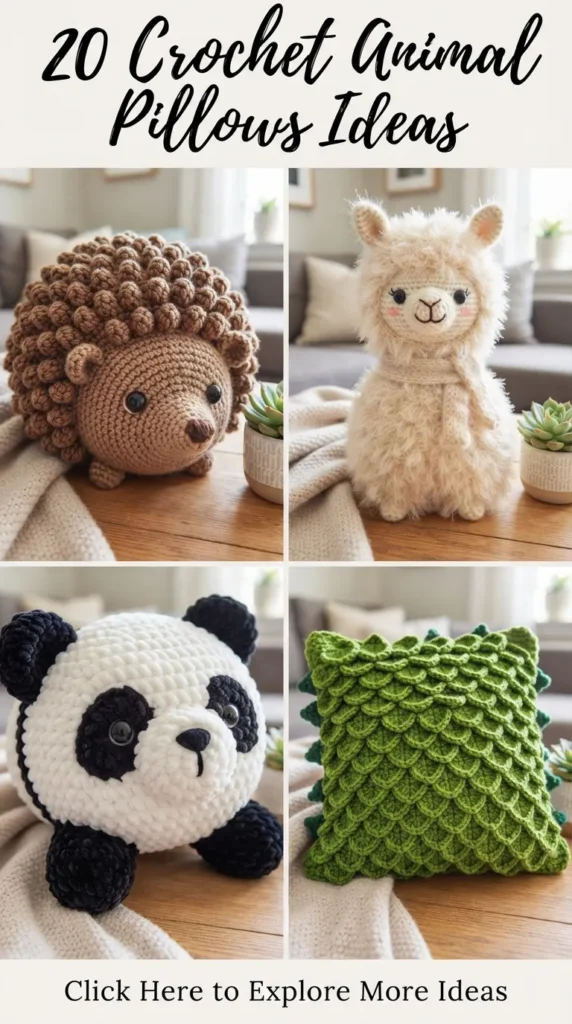
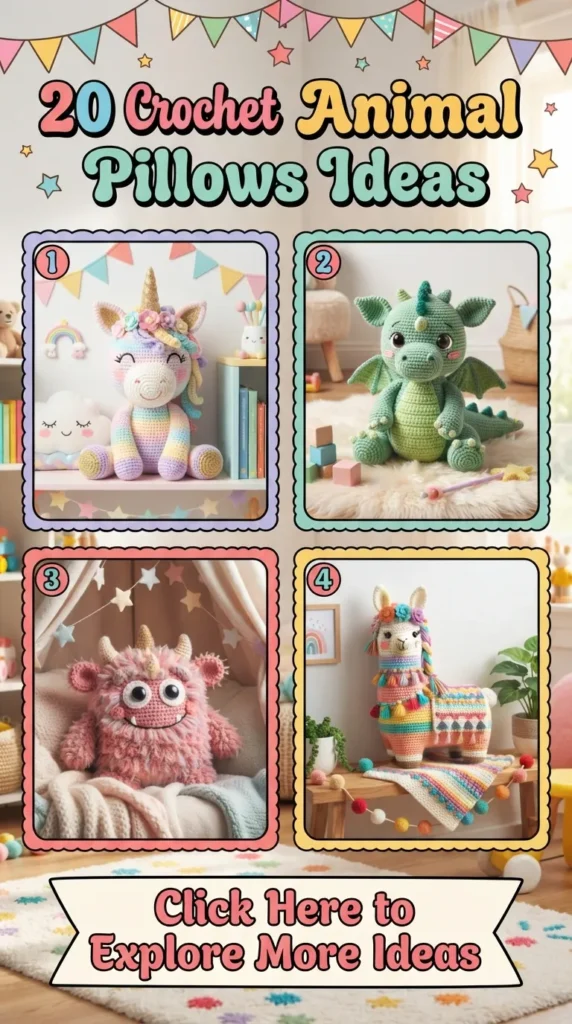
Handmade home decor brings warmth, texture, and individuality into any interior. Among the most charming fiber arts projects gaining massive popularity across design boards are aesthetic crochet animal pillows. Blending sculptural amigurumi techniques with functional cushion design, these plush accent pieces bridge the gap between playful whimsy and refined modern styling. Whether placed upon a minimalist linen sofa, nestled inside a sunlit reading nook, or styled across a neutral bohemian bedscape, a crochet animal pillow introduces tactile richness that mass-produced furnishings simply cannot replicate.
Creating your own decorative animal cushions allows for endless creative customization—from choosing earthy neutral palettes and cloud-soft chenille textures to exploring vintage granny stitch motifs and Scandinavian minimalism. Below is a comprehensive guide featuring 20 sophisticated crochet animal pillow projects, complete with design concepts, step-by-step structural workflows, finishing tips, and creative variations to inspire your next handmade masterpiece.
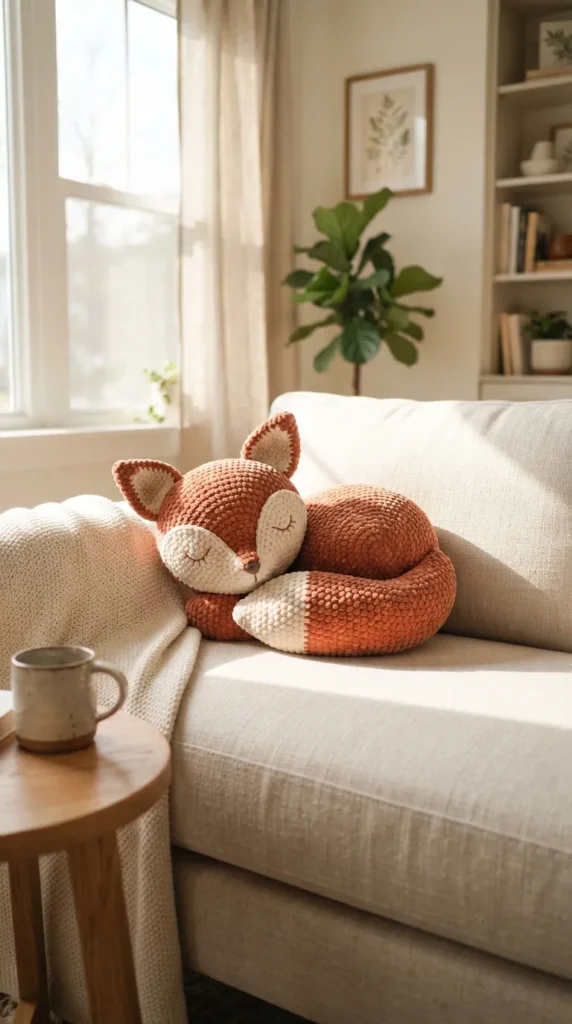
1. Minimalist Sleeping Fox Cushion
Concept Overview
The sleeping fox cushion captures woodland tranquility through gentle curves, clean contours, and an earthy color palette. Unlike overly cartoonish animal pillows, this minimalist concept focuses on a stylized, crescent-moon silhouette where the fox curls gracefully around itself. Its closed, embroidered eyes and integrated tail create a serene accent piece ideal for modern rustic living rooms, cozy nursery corners, or nature-inspired bedroom suites.
Design Philosophy
This project relies on warm terracotta tones paired with creamy ivory and soft slate charcoal. By using matte velvet or cotton-blend yarn instead of high-sheen synthetic fibers, the pillow maintains a calm, organic aesthetic that complements neutral textiles, exposed wood shelving, and natural stone features.
Step-by-Step Construction
- Main Body Form: Work in continuous spiral rounds of single crochet to create two wide, circular or oval panels using terracotta worsted or bulky yarn. Increase evenly across each round until your base measures approximately 16 to 18 inches in diameter.
- White Snout & Accent Wedge: Crochet a tapered wedge using soft ivory yarn, utilizing basic increases along one edge to mimic the natural angle of a fox’s muzzle. Slip stitch or whip stitch this piece flat against the right side of the front circular panel.
- Embroidered Facial Details: Before stuffing the pillow, use black cotton embroidery floss or light-weight charcoal yarn to backstitch two curved, crescent-shaped sleeping eye lines directly onto the ivory section. Add a satin-stitch triangular nose at the narrowest point.
- Ears & Tail Accents: Craft two small triangular ears with ivory inner triangles and black tips. For the tail, crochet an elongated, curved cone in terracotta with a tapered white tip.
- Assembly & Filling: Align the front and back body panels with wrong sides together. Join using single crochet around the perimeter, inserting the ears at the top. Pack firmly with premium silicone-treated polyester fiberfill to prevent lumpiness, slide the tail along the bottom rim, and seam closed securely.
Essential Tips
- Maintain tight, even tension throughout the single crochet rounds to ensure the fiberfill remains invisible between stitches.
- Use a stitch marker on the first stitch of every round to keep precise count of your increases, preventing the circle from warping into an unintended hexagon.
Design Variations
- Winter Arctic Fox: Replace terracotta with oatmeal, cool light gray, and pure snow white for a frosty, Scandinavian winter vibe.
- Textured Bouclé Fox: Use textured bouclé yarn for the main panel while keeping the facial embroidery smooth for rich tactile contrast.
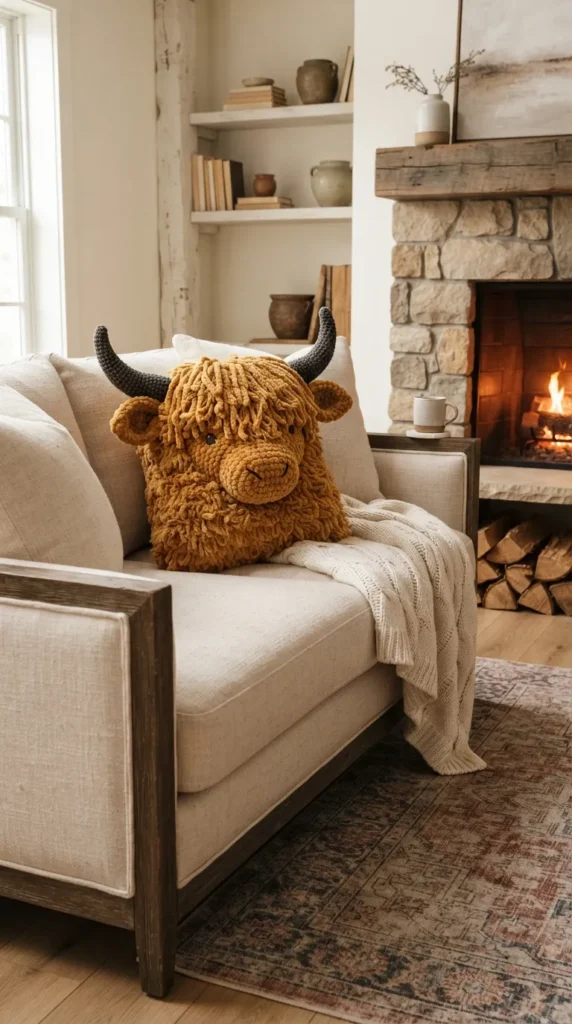
2. Chunky Chenille Highland Cow Pillow
Concept Overview
Known for their rustic charm, long sweeping horns, and shaggy coats, Highland cows have become an icon of cozy farmhouse styling. This design translates those pastoral traits into an oversized, ultra-squishy floor or couch pillow using jumbo chenille yarn. The deep caramel texture and floppy fringe bring dimensional warmth and comforting tactile appeal to rustic, modern farmhouse, and cottagecore rooms.
Design Philosophy
The appeal of this pillow lies in its exaggerated textures. Combining smooth, dense stitches on the central muzzle with long, brushed-out fringe across the forehead creates depth, turning a standard pillow into an interactive, touchable focal point.
Step-by-Step Construction
- Square or Oval Cushion Base: Using super bulky #6 or #7 chenille yarn in warm honey-caramel, work two identical rectangular or rounded square panels using half double crochet (HDC) for quick fabric building with moderate density.
- Dimensional Snout: Work a wide horizontal oval in a contrasting sandy oatmeal hue using single crochet stitches to keep it dense. Stuff lightly and sew onto the lower third of the front panel.
- Curved Horns: In natural ecru or linen-colored worsted yarn, crochet two tapered horn cones. Stuff firmly to retain structural rigidity, angling them outward with subtle decreases along one side.
- The Signature Shaggy Fringe: Cut dozens of 8-inch strands of matching caramel yarn. Using a larks head knot (slip loop), attach multiple strands between the ears and across the upper forehead. Gently separate the yarn plies with your fingers or a wide-tooth wooden comb for a wild, shaggy aesthetic.
- Finishing: Stitch the horns, ears, and nostrils securely using a tapestry needle and strong matching yarn. Assemble the panels with an invisible mattress stitch around a round pillow insert or dense cluster stuffing.
Essential Tips
- Chenille yarn can shed easily at cut ends; dab a tiny dot of fabric glue or lightly singe synthetic ends to keep fringe secure over time.
- Insert a pre-made fabric pillow form instead of loose fiberfill to maintain an even, supportive shape under heavy lounging.
Design Variations
- Muted Charcoal Highland Cow: Swap traditional caramel for charcoal and smoky gray tones to blend into modern industrial interiors.
- Floral Wreath Accent: Add small crocheted eucalyptus sprigs and neutral linen blossoms between the horns for a botanical bohemian look.
3. Nordic Hygge Polar Bear Floor Cushion
Concept Overview
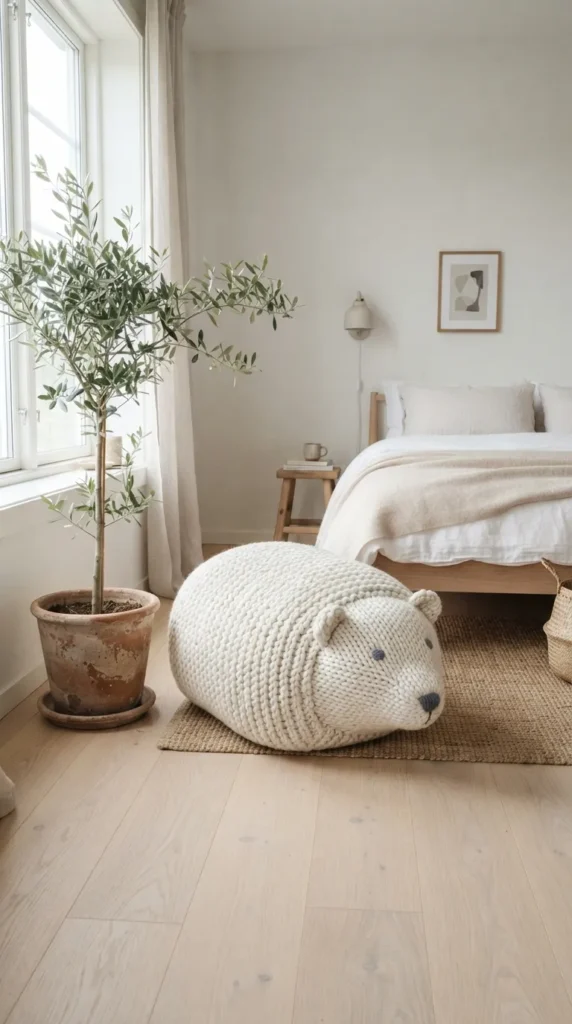
Understated, functional, and deeply comforting, the Nordic Hygge Polar Bear floor cushion emphasizes sculptural simplicity and expansive coziness. Designed as a large, circular floor pouf with minimalist bear features, it acts as both functional casual seating and a striking sculptural decor piece in Scandinavian, Japandi, or minimalist modern living areas.
Design Philosophy
Rooted in Nordic design principles, this piece avoids bright contrasts. It pairs soft chalk white, warm alabaster, and muted slate gray, celebrating clean silhouettes, negative space, and functional coziness.
Step-by-Step Construction
- Heavyweight Cushion Shell: With doubled strands of chunky wool or roving-style yarn in soft ecru, crochet two wide 22-inch rounds using the waistcoat stitch (center single crochet) for a dense, knit-like appearance that resists stretching.
- Gusset Band for Depth: To turn this into a thick floor cushion, work a 4-inch wide strip of single crochet in back loops only to create ribbed side walls that connect the top and bottom circles.
- Sculpted Round Ears: Crochet four small, semi-circular ear cups in matching ecru. Join them in pairs with single crochet around the edges to make them thick and structured, then sew them seamlessly onto the upper curve of the top panel.
- Subtle Facial Features: Using slate gray matte yarn, embroider an inverted triangle nose and simple vertical mouth line. Keep the eyes minimalist with tiny single French knots or short straight stitches.
- Firm Assembly: Join the top round, side gusset, and bottom round using slip stitches. Fill with a high-density foam round core surrounded by loose polyfill for firm, supportive seating.
Essential Tips
- The waistcoat stitch creates a dense, non-elastic fabric; size up your crochet hook by 1.0mm to 1.5mm to make inserting the hook easier.
- Reinforce the interior base with a non-slip fabric backing if the pillow is intended for hardwood or tile floor seating.
Design Variations
- Sleeping Brown Bear: Work in warm mocha and taupe tones for an earthy, mountain-cabin vibe.
- Panda Colorblock: Keep the round base cream while working the ears and side gussets in deep charcoal for a subtle panda transformation.
4. Vintage Botanical Frog Cushion
Concept Overview
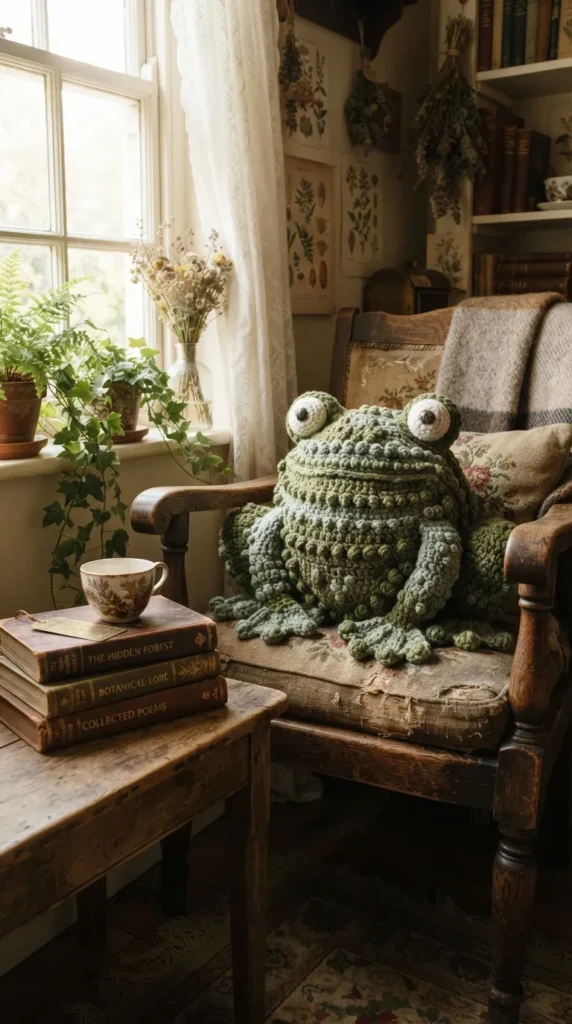
Drawing inspiration from classic botanical illustrations, the Vintage Botanical Frog cushion features sage greens, muted moss tones, and soft olive textures. This whimsical design uses rounded, protruding eye globes and a gently flattened, organic body shape, offering an intellectual, vintage-storybook flair to bookshelf reading chairs and sunroom daybeds.
Design Philosophy
Eschewing neon greens for antique botanical hues, this cushion works harmoniously alongside potted houseplants, vintage brass accents, and aged leather books. Delicate embroidered details add an heirloom aesthetic.
Step-by-Step Construction
- Olive Shaped Body Plates: Using worsted-weight heathered moss green yarn, crochet two wide, horizontally elongated oval panels. Incorporate subtle front-post stitches along the outer third to mimic the organic texture of amphibian contours.
- Soft Cream Underside Plate (Optional): Crochet an inner cream or pale celery oval to stitch onto the bottom belly region of the front plate for natural color gradation.
- 3D Globe Eye Domes: Crochet two hollow half-spheres in matching green. Insert plastic safety eyes or embroider deep amber cat-pupils on yellow felt circles, then stuff the domes firmly so they hold their spherical shape when seated atop the cushion.
- Subtle Webbed Feet Corners: Along the lower outer perimeter of the front panel, work small picot cluster stitches directly into the edge to hint at delicate webbed feet without adding cumbersome hanging appendages.
- Final Join: Pin the eye domes securely to the top edge, slip stitch the front and back body panels together, stuff generously with cluster fiberfill, and seam shut.
Essential Tips
- Use heathered or tweed yarns containing small flecks of brown, ochre, and dark green to add depth and an organic, field-guide aesthetic.
- Pin the eye domes with long pearl-head pins before sewing to ensure symmetrical placement across the curved top border.
Design Variations
- Toad Textured Bobbles: Integrate alternating small bobble stitches across the top green panel to simulate a bumpy, organic toad skin texture.
- Waterlily Crown: Crochet an ivory waterlily blossom with a mustard-yellow center and fasten it next to one eye globe for a cottagecore look.
5. Velvet Golden Honeybee Pillow
Concept Overview
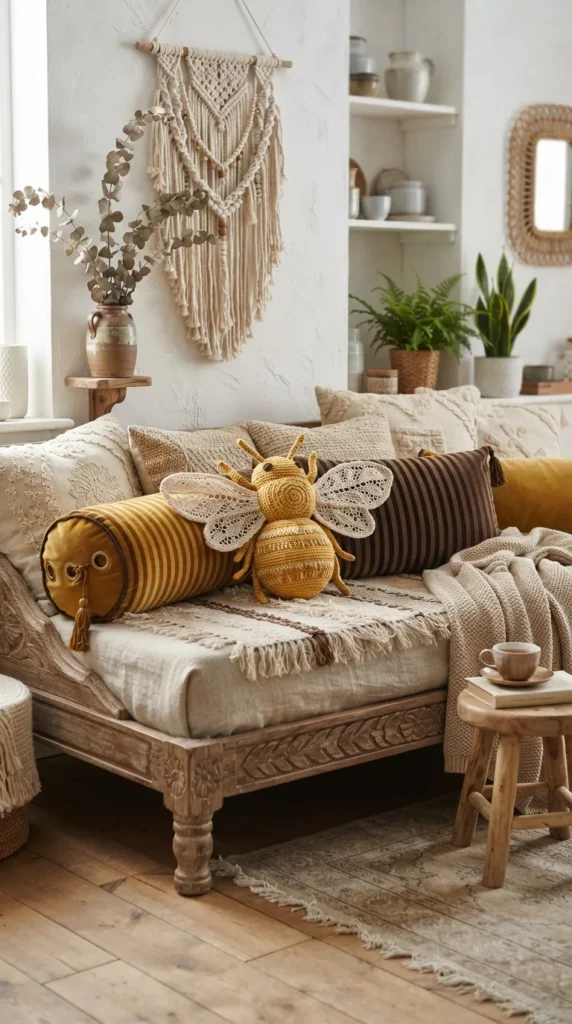
The velvet golden honeybee pillow brings rich warmth, symmetry, and geometric charm to modern bohemian interiors. Crafted with goldenrod yellow, rich espresso brown, and translucent-looking white lace wings, this pillow adds a bright pop of color and plush texture to dark velvet sofas or neutral linen bedding.
Design Philosophy
Contrasting textures make this concept work: plush, high-pile micro-velvet yarn across the striped body paired with fine, openwork lace cotton for the wings. This keeps the pillow light, elegant, and decorative rather than bulky.
Step-by-Step Construction
- Cylindrical or Rounded Body: Work in the round with plush velvet yarn, alternating between 4 rounds of rich mustard yellow and 2 rounds of espresso brown to create distinct, clean bumblebee stripes.
- Tapered Rear Stinger: Taper the back rounds using rapid single crochet decreases, finishing with a tiny black cone tip to represent the stinger.
- Delicate Flat Wings: Switch to a fine #2 or #3 weight cotton-linen yarn in off-white. Crochet two teardrop-shaped motifs using open mesh double crochet and shell stitches, blocking them with light steam so they hold their flat, openwork shape.
- Antennae Knots: Create two short, tight cord segments in dark espresso yarn using the Romanian cord technique, topping each with a small wooden bead or tight crochet bobble.
- Assembly: Stuff the striped velvet body firmly. Affix the flattened lace wings flat against the upper back stripe with invisible nylon thread, then secure the antennae at the brow line.
Essential Tips
- Velvet yarn can create loose loops (“worming”) if your tension is slack. Drop down one full hook size from the manufacturer’s recommendation to keep your stitches compact.
- Block the delicate cotton wings before attaching them to keep them from curling over time.
Design Variations
- Muted Honeycomb Hexagon: Work the pillow as an oversized flat hexagon using the honeycomb stitch, embroidering a stylized golden bee in the center.
- Oversized Floor Bee: Scale up to jumbo velvet blanket yarn with thick, felted fabric wings for a large children’s reading lounger.
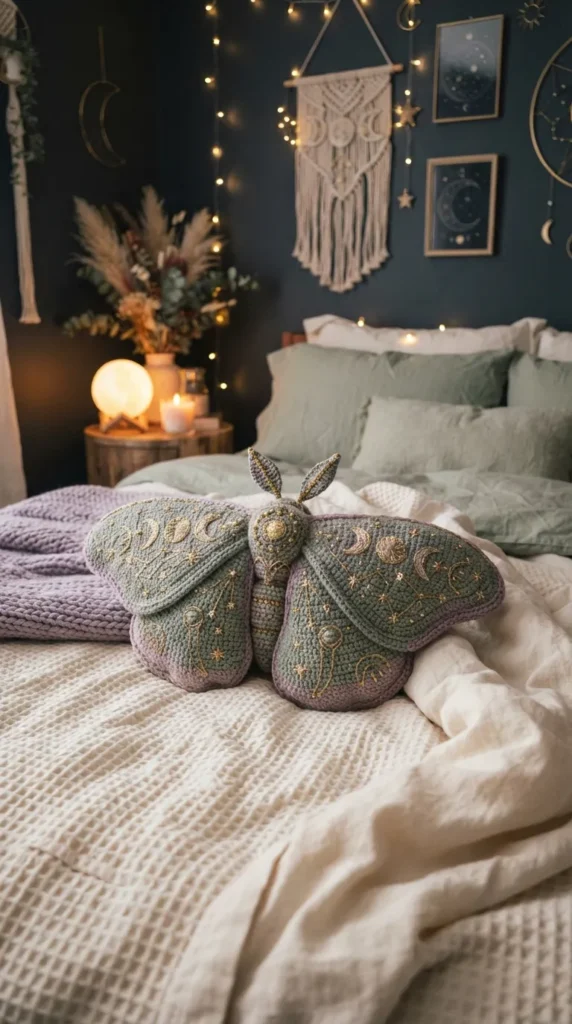
6. Boho Celestial Moon Moth Pillow
Concept Overview
Inspired by woodland folklore and night sky motifs, the Boho Celestial Moon Moth pillow is a stunning, wide-span decorative piece. Featuring broad, scalloped wings in dusty sage, muted lavender, or slate teal, highlighted with embroidered stars and crescent phases, this cushion transforms standard seating into a magical focal point.
Design Philosophy
The silhouette is the centerpiece here. Moving away from standard circular or square designs, this pillow follows the natural, wide shape of moth wings. It emphasizes muted jewel tones, matte cotton yarns, and delicate metallic embroidery floss accents.
Step-by-Step Construction
- Central Cocoon Body: Crochet an elongated, ribbed oval column in deep charcoal or warm taupe using single crochet in the back loop only (SC-BLO).
- Wide Scalloped Wings: Work outward from the central body or make two distinct wing panels. Combine double crochet and treble crochet shell clusters to form sweeping upper wings and tapered, tailed lower wings. Make a matching pair for the back.
- Celestial Surface Embroidery: Using metallic gold embroidery thread or mustard cotton yarn, embroider delicate moon phases, sunburst stars, and concentric circular eye-spots across the wing surfaces before assembling.
- Feathery Antennae: Craft two small leaf-shaped antennae using bullion stitches or loop stitches, brushing them out gently with a fine comb.
- Assembly & Reinforcement: Sew front and back wing assemblies together along the edges. Fill with micro-fiberfill, using extra stuffing in the central body column while keeping the outer wing tips gently padded so they drape naturally.
Essential Tips
- When working with wide winged shapes, insert a thin layer of quilt batting between the crocheted panels alongside loose stuffing to keep the wing edges smooth and flat.
- Use a hoop or embroidery stabilizer on the back of the crochet panel while adding celestial metallic stitching to prevent puckering.
Design Variations
- Neutral Sand Moth: Work entirely in shades of ecru, wheat, and cream for an understated, modern coastal look.
- Velvet Midnight Moth: Use deep midnight navy velvet yarn with bright silver star embroidery for dramatic mood-board spaces.
7. Pastel Japanese Koi Fish Lumbar Pillow
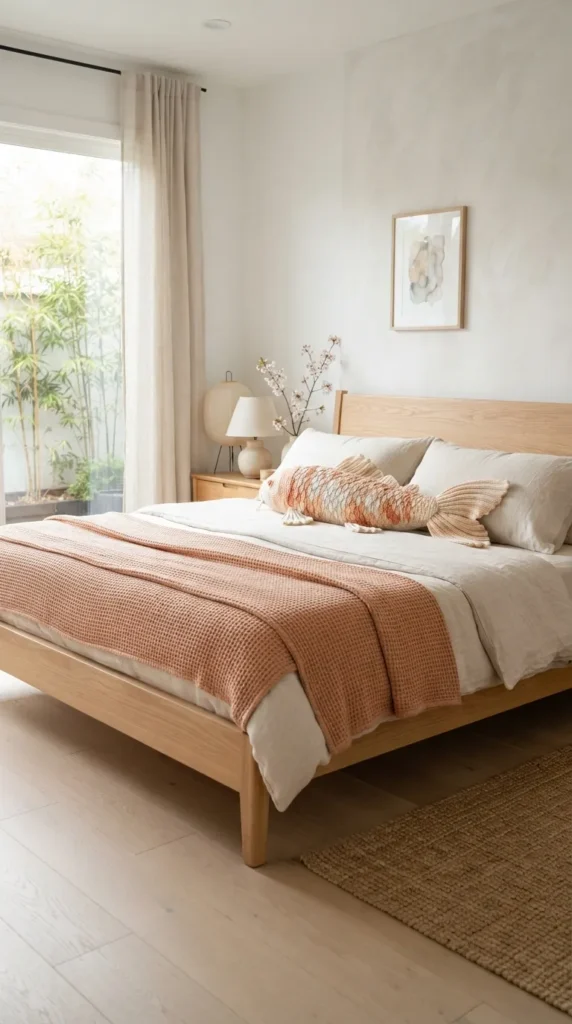
Concept Overview
Designed as an elongated lumbar cushion, the Pastel Japanese Koi Fish pillow combines graceful aquatic lines with soothing color blocking. Flowing fins, delicate scale textures, and asymmetrical patches of peach, terracotta, and cream bring gentle movement and zen serenity to modern minimalist bedrooms.
Design Philosophy
This design uses an organic, tapered silhouette rather than a rigid rectangle. By employing soft pastel tones—apricot, soft cream, and muted shell pink—it evokes flowing watercolor paintings and Japanese garden ponds without overwhelming the room’s color scheme.
Step-by-Step Construction
- Tapered Lumbar Base: Crochet a long cylinder that starts wide and gently tapers down toward one end over 24 to 28 inches, working in spiral rounds of half double crochet.
- Intarsia Color Blotches: Introduce irregular patches of peach, soft black, and terracotta across the cream base using tapestry or intarsia crochet techniques, keeping yarn floats neat inside the cylinder.
- Textured Scale Stitching: Incorporate subtle crocodile stitch scales across the upper center section to add dimensional relief and light-catching depth.
- Flowing Ribbed Fins: For the tail and pectoral fins, crochet flat trapezoids in back-loop-only single crochet to create accordion-style pleats. Pinch the bases tightly and sew them along the sides and tail end.
- Final Shaping: Stuff the elongated body with shredded memory foam or lightweight polyfill, maintaining a supple, pliable feel so the fish can curve gently along sofa backs.
Essential Tips
- Avoid overstuffing lumbar cushions; keeping the filling slightly pliable ensures comfortable lower back support.
- Fasten fin attachments with double-pass whip stitches on the inside of the fabric to handle movement and handling without pulling loose.
Design Variations
- Monochrome Ink-Wash Koi: Work in shades of charcoal, dove gray, and soft white for a sleek, modern Japanese aesthetic.
- Golden Sunset Koi: Use rich saffron, marigold, and cream for a warmer, high-energy bohemian look.
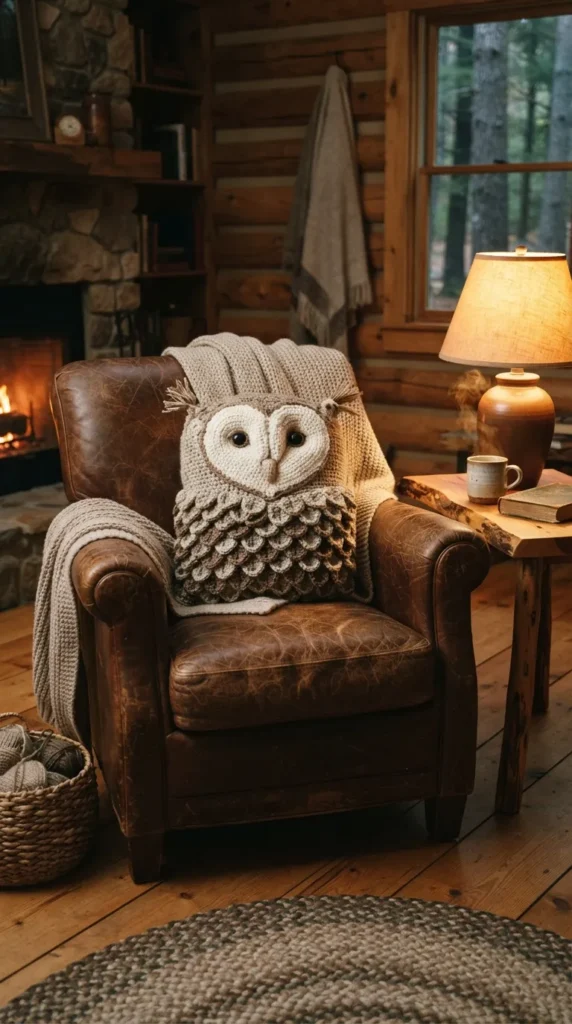
8. Woodland Textured Barn Owl Pillow
Concept Overview
Featuring feathered textures, warm neutral tones, and prominent, serene eyes, the Woodland Textured Barn Owl pillow brings cozy rustic character into any interior. The interplay between raised crocodile stitches, smooth alpine panels, and a heart-shaped facial disc creates a rich, sophisticated look for reading chairs and study lounges.
Design Philosophy
Emphasizing natural textures, this design blends heathered oatmeal, warm taupe, cocoa brown, and soft ecru. The natural geometry of the owl’s heart-shaped face balances the tactile feather stitches across the belly.
Step-by-Step Construction
- Heart-Shaped Facial Disc: Crochet two flat semi-circles in ecru yarn that join at a downward point, edged with a thin border of biscuit brown single crochet.
- Embroidered Eyes and Beak: Sew deep coffee-brown felt rounds or embroidered circles onto the face, adding a small down-turned nose triangle in caramel yarn.
- Tiered Feathered Body: Work the front body panel from the bottom up. Alternate 2 rows of standard half double crochet with 1 row of crocodile scales (5 double crochets down and 5 up adjacent posts) to create layered chest plumage.
- Smooth Back Panel: Work a matching back panel in plain half double crochet or moss stitch to ensure the pillow rests flush against furniture surfaces.
- Tufted Ear Tips: Join the panels around a rectangular pillow form, adding small feathered tassel tufts to the top left and right corners.
Essential Tips
- Crocodile stitch uses significant amounts of yarn; ensure you have roughly 30% more yarn on hand than you would for standard single or double crochet projects.
- Keep your scale stitches loose so they lie flat and overlap naturally like real feathers.
Design Variations
- Snowy Winter Owl: Work the body in pure white with scattered charcoal flecks for an elegant winter holiday look.
- Tweed Forest Owl: Use wool-blend tweed yarn with subtle flecks of rust and forest green for a warm, heritage look.
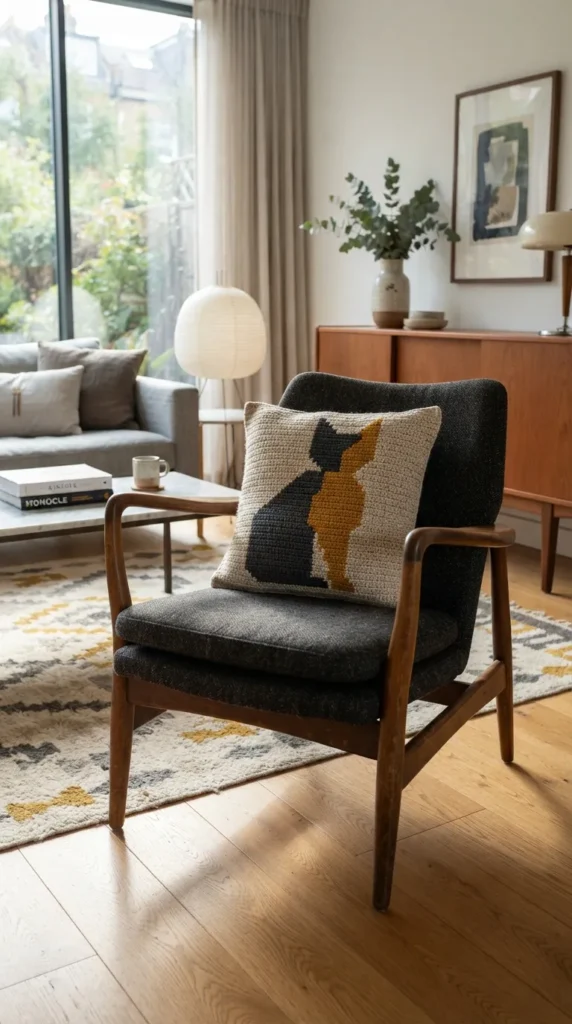
9. Scandi Geometric Cat Silhouette Pillow
Concept Overview
Modern cat decor shines when stripped down to clean, mid-century Scandinavian lines. The Scandi Geometric Cat Silhouette pillow avoids complex details, focusing instead on a smooth, flat-bottomed silhouette with distinct triangular ears and sharp intarsia color blocking.
Design Philosophy
This project uses clean lines, neutral geometry, and understated color palettes. Soft oatmeal bases with matte charcoal, mustard, or dusty blush geometric shapes blend seamlessly into contemporary, mid-century modern, or urban apartment layouts.
Step-by-Step Construction
- Color-Blocked Base Panels: Using the intarsia crochet technique with DK-weight cotton-acrylic yarn, work two flat panels following a geometric chart (such as a split diagonal or half-circle color block).
- Integrated Ear Shaping: Continue the color block directly into the top corners, using gradual decreases to create sharp, upright triangular ears without separate seams.
- Minimalist Whiskers: Use a single strand of fine dark thread to embroider three straight, widely-spaced whisker lines on each cheek, omitting eyes and mouths for an abstract silhouette.
- Crisp Perimeter Join: Pin the front and back panels precisely, matching color change transitions. Join with a tight single crochet edge using the dominant border color.
- Structured Fill: Insert a custom-cut high-density foam sheet backed with a thin layer of polyfill to maintain a clean, flat, modern profile.
Essential Tips
- When changing colors in intarsia crochet, drop the old yarn color on the wrong side and pick up the new strand with the final yarn-over of the previous stitch to keep color lines sharp.
- Block both panels flat with steam before seaming to ensure the edges don’t curl.
Design Variations
- Checkerboard Retro Cat: Use a two-tone retro checkerboard pattern across the front panel in warm mustard and ecru.
- Bouclé Silhouette: Work in unbrushed cream bouclé yarn for a cozy, cloud-soft texture while keeping the cat outline minimalist.
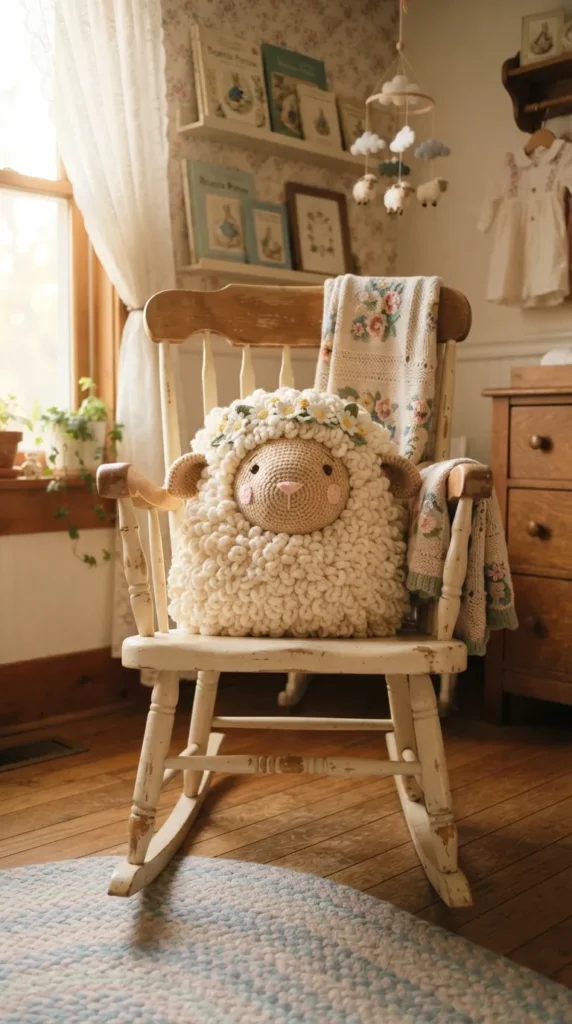
10. Whimsical Daisy Meadow Lamb Pillow
Concept Overview
Combining fluffy textured loop stitches with tiny retro daisy floral motifs, the Whimsical Daisy Meadow Lamb pillow is the ultimate cottagecore accent. Its soft, curly texture mimics a spring lamb’s fleece, making it a soothing, tactile addition to rocking chairs, cozy daybeds, and soft country bedrooms.
Design Philosophy
This design balances rich loops with smooth fabric finishes. Working the main body in looped fleece stitches and the face and ears in flat, matte stitches keeps the facial expression sweet, calm, and readable.
Step-by-Step Construction
- Looped Wool Body Shell: Work a wide circular front panel using the crochet loop stitch (wrapping yarn around your finger before completing each single crochet) in warm clotted-cream wool yarn.
- Smooth Teardrop Face: Crochet a smooth, flat teardrop-shaped piece in soft biscuit-tan cotton yarn using regular single crochet. Embroider gentle sleepy eyes and a soft pink ‘Y’ shaped nose.
- Floppy Dropped Ears: Crochet two long, rounded ears in matching biscuit tan, stitching them so they drape downward naturally on either side of the head.
- Crochet Daisy Accents: Make 3 to 4 miniature daisies with 5 white puff-stitch petals around mustard button centers. Sew them as a delicate crown along the lamb’s forehead.
- Assembly: Attach the face and daisy crown directly onto the looped front panel. Join to a flat, plain cream back panel, fill with hypoallergenic fiberfill, and seam closed.
Essential Tips
- Keep your finger tension consistent while pulling yarn for loop stitches to ensure all fleece loops are the same height.
- Place a smooth, solid lining fabric inside the pillow before stuffing so polyfill fibers don’t push out through the textured loop stitches.
Design Variations
- Pastel Meadow Lamb: Scatter miniature crochet forget-me-nots and tiny lavender sprigs alongside the daisies for a garden-inspired look.
- Charcoal Sheep: Use deep charcoal loop stitches for the fleece paired with a dove gray face for a bold, modern rustic look.
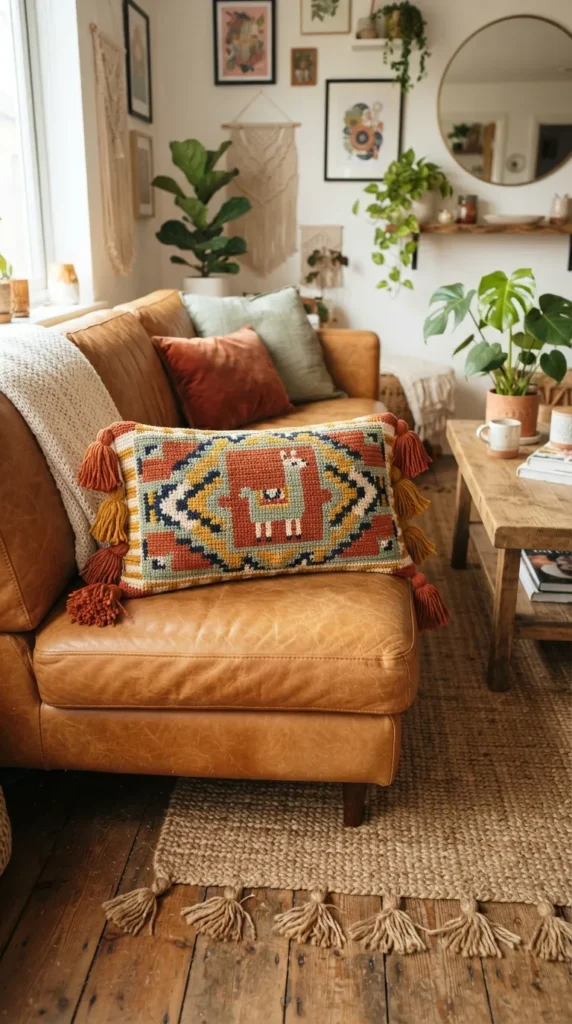
11. Modern Aztec Llama Lumbar Cushion
Concept Overview
The Modern Aztec Llama Lumbar cushion blends Andean textile art with clean modern bohemian home styling. Featuring a proud llama profile framed by geometric diamond bands, pom-pom trims, and fringed tassels, this colorful rectangular pillow adds personality to leather sofas, rattan accent chairs, and layered beds.
Design Philosophy
Rich in pattern and cultural inspiration, this pillow uses dusty desert tones: warm terracotta, adobe rust, desert sage, mustard yellow, and soft sand. It balances clean tapestry-crochet geometry with playful tassel details.
Step-by-Step Construction
- Rectangular Tapestry Canvas: Work a 12×20-inch rectangle using single crochet while carrying secondary colors inside the stitches (tapestry crochet), creating a central llama silhouette flanked by chevron borders.
- Embroidered Halter Details: After completing the panel, use bright jewel-toned thread to embroider a decorative bridal harness and saddle blanket directly onto the llama.
- Ear Extensions: Crochet two small upright llama ears and stitch them along the top edge of the pillow so they extend past the rectangular border.
- Tassel & Fringe Accents: Handcraft four multi-colored mini pom-poms or yarn tassels and secure them to the four outer corners of the cushion cover.
- Zippered Back Panel: Work two overlapping back panels in solid sand-colored linen stitch with buttons or a hidden zipper to make the decorative cover easily removable for washing.
Essential Tips
- Keep carried yarn strands lightly tensioned inside tapestry stitches; pull gently every 10 stitches to avoid puckering and uneven fabric edges.
- Use a lightweight acrylic-cotton blend to keep the intricate colorwork crisp and well-defined without adding excessive weight.
Design Variations
- Neutral Minimalist Llama: Work the entire tapestry chart in tone-on-tone creams, soft whites, and light oatmeal for a subtle, textured look.
- Fuzzy Saddle Llama: Work the saddle blanket area in colorful loop stitches to add rich 3D texture against the smooth background.
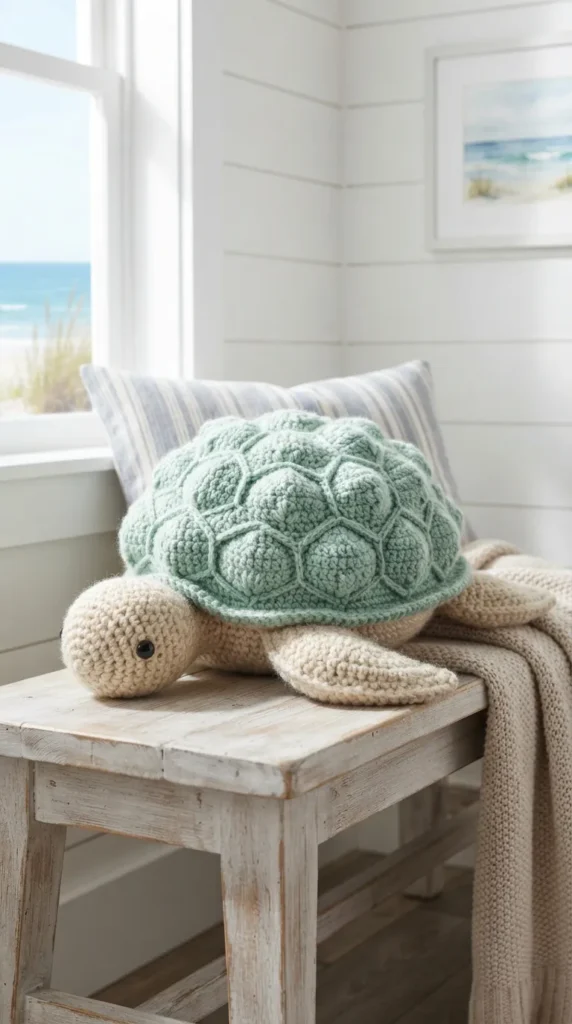
12. Soft Velvet Seashell Turtle Pillow
Concept Overview
With rounded geometry and oceanic tranquility, the Soft Velvet Seashell Turtle pillow serves as both a sculptural cushion and a comfy rest. The shell features hexagonal granny motifs or spiral ridges that evoke coastal calm, making it a natural accent for seaside cottages, contemporary bathrooms, or relaxed coastal living spaces.
Design Philosophy
This design reinterprets coastal decor through an elegant, modern lens. Rather than bright blues and cartoon motifs, it uses sea-glass greens, misty sage, muted eucalyptus, and warm sandy ecru in plush velvet yarn.
Step-by-Step Construction
- Segmented Hexagonal Shell: Crochet 7 flat hexagonal motifs in sea-glass green velvet using double crochet clusters. Join them together into a raised dome: one central hexagon surrounded by six outer hexagons.
- Structured Underbelly: Work a simple, flat circular panel in sandy ecru yarn to serve as the turtle’s plastron (underbelly).
- Flippers and Head: Crochet two wide paddle-shaped front flippers, two smaller rear flippers, and a rounded, gently curved head piece in sage green. Lightly stuff the head and leave the flippers flat.
- Shell Edge Trim: Work a neat scallop or reverse single crochet (crab stitch) border around the perimeter of the assembled hexagonal dome to define the outer rim of the shell.
- Final Assembly: Pin the flippers and head between the top shell and underbelly panel. Slip-stitch around the rim, stuffing firmly with fiberfill to create a domed cushion.
Essential Tips
- Joining velvet hexagons with a flat slip-stitch on the wrong side creates clean, hidden seams that keep the geometric dome smooth.
- Use lightweight cluster polyfill to keep the shell dome lifted without stretching the velvet stitches apart.
Design Variations
- Swirling Nautilus Shell: Replace the hexagons with a continuous spiral ridge motif using front-post double crochet for a nautilus-inspired look.
- Deep Ocean Emerald: Use deep emerald velvet with bright metallic gold seam accents for an opulent, jewel-toned statement piece.
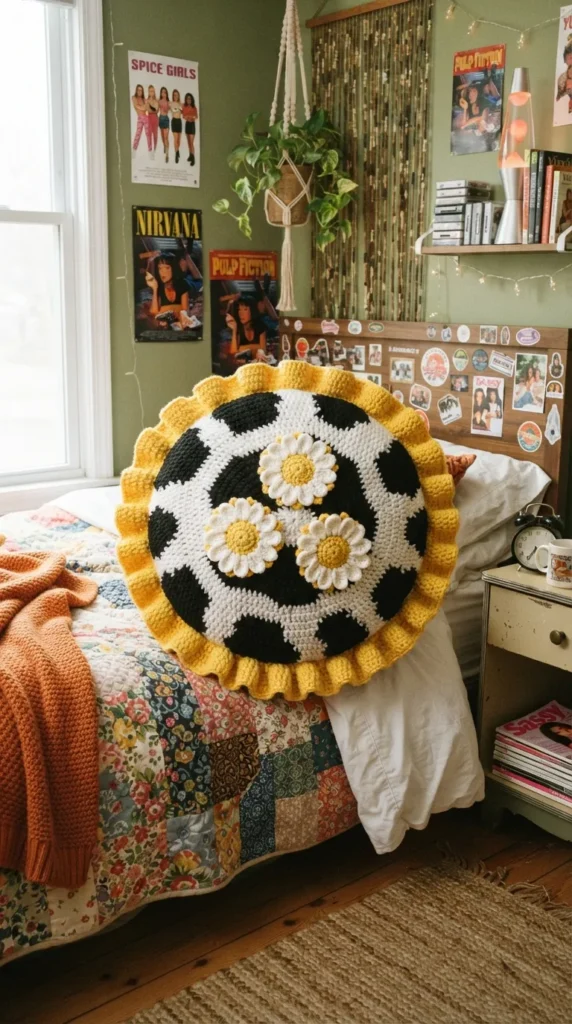
13. Retro Daisy Cow Print Round Pillow
Concept Overview
Combining 90s nostalgia, cottagecore charm, and retro funk, the Retro Daisy Cow Print round pillow features organic dalmatian-style cow spots paired with playful daisy appliques. This round accent pillow adds lighthearted personality to student spaces, retro eclectic living rooms, and creative bedroom settings.
Design Philosophy
High-contrast monochrome cow spots meet warm retro pastels. The juxtaposition of bold black-and-white shapes with soft buttercup yellow and white flowers creates an eye-catching, balanced accent.
Step-by-Step Construction
- Freeform Spotted Base Panels: Using worsted cotton-blend yarn in bright white, crochet a flat circular panel. Intersperse organic, irregular black patches using intarsia or tapestry crochet to mimic natural cow spots. Repeat for the back panel.
- Outer Ruffle Edge: Join the front and back panels with a bright buttercup yellow ruffled border by working 3 to 4 double crochets into every outer stitch.
- 3D Daisy Appliques: Crochet 3 separate daisy flowers with thick white puff petals and golden amber centers.
- Placing the Appliques: Sew the daisies asymmetrically across the top surface, clustering them along one side of the spotted base.
- Final Stuffing: Insert a round 16-inch cushion form into the casing before closing the final ruffle stitches, ensuring a smooth, round silhouette.
Essential Tips
- Avoid uniform, repetitive circles when making cow spots; draw random, wavy shapes on a circular graph beforehand for an authentic, organic pattern.
- Steaming the outer ruffle lightly will help it drape gracefully around the edge of the pillow without standing stiffly upright.
Design Variations
- Pastel Brown Dairy Cow: Swap black spots for warm chocolate or caramel spots with lavender daisies for a softer aesthetic.
- Checkerboard Cow Hybrid: Alternate spotted quadrants with retro pink checkerboard squares for an eclectic look.
14. Sweet Sloth Hanging Branch Cushion
Concept Overview
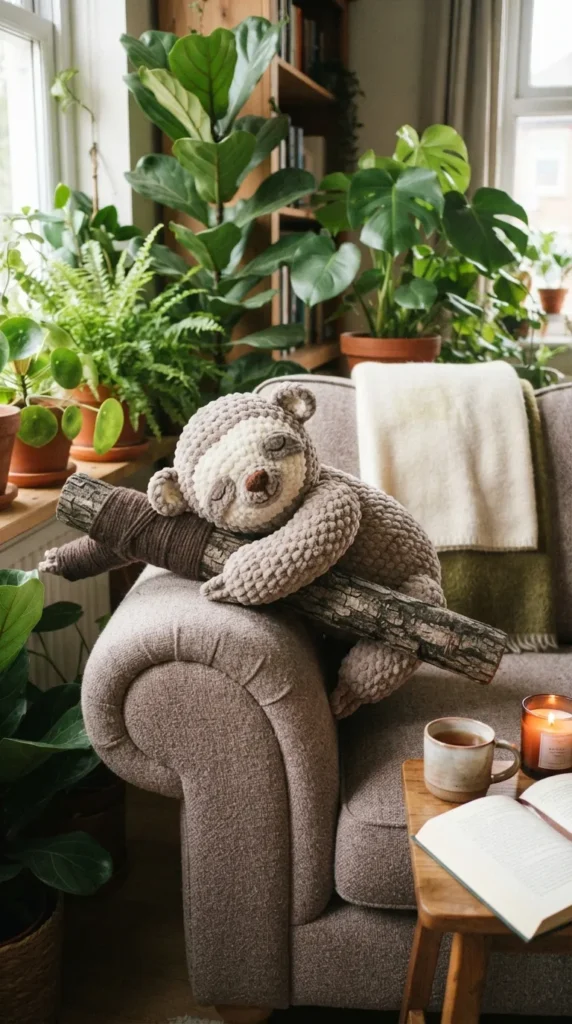
Capturing the relaxed, unhurried spirit of the rainforest canopy, the Sweet Sloth Hanging Branch cushion is designed to drape naturally over the arm of a sofa, chair back, or reading bench. Long limbs with felt claws hug a soft crocheted branch, adding playful, functional charm to relaxed modern spaces.
Design Philosophy
This piece functions as interactive, draping furniture jewelry. Using heathered taupe, warm linen, and forest greens, it brings the organic charm of botanical gardens indoors.
Step-by-Step Construction
- Elongated Branch Base: Crochet a long cylinder in bark-brown yarn using textured crunch stitch to emulate rough wood bark. Stuff firmly with dense foam to keep the branch straight.
- Sloth Torso & Head: Crochet an oval body in heathered taupe boucle or brushed acrylic yarn. Create a cream mask insert with two darker eye streaks and sleepy embroidered eyes.
- Hanging Claws & Limbs: Crochet four long, narrow limbs. At each paw end, sew three small, soft beige felt claws or tight crocheted icord claws.
- Leaf Sprigs: Crochet a cluster of monstera and eucalyptus leaves in olive green, securing them to the ends of the branch for botanical flair.
- Mounting: Position the sloth over the center of the branch, securing its paws around the wood base with hidden stitches so it appears to hang naturally.
Essential Tips
- Brush acrylic body stitches lightly with a wire pet slicker brush to give the sloth a soft, realistic fur texture without hiding the crochet stitches underneath.
- Add a small pouch of ceramic weight beads inside the sloth’s lower belly to help the pillow balance securely over sofa armrests.
Design Variations
- Single Sloth Face Pillow: Simplify the design into a round, fluffy floor pillow focusing solely on the sloth’s sweet, sleepy face.
- Jungle Vine Extension: Add long crocheted vines with trailing string-of-pearls leaves hanging down from the branch ends for added vertical drama.
15. Ethereal Swan Lake Velvet Neckroll
Concept Overview
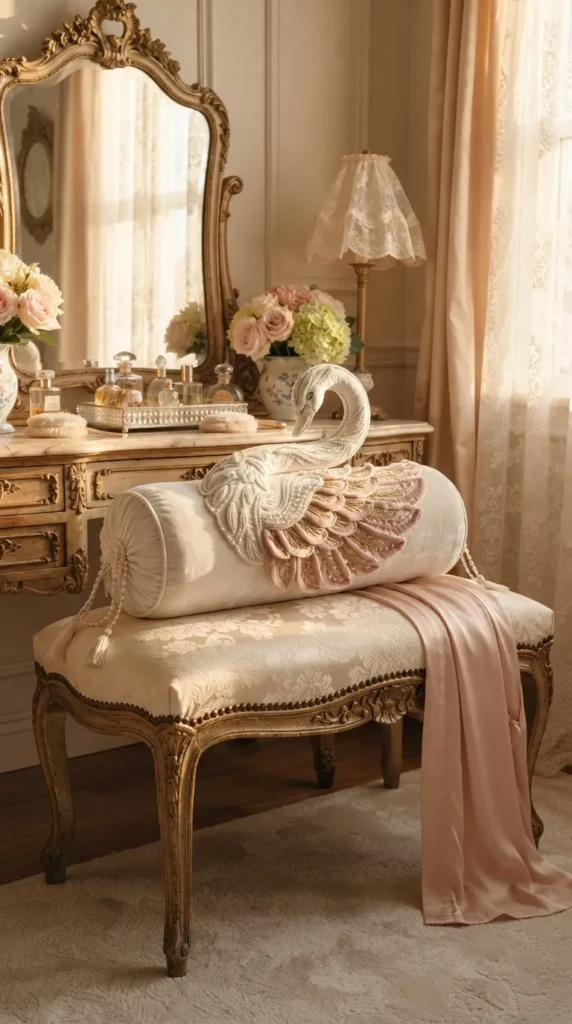
Inspired by classic ballet elegance and graceful water birds, the Ethereal Swan Lake Velvet neckroll is a refined cylindrical pillow. Featuring a gracefully curved swan neck, delicate feather details, and a soft velvet finish, this piece brings fairytale sophistication to chaise lounges, dressing tables, and romantic master suites.
Design Philosophy
All about clean lines, luxury, and subtle details. By using pale pearl white, blush pink, and delicate metallic gold, this design functions as an elegant work of fiber art that fits right into classic, French provincial, or romantic interiors.
Step-by-Step Construction
- Cylindrical Velvet Bolster: Work a 14×6-inch bolster cylinder using soft pearl-white micro-chenille or velvet yarn in continuous rounds of single crochet.
- Sculpted Neck and Head: Crochet an S-curved, tapered tube for the swan neck, using short rows to establish an elegant arch. Stuff firmly and securely sew one end onto the front edge of the cylinder.
- Detailed Beak and Mask: In soft peach or apricot yarn, crochet a delicate beak with a small black velvet mask detail at the base, embroidering a closed, sleeping eyelid.
- Layered Wing Panels: Crochet two wing appliques using tiered fan stitches in alternating rows of pearl white and pale blush. Block them flat and sew along the cylinder sides.
- Bolster Edge Gathers: Gather the flat ends of the neckroll cylinder with invisible drawstrings, accenting each side with a golden yarn tassel or velvet-covered button.
Essential Tips
- Insert a flexible craft wire or soft pipe cleaner wrapped in batting inside the swan’s neck to maintain its graceful curve over time.
- Keep the wing fan stitches light and open so they flutter delicately against the dense velvet bolster base.
Design Variations
- Black Swan Opulence: Create a dramatic version using deep jet-black velvet yarn, a metallic charcoal beak, and antique gold wing accents.
- Crown Princess Swan: Crochet a tiny metallic gold lace coronet and stitch it between the swan’s ears for a touch of regal charm.
16. Autumn Forest Hedgehog Bobble Cushion
Concept Overview
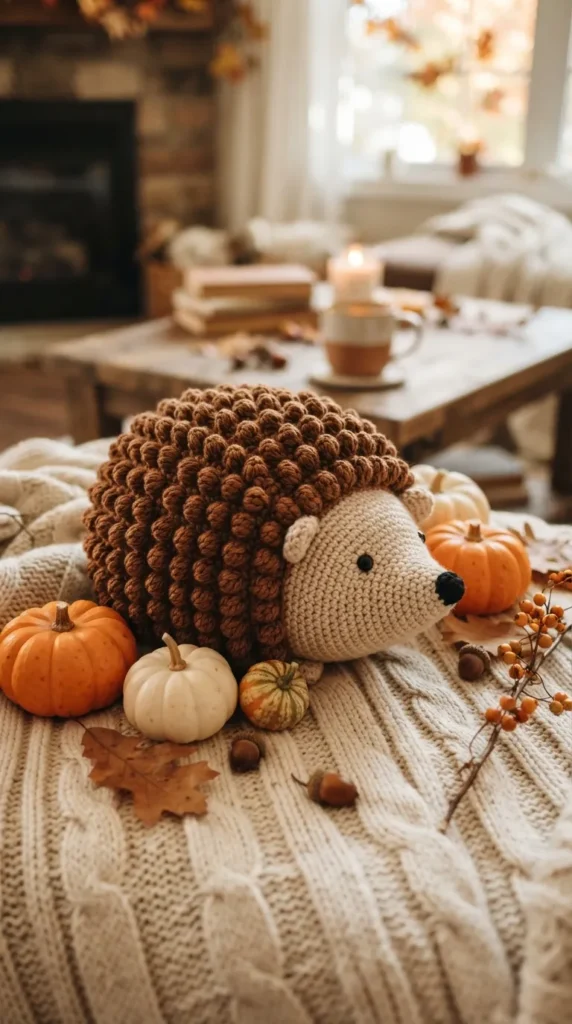
Celebrating rich woodland textures and cozy fall warmth, the Autumn Forest Hedgehog Bobble cushion features dense rows of raised bobbles that mimic soft, harmless quills. Its smooth, friendly face and textured back make it a comforting, tactile companion on chilly autumn evenings.
Design Philosophy
The appeal of this pillow comes from the contrast between the dimensional bobble-stitch quill coat and the smooth, fine-stitch face. Earthy autumn tones—chestnut brown, rich hazelnut, warm pumpkin, and toasted almond—bring seasonal warmth to harvest-themed and rustic spaces.
Step-by-Step Construction
- Smooth Tapered Muzzle: Starting at the nose with dark espresso yarn, work outward in rounds of single crochet, transitioning to warm almond beige to form a smooth snout. Embroider an oval nose and small, happy eyes.
- Textured Bobble Quill Body: Transition into chestnut brown yarn and begin working the back body in rounds: alternate 1 single crochet with 1 five-double-crochet bobble stitch across the entire upper half of the pillow.
- Flat Underbelly: Keep the bottom third of the pillow in smooth single crochet or moss stitch so the pillow sits comfortably flat on seats.
- Miniature Rounded Ears: Crochet two small saucer-shaped ears in almond beige, stitching them right where the smooth face meets the bobble quill coat.
- Assembly and Stuffing: Fill the pillow with soft polyfill, keeping the muzzle firm to retain its pointed shape while leaving the bobbled body soft and huggable.
Essential Tips
- Push all bobble clusters firmly toward the right side of the fabric as you crochet each round to ensure a dense, even quill coat.
- Use a smaller hook for the snout section to prevent stuffing from showing through the single crochet decreases.
Design Variations
- Puff Stitch Variation: Swap standard bobble stitches for puffy jasmine stitches to create a lighter, cloud-like quill texture.
- Forest Forager Accents: Sew a tiny crocheted red acorn or oak leaf tucked behind one ear for a playful woodland touch.
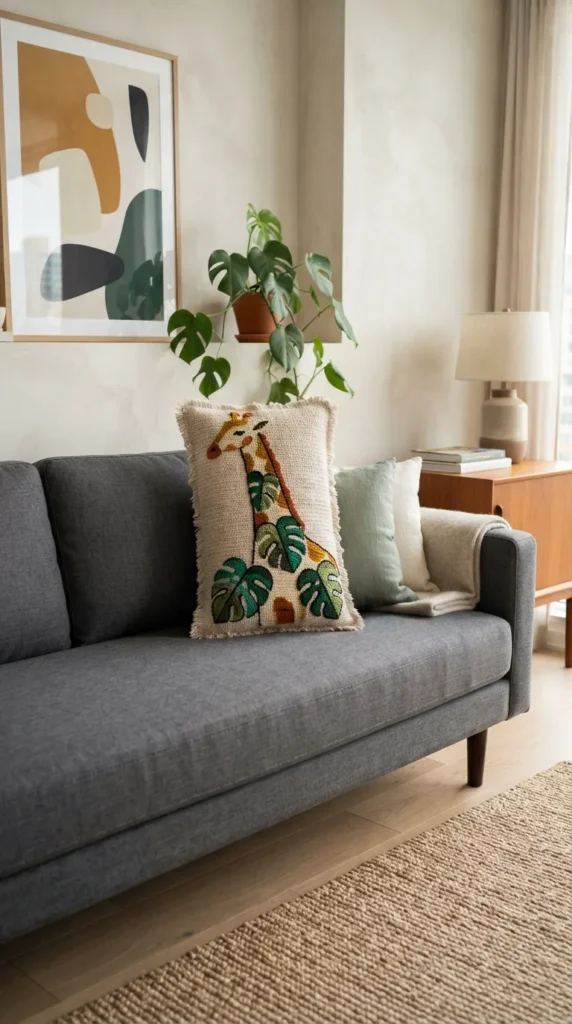
17. Abstract Botanical Safari Giraffe Pillow
Concept Overview
Reinterpreting classic safari themes through a contemporary art lens, the Abstract Botanical Safari Giraffe pillow features stylized geometric spots mixed with delicate botanical leaf prints. This tall rectangular pillow makes an artistic statement in urban apartments, creative workspaces, and modern eclectic living rooms.
Design Philosophy
Moving away from realistic animal patterns, this concept uses abstract artistic styling. Mustard yellow, warm ochre, soft olive green, and sandy linen create a sophisticated, earthy palette that pairs easily with modern art and indoor plants.
Step-by-Step Construction
- Tall Rectangular Base: Work a 14×22-inch rectangular panel in linen-stitch using unbleached natural cotton yarn, creating a clean, woven texture for the background canvas.
- Tapestry Giraffe Silhouette: Work a long, stylized giraffe neck along one side using warm ochre yarn, shaping the horns (ossicones) smoothly at the top.
- Botanical Leaf Spots: Instead of standard geometric spots, crochet small Monstera-leaf shapes, clover motifs, and olive branch sprigs in sage green, sewing them across the giraffe’s neck to form unique, nature-inspired spots.
- Back-Panel Envelope Closure: Crochet a matching back panel in solid olive green with a classic envelope button closure for easy pillow insert removal.
- Finishing Details: Add a minimalist fringe mane along the back curve of the neck using short strands of natural jute or linen thread.
Essential Tips
- The linen stitch (single crochet, chain 1, skip 1) creates a firm, woven-like fabric that resists stretching, making it ideal for decorative tapestry surfaces.
- Steam-block all botanical appliques before stitching them down so they lie flat without bubbling.
Design Variations
- Terracotta Safari: Swap ochre and olive for dusty terracotta, rust, and peach for a warm desert sunset theme.
- Embroidered Line Art: Crochet a clean, solid cream background and embroider the entire giraffe using black single-line continuous contour stitching.
18. Coastal Blue Whale Floor Pouf
Concept Overview
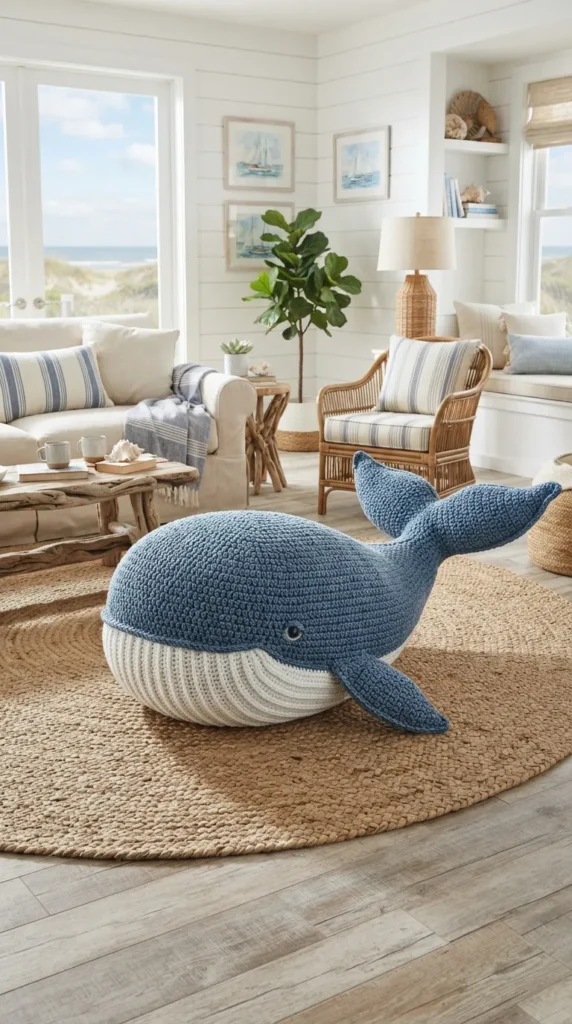
Spacious, soft, and comfortable, the Coastal Blue Whale floor pouf brings ocean majesty into casual family rooms, playrooms, and coastal dens. Shaped like a resting gentle giant, this oversized floor cushion features a ribbed underbelly and sweeping tail flukes that make it a favorite for lounging and reading.
Design Philosophy
This project focuses on comfort, durability, and soothing nautical style. Using washed denim blue, misty seafoam, and crisp nautical cream, it introduces maritime character that feels mature and relaxing.
Step-by-Step Construction
- Wide Oval Top Shell: Using two strands of chunky denim-blue wool-acrylic yarn, crochet a wide oval shell using half double crochet stitches, working gradual increases to create a gentle dome.
- Ribbed White Underbelly (Grooves): Work a matching white panel in back-loop-only half double crochet to create the distinctive accordion grooves of a baleen whale’s throat.
- Horizontal Tail Flukes: Crochet two wide triangular fins in denim blue, seaming them horizontally onto a tapered rear tail segment.
- Side Pectoral Flippers: Create two paddle-shaped flippers and sew them into the side seams where the denim top meets the white underbelly.
- Stuffing & Closure: Fill with a mix of shredded high-density upholstery foam and polyfill for a supportive, long-lasting seat, then single-crochet the edges closed.
Essential Tips
- Using shredded foam instead of regular polyfill for large floor poufs prevents sagging and helps the piece hold its shape under heavy daily use.
- Work with two strands of yarn held together on a large hook to build durable, heavyweight fabric quickly.
Design Variations
- Minke Whale Gray: Work in misty dove gray and ivory for a soft, understated coastal look.
- Patchwork Nautical Whale: Use various shades of recycled denim yarn for a vintage, maritime upcycled look.
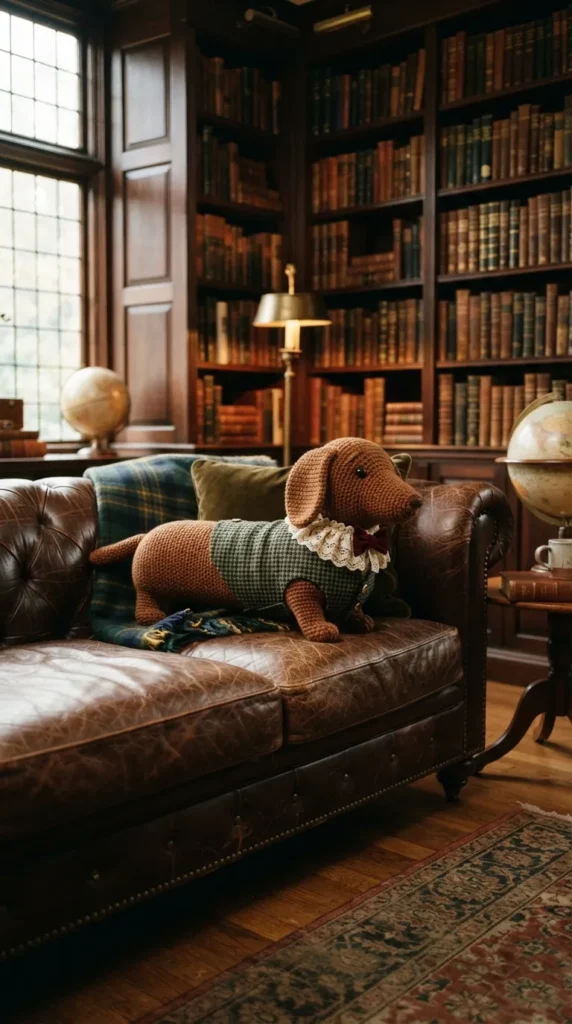
19. Regency Era Dapper Dachshund Bolster
Concept Overview
Celebrating the classic sausage-dog silhouette with a touch of historic elegance, the Regency Era Dapper Dachshund bolster is a long, low cushion designed for sofa benches and window seats. Featuring a smart waistcoat pattern or ruffled collar, this piece brings playful literary charm to traditional and cottage libraries.
Design Philosophy
This design pairs vintage sophistication with whimsical character. Rich houndstooth checks, muted tartan motifs, deep forest greens, and rich burgundy bring historic style to cozy reading corners.
Step-by-Step Construction
- Extra-Long Body Tube: Crochet an elongated cylinder (approx. 26 to 30 inches long by 6 inches wide) in rich chestnut brown yarn using dense single crochet.
- Waistcoat Wrap (Optional): Crochet an integrated center sleeve in green-and-cream houndstooth pattern to give the dachshund a cozy, tailored jacket.
- Droopy Hound Ears: Work two long, wide teardrop ears in matching chestnut brown, allowing them to hang low over the shaped head.
- Short Stumpy Legs: Crochet four short, firm cylindrical legs, stuffing them tightly with fiberfill and sewing them along the bottom of the body so the dog rests flat.
- Ruffled Collar Accent: Add a small gathered ruffle in antique ivory yarn around the neck, fastening it with a tiny brass decorative button.
Essential Tips
- Insert a pre-made foam bolster roll inside the dachshund’s long body to prevent it from sagging or bending in the middle when leaned on.
- Sew the legs slightly outward at a subtle angle to give the dachshund a sturdy, stable base on flat surfaces.
Design Variations
- Modern Minimalist Sausage Dog: Skip the waistcoat and ruffle, working the entire dog in a single sleek shade of charcoal or biscuit tan.
- Fair Isle Sweater Dachshund: Replace the houndstooth with a cozy Scandinavian Fair Isle snowflake sweater pattern across the midsection.
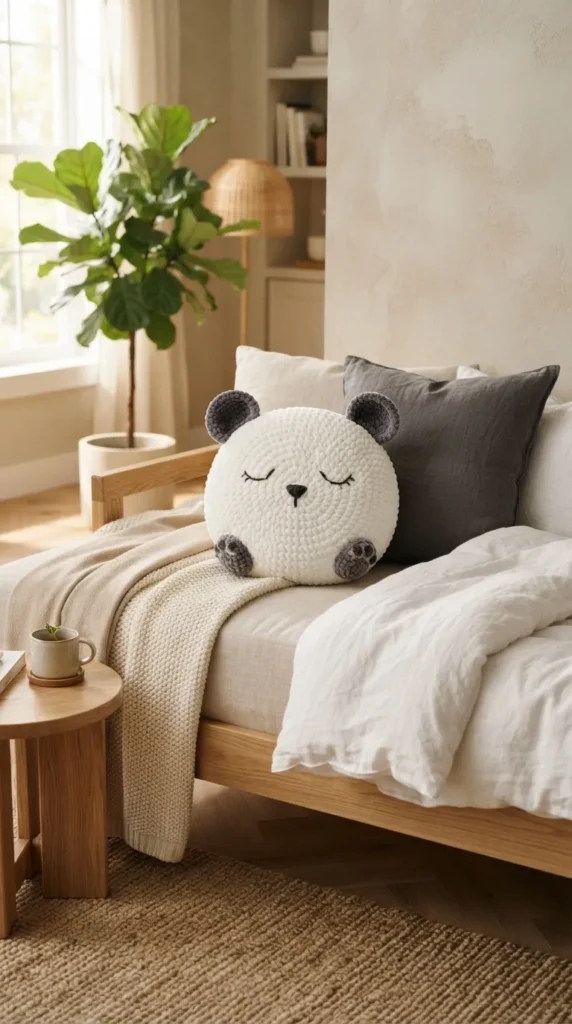
20. Cozy Sleeping Panda Round Pillow
Concept Overview
With clean black-and-white contrast, gentle curves, and a calm sleeping expression, the Cozy Sleeping Panda round pillow is a versatile accent for any space. Its peaceful face and plush ear cups create a welcoming, comforting presence on accent armchairs, daybeds, and floor cushions.
Design Philosophy
The power of this design lies in its balanced proportions and peaceful mood. Soft cloud-white textures paired with velvety matte charcoal-black accents create an inviting, restful focal point.
Step-by-Step Construction
- Large Circular White Face: Work two large 18-inch flat circular panels in super-soft cloud-white chenille or brushed alpaca yarn using half double crochet.
- Tilted Black Eye Patches: Crochet two distinctive oval patches in black yarn. Embroider sweet, curved sleeping eye arcs in white embroidery thread across the lower half of each patch before attaching.
- Black Button Nose & Curved Smile: Sew a soft triangular black nose in the center, adding a tiny curved mouth line in black yarn underneath.
- Cup-Shaped Black Ears: Work two thick black half-spheres, pinching their bottom corners slightly to form cup-shaped ears, then sew them onto the top rim of the front panel.
- Assembly: Align the front and back white panels, crochet the edges together with a smooth single-crochet border, and fill with premium micro-cluster fiberfill for a cloud-soft feel.
Essential Tips
- When working with dark black yarn on white backgrounds, use a clean tapestry needle and matching black thread to sew the eye patches down, hiding stitches along the inner black edge.
- Stuff the cup ears with a tiny ball of fiberfill before attaching to help them stay upright and perky.
Design Variations
- Bamboo Leaf Accent: Crochet two small sage-green bamboo leaves and tuck them beside one ear for a pop of botanical color.
- Blushing Panda: Use soft pink powder blush or pink embroidery thread on the cheeks just below the black eye patches for a sweet, rosy touch.
Curated Material & Care Guide for Crochet Pillows
| Pillow Design | Recommended Yarn Weight | Best Fiber Content | Optimal Hook Size | Pillow Insert Type |
| Minimalist Sleeping Fox | Bulky (#5) | Cotton / Acrylic Blend | 5.0 mm – 5.5 mm | Round Polyfill Form |
| Highland Cow Pillow | Jumbo Chenille (#7) | 100% Polyester | 8.0 mm – 9.0 mm | Loose Cluster Fiberfill |
| Nordic Polar Bear Pouf | Super Bulky (#6) | Wool Roving / Felted Wool | 7.0 mm – 8.0 mm | High-Density Foam Core |
| Vintage Frog Cushion | Worsted (#4) | Tweed / Wool Blend | 4.0 mm – 4.5 mm | Custom Oval Form |
| Velvet Honeybee Pillow | Bulky Velvet (#5) | Micro-Polyester Velvet | 4.5 mm – 5.0 mm | Premium Polyester Fill |
| Boho Moon Moth Pillow | Worsted (#4) | 100% Matte Cotton | 3.75 mm – 4.0 mm | Quilt Batting + Loose Fill |
| Pastel Koi Fish Lumbar | Light Worsted / DK (#3) | Cotton / Bamboo Blend | 3.5 mm – 4.0 mm | Pliable Memory Foam |
| Woodland Barn Owl | Worsted (#4) | Heathered Acrylic Blend | 4.0 mm – 4.5 mm | Square Form (16×16) |
| Scandi Geometric Cat | DK (#3) | Mercerized Cotton | 3.0 mm – 3.5 mm | Flat High-Density Foam |
| Daisy Meadow Lamb | Chunky (#5) + DK (#3) | Wool Bouclé + Cotton | 5.5 mm / 3.5 mm | Hypoallergenic Polyfill |
| Aztec Llama Lumbar | DK / Sport (#2-#3) | Acrylic / Linen Blend | 3.25 mm – 3.5 mm | Rectangular Form (12×20) |
| Seashell Turtle Pillow | Bulky Velvet (#5) | Polyester Velvet | 4.5 mm – 5.0 mm | Clustered Micro-Polyfill |
| Retro Daisy Cow Print | Worsted (#4) | Cotton / Acrylic Blend | 4.5 mm – 5.0 mm | Round 16-inch Form |
| Sweet Sloth Branch | Worsted (#4) + Chenille | Acrylic Tweed + Chenille | 4.0 mm – 4.5 mm | Dense Foam Tube + Beads |
| Swan Lake Neckroll | Bulky Velvet (#5) | Micro-Velvet | 4.5 mm – 5.0 mm | Cylindrical Neckroll Form |
| Autumn Hedgehog | Worsted (#4) | Wool Blend | 4.0 mm – 4.5 mm | Hypoallergenic Polyfill |
| Abstract Safari Giraffe | DK / Light Worsted (#3) | Unbleached Matte Cotton | 3.5 mm – 4.0 mm | Rectangular Form (14×22) |
| Coastal Blue Whale | Super Bulky (#6) | Chunky Wool-Acrylic | 8.0 mm – 9.0 mm | Shredded Upholstery Foam |
| Dapper Dachshund | Worsted (#4) | Pure Wool / Wool-Acrylic | 4.0 mm – 4.5 mm | Long Foam Bolster Core |
| Cozy Sleeping Panda | Bulky Chenille (#5) | Plush Polyester Chenille | 5.0 mm – 5.5 mm | Cloud Micro-Fiberfill |