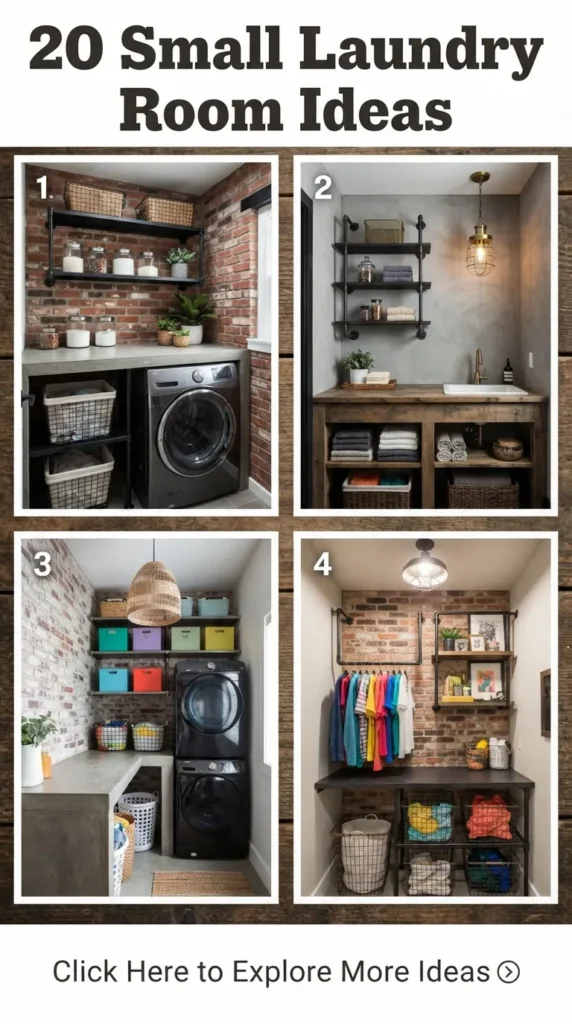
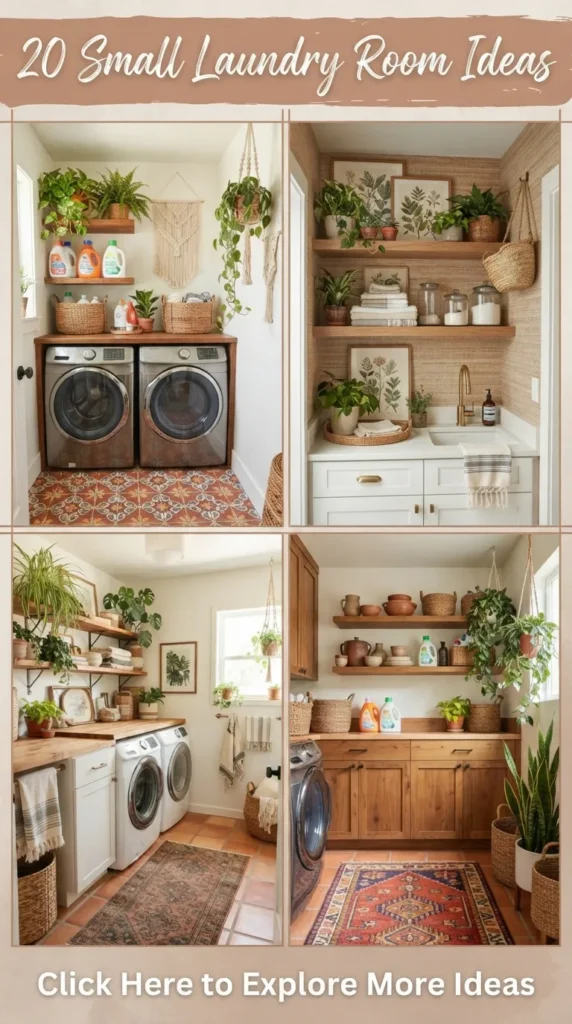
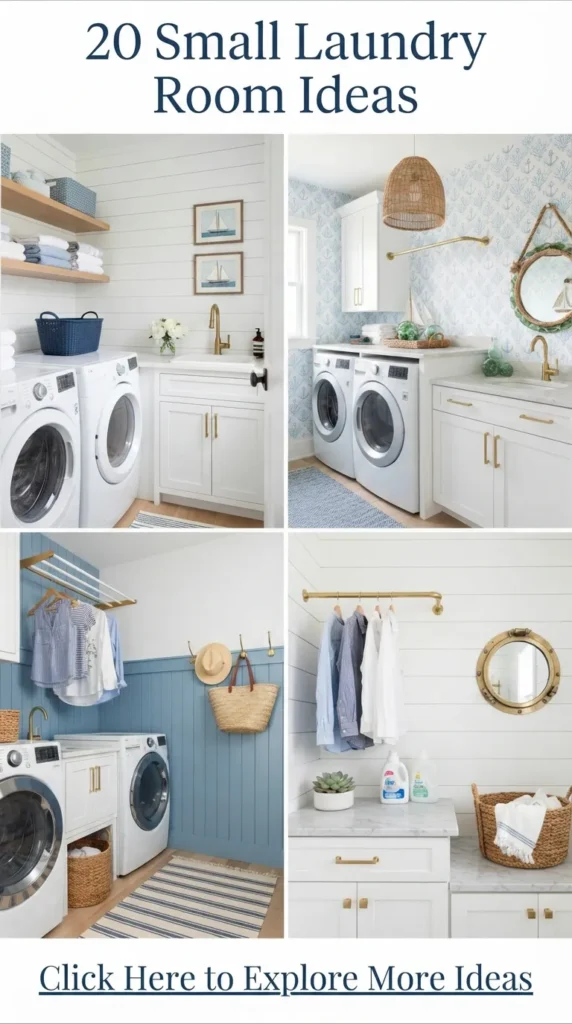
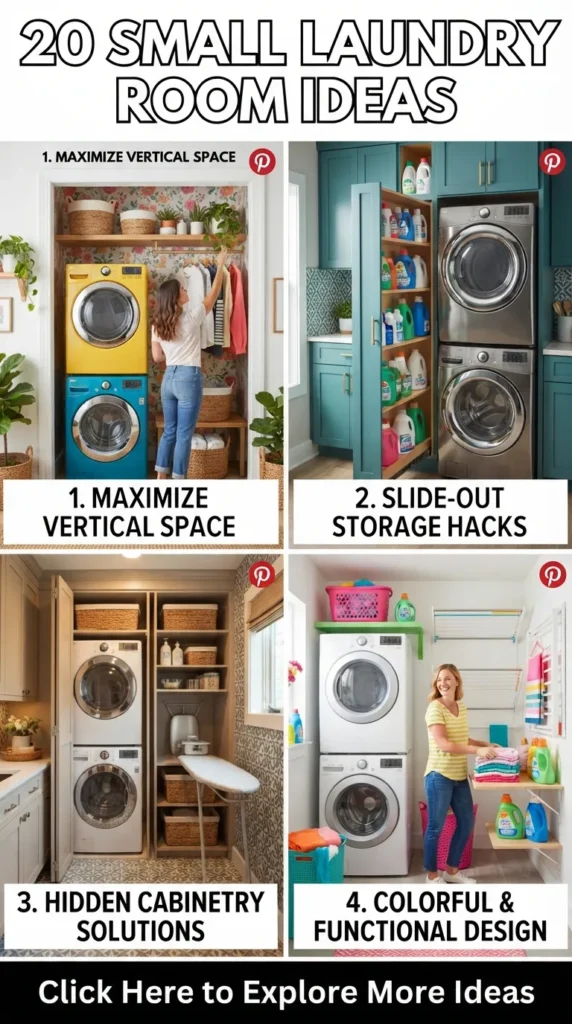
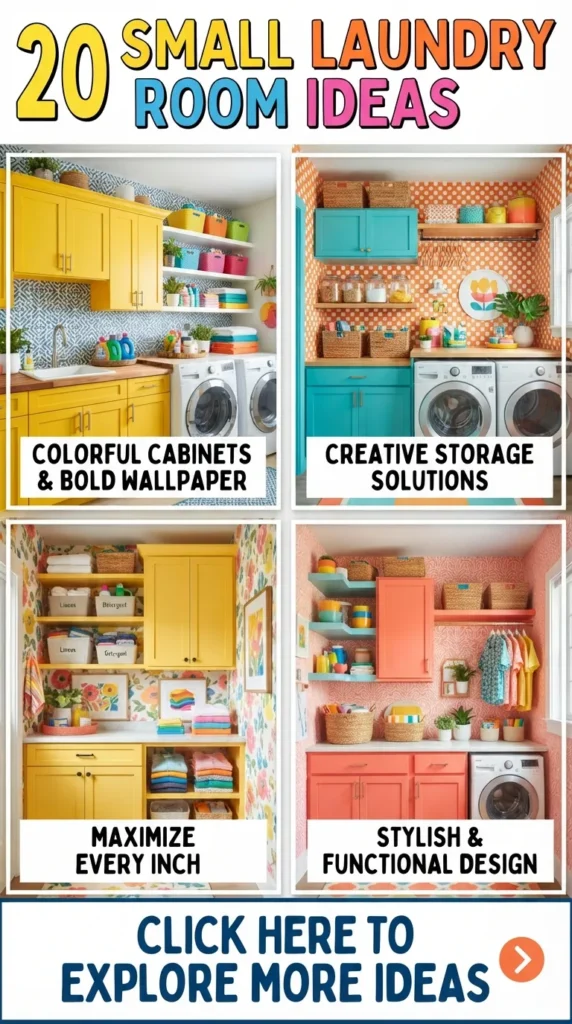
Transforming a compact laundry area into a serene, highly efficient, and aesthetically stunning space is one of the most rewarding home improvement projects you can undertake. A small footprint should never limit your interior design ambitions. With smart spatial planning, warm textures, elegant cabinetry, and functional accents, even the tightest alcove, closet, or utility corner can become a Pinterest-worthy sanctuary.
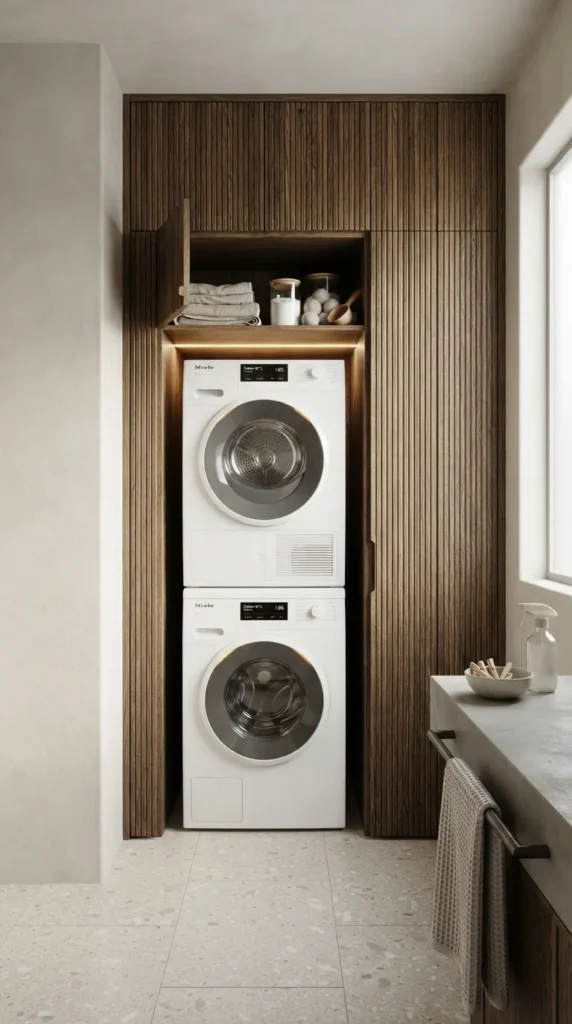
1. Stackable Washer-Dryer in a Reeded Wood Nook
Introduction Maximizing vertical real estate is the cornerstone of compact utility design. Enclosing front-loading stackable machines within custom, warm-toned reeded timber millwork conceals utilitarian harshness while introducing rich tactile depth.
What This Idea Means This concept merges appliance concealment with natural architectural textures. Instead of leaving appliances exposed to the surrounding room, a dedicated nook lined with slim vertical wooden slats brings organic Scandinavian or Japandi warmth to the workspace.
How to Make It
- Measure your stackable washer and dryer footprint, adding three inches on each side and four inches at the rear for ventilation, plumbing, and electrical hookups.
- Build a sturdy surround frame using moisture-resistant plywood.
- Clad the outer panels with fluted or reeded oak or ash wood tambour panels.
- Seal the wood using a matte polyurethane clear coat to protect against humidity and lint buildup.
Tips and Variations
- Tip: Install a slim slide-out vertical drawer beside the stack to store narrow detergent bottles.
- Variation: Paint the reeded slats in a moody charcoal or muted sage green instead of natural stain for a contemporary look.
2. Farmhouse Butcher Block Folding Countertop
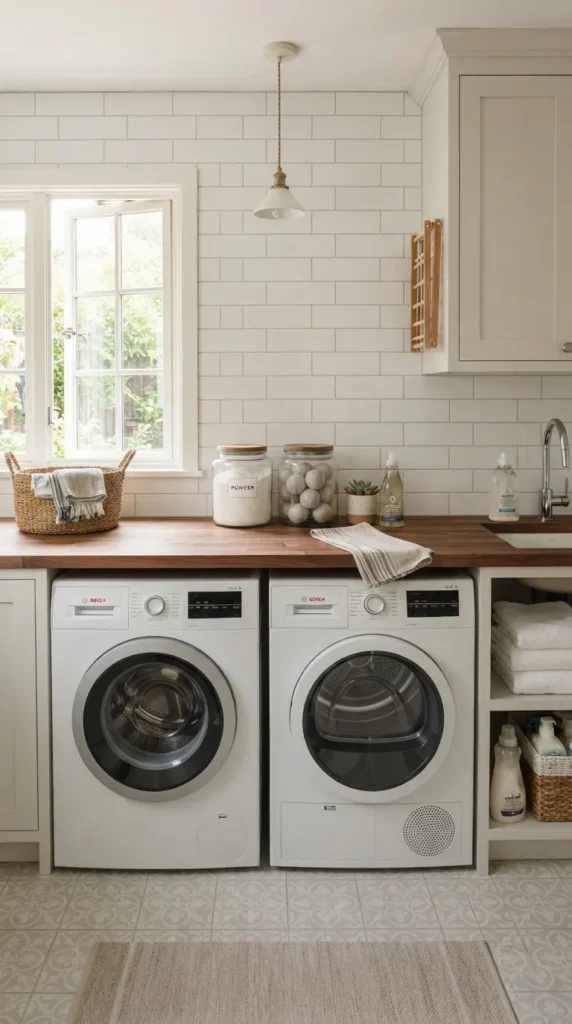
Introduction A continuous horizontal working surface instantly unifies side-by-side front-loading units. Topping them with a rich, oiled butcher block creates a seamless laundry folding station.
What This Idea Means Placing a heavy-duty wooden slab over appliances eliminates awkward gaps where socks vanish, providing a practical folding table that doubles as a display ledge for curated laundry jars.
How to Make It
- Ensure your front-loading machines sit level side by side with vibration pads beneath their feet.
- Mount support cleats directly into the wall studs along the back and sides, slightly above machine height so the counter floats without vibrating directly on the appliances.
- Cut an edge-grain oak or walnut butcher block slab to fit flush against the walls.
- Sand smoothly and finish with food-grade mineral oil or water-resistant satin hardwax oil.
Tips and Variations
- Tip: Add a small 2-inch backsplash lip from the matching wood along the back wall to prevent items from falling behind.
- Variation: Use a faux-marble quartz slab with soft grey veining instead of butcher block for a luxe, maintenance-free finish.
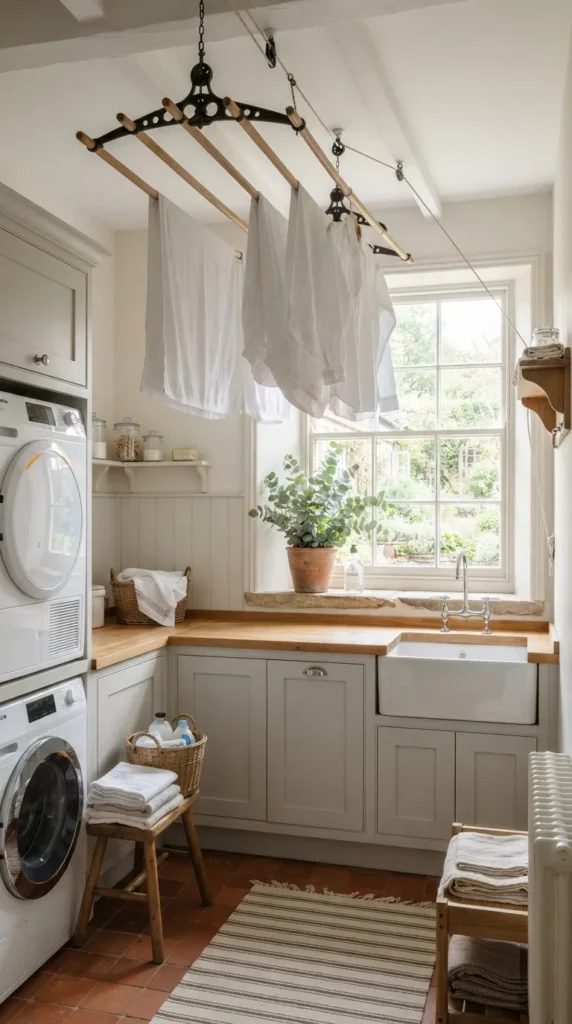
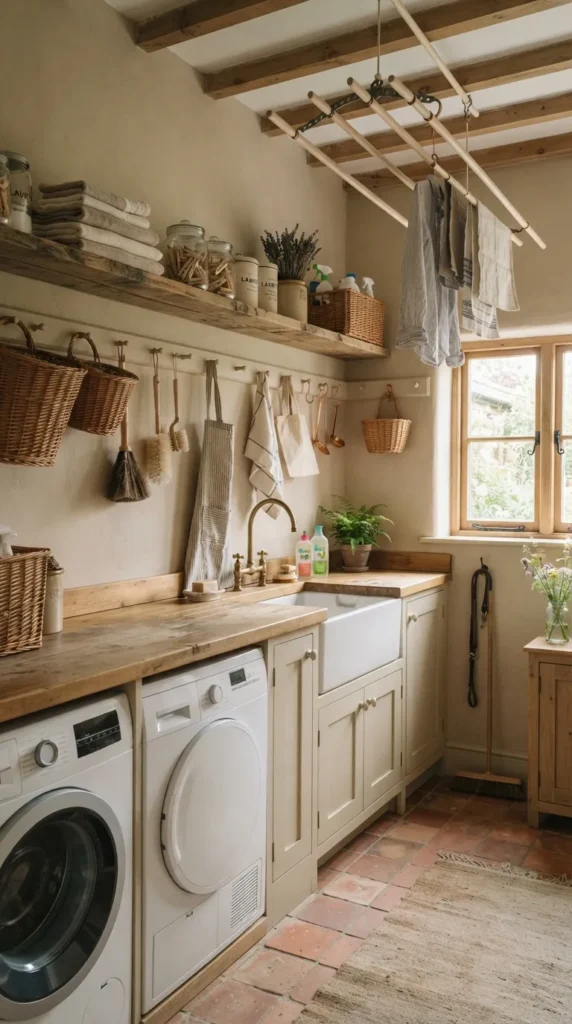
3. Ceiling-Suspended Victorian Drying Pulley Rack
Introduction Floor-standing drying racks take up valuable foot space in compact quarters. A ceiling-hung traditional pulley system utilizes unused overhead clearance for natural air-drying.
What This Idea Means Drawing inspiration from classic Victorian utility sculleries, a suspended wooden drying rack utilizes ceiling pulleys to hoist damp linens up toward warmer ceiling air, keeping the floor unobstructed.
How to Make It
- Locate ceiling joists using a stud finder to anchor heavy-duty cast-iron screw hooks securely.
- Assemble a timber frame fitted with smooth wooden dowels or buy a traditional cast-iron rack end kit.
- Thread heavy-duty braided rope through double and single ceiling pulleys.
- Secure the tie-off wall cleat at waist height on an adjacent wall stud.
Tips and Variations
- Tip: Position the rack away from doorway swings and primary lighting fixtures.
- Variation: Paint the wooden dowels in an accent color matching your cabinetry trim, or choose antique brass pulley hardware.
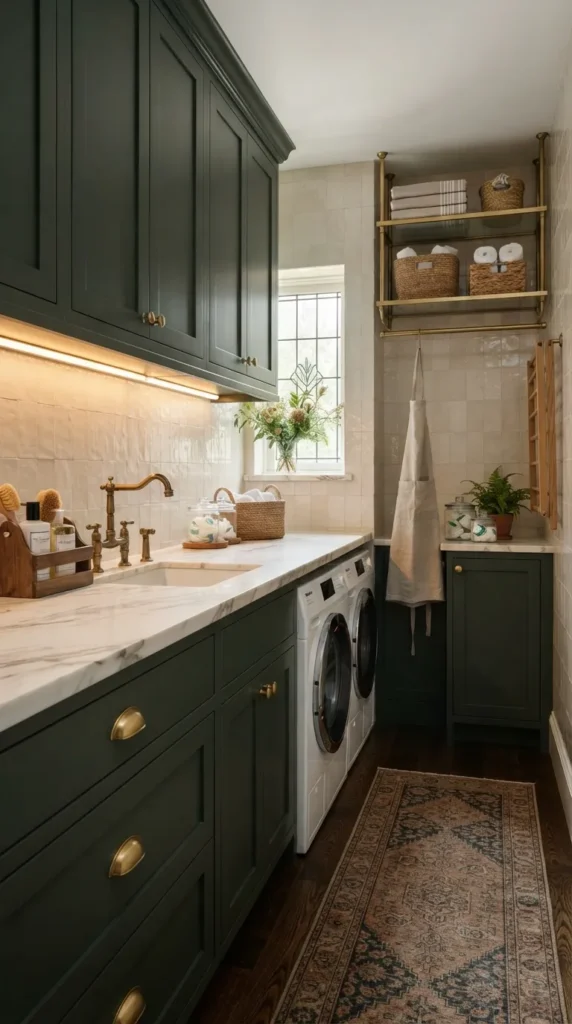
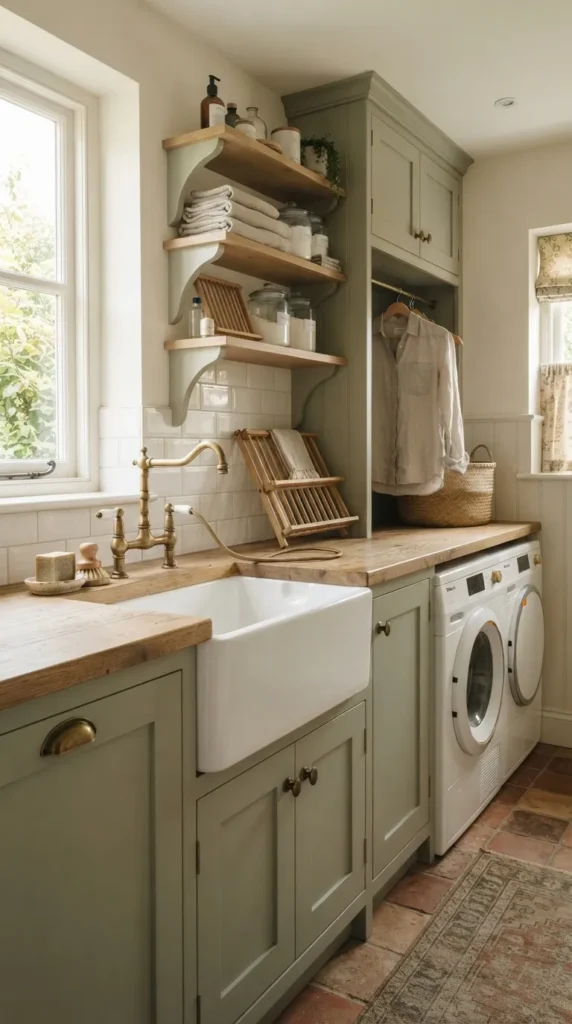
4. Vintage Brass Hardware and Deep Green Cabinetry
Introduction Rich, dark tones add dramatic character to small rooms. Pairing forest green cabinetry with unlacquered brass hardware turns an ordinary utility zone into an artisanal retreat.
What This Idea Means Rather than sticking strictly to plain white, saturated earth tones like heritage hunter green or deep olive create visual depth, making a tight corner feel intentional, cozy, and high-end.
How to Make It
- Prep upper and lower cabinet doors by sanding, cleaning with TSP, and applying a bonding primer.
- Apply two coats of semi-gloss or satin enamel paint in rich forest or olive green.
- Drill and install solid unlacquered brass bar pulls, bin cups, and matching brass hinges.
- Balance the dark paint by installing under-cabinet warm LED light strips.
Tips and Variations
- Tip: Unlacquered brass will develop a natural living patina over time that adds authentic vintage character.
- Variation: Swap deep green for midnight navy or slate blue if cool undertones better complement your home’s palette.
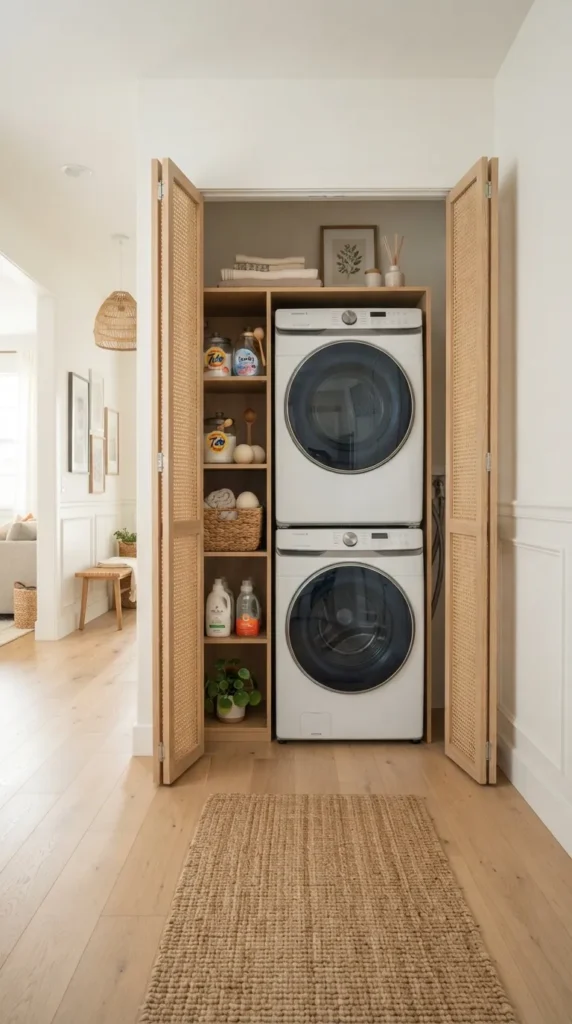
5. Sliding Cane Webbing Bi-Fold Doors
Introduction Hiding laundry appliances behind ventilated sliding screens keeps common hallways tidy while maintaining necessary airflow for equipment.
What This Idea Means Standard solid doors often block walkways when opened. Bi-fold or sliding bypass doors inset with natural woven rattan cane webbing provide a light, breathable barrier that softens appliance noise.
How to Make It
- Build or repurpose flat wooden door frames made from lightweight pine or hardwood.
- Soak woven cane webbing in warm water for 30 minutes to make it pliable.
- Stretch the damp webbing tightly across the back of the door frame cutouts, stapling every two inches.
- Trim excess cane and install trim moulding over the staples. As the cane dries, it tightens into a flat, drum-tight weave.
- Mount using top-hung sliding barn door tracks or smooth bi-fold tracks.
Tips and Variations
- Tip: Use a pneumatic staple gun for clean and consistent tensioning.
- Variation: Stain the outer wood frames a rich espresso tone to contrast the pale natural rattan mesh.
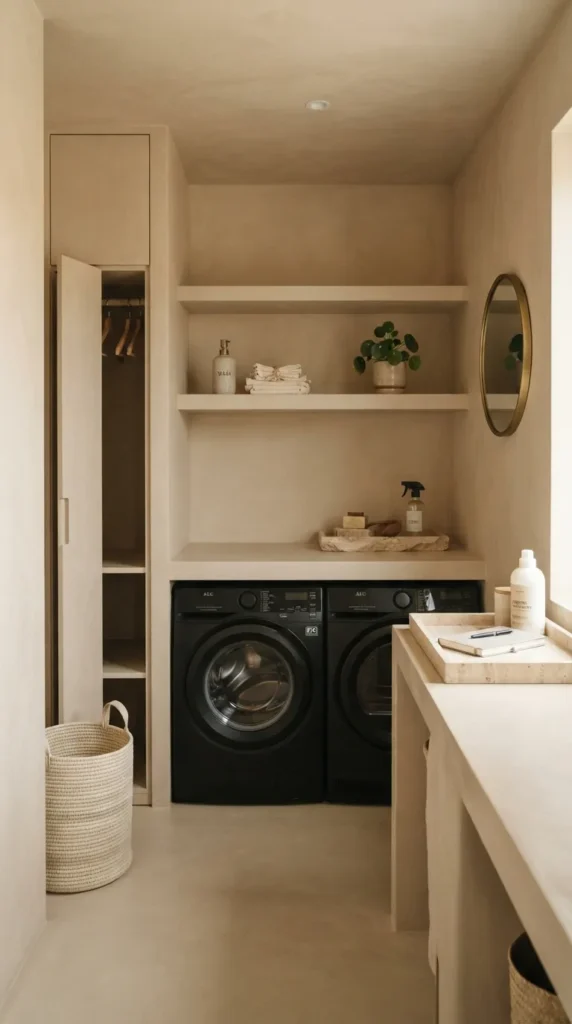
6. Minimalist Hidden Pocket Door Closet
Introduction When space is at an absolute premium, standard swing doors waste square footage. Pocket doors slide silently inside wall cavities to reveal a fully operational laundry station.
What This Idea Means Integrating a micro-laundry setup inside a hall closet or powder room nook using pocket doors allows you to close off chore clutter entirely when entertaining guests.
How to Make It
- Frame a pocket door structural header inside your stud wall.
- Install high-grade ball-bearing pocket door hardware tracks to ensure smooth, silent sliding.
- Hang lightweight solid-core doors with recessed flush pull latches.
- Fit internal door-activated magnetic switch sensors that automatically turn on overhead task lighting when doors slide open.
Tips and Variations
- Tip: Ensure power outlets and supply lines inside the closet are mounted on the back wall rather than the pocket wall to prevent screw penetrations into the door cavity.
- Variation: Install frosted reeded glass pocket door inserts to allow ambient daylight to pass through while keeping appliances concealed.


7. Floating Raw-Edge Solid Oak Shelving
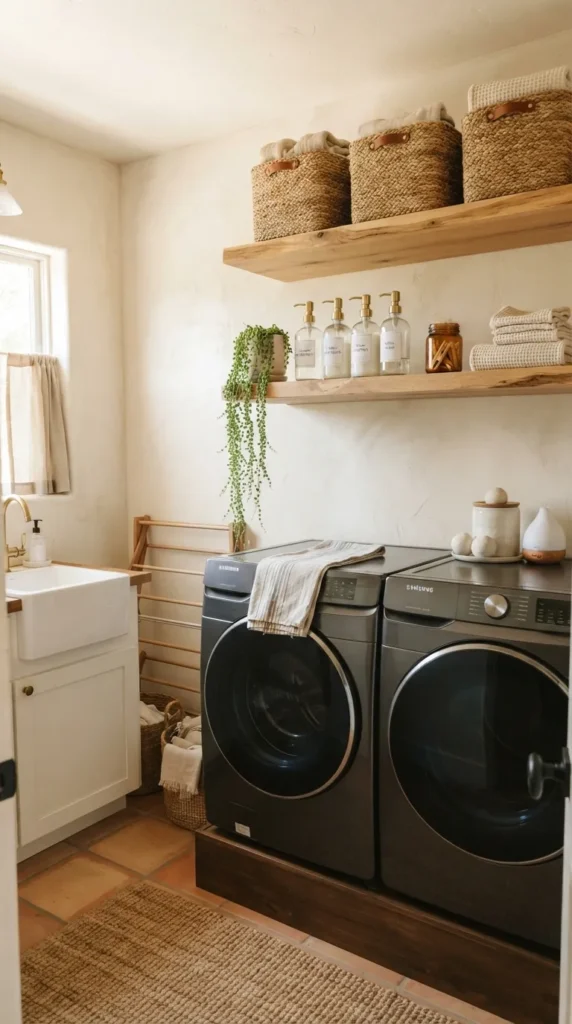
Introduction Upper cabinetry can sometimes overwhelm a tight utility room, making the ceiling feel lower. Thick, floating raw-edge oak shelves open up wall space while providing functional display room.
What This Idea Means Open timber shelving introduces artisanal lines and provides quick, visible access to daily essentials like glass laundry detergent dispensers, woven peg baskets, and wool dryer ball jars.
How to Make It
- Source kiln-dried raw-edge or live-edge solid white oak planks cut to 10–12 inches deep.
- Level and securely bolt heavy-duty hidden steel floating shelf brackets directly into wall studs.
- Router corresponding bracket holes in the back edge of your timber planks.
- Slide shelves onto the steel rods and secure with underside set screws.
- Finish the wood with a clear protective matte sealer.
Tips and Variations
- Tip: Store everyday powdered soaps and fabric softeners in matching clear glass apothecary jars to maintain a clean aesthetic.
- Variation: Add small under-shelf brass hooks to hang small wire lint brushes or linen dusters.
8. Handcrafted Zellige Tile Backsplash
Introduction Reflective surfaces bounce light through compact rooms. Glossy, artisan zellige terracotta wall tiles add shimmering, organic texture behind counters and washbasins.
What This Idea Means Unlike flat, uniform machine-made tiles, handcrafted zellige tiles feature subtle tone variations, chiseled edges, and an uneven surface that catches natural light, adding depth to plain walls.
How to Make It
- Prep the wall with cement backer board around the sink and countertop area.
- Apply white thin-set mortar using a notched trowel.
- Place 4×4-inch natural white or soft pearlescent zellige tiles closely together with minimal grout lines (1mm spacer or butted edge).
- Fill seams using fine, non-sanded grout and sponge clean gently to highlight the irregular tile profiles.
Tips and Variations
- Tip: Dry-lay tiles on the floor beforehand to balance high-gloss and matte shade variations across the wall.
- Variation: Choose pale eucalyptus or terracotta-toned zellige to add subtle color to a neutral room.
9. Monochromatic Warm Beige and Microcement Finish
Introduction A seamless, monolithic surface finish visually expands small spaces. Microcement walls, floors, and countertops create an earthy, calm atmosphere.
What This Idea Means Eliminating grout lines and busy transitions tricks the eye into seeing a larger, continuous space. A soft warm beige or limestone microcement wash provides a serene Mediterranean spa feel.
How to Make It
- Apply a stabilizing primer over smooth drywall or cement substrate.
- Trowel on a base coat of fine microcement plaster with sweeping, balanced strokes.
- Sand lightly between applications and apply a second coat for refined texture.
- Finish with two coats of breathable, waterproof polyurethane sealer to resist moisture and soap splashes.
Tips and Variations
- Tip: Pair seamless plaster walls with light travertine trays and unbleached cotton laundry hampers.
- Variation: Add built-in wall niches finished in the same microcement to store soap dispensers without needing protruding metal shelves.
10. Shaker Peg Rails with Woven Storage Baskets
Introduction A classic Shaker peg rail running the perimeter of the room turns bare vertical walls into practical, adaptable hanging storage.
What This Idea Means Borrowing from utilitarian Shaker design, a continuous wall-mounted peg board keeps floor pathways clear. It provides flexible hooks for drying delicates, hanging ironing boards, or holding woven tote bags filled with utility accessories.
How to Make It
- Cut a 1×4-inch solid maple or poplar board to your desired wall length.
- Drill evenly spaced holes (approximately 6 inches apart) using a Forstner bit.
- Glue turned wooden Shaker pegs into the holes using wood glue.
- Screw the rail securely into wall studs and counter-sink the screws, filling holes with wood plugs before painting or staining.
Tips and Variations
- Tip: Paint the peg rail the exact same color as your wall to blend it seamlessly into the background.
- Variation: Install a matching picture ledge shelf directly above the peg rail to display framed botanical art and small potted plants.
11. Built-in Undermount Deep Fireclay Belfast Sink
Introduction Hand-washing delicate garments and soaking stained fabrics is easier with a proper basin. A deep, glossy white fireclay sink introduces classic cottage luxury into a compact setup.
What This Idea Means A heavy-duty fireclay or ceramic sink provides a durable basin that handles heavy utility tasks without scratching, while the exposed apron front adds timeless country character.
How to Make It
- Construct a reinforced cabinet base frame capable of holding the substantial weight of a water-filled fireclay basin.
- Install water-resistant solid surface or treated hardwood countertops with a precise undermount cutout.
- Plumb an antique brass or matte black gooseneck bridge faucet fitted with an extendable pull-down spray head.
- Seal perimeter edges with mold-resistant silicone.
Tips and Variations
- Tip: Choose a faucet with a high-clearance arch to make filling tall buckets straightforward.
- Variation: Install a modern black granite composite sink instead of white fireclay for an industrial aesthetic.
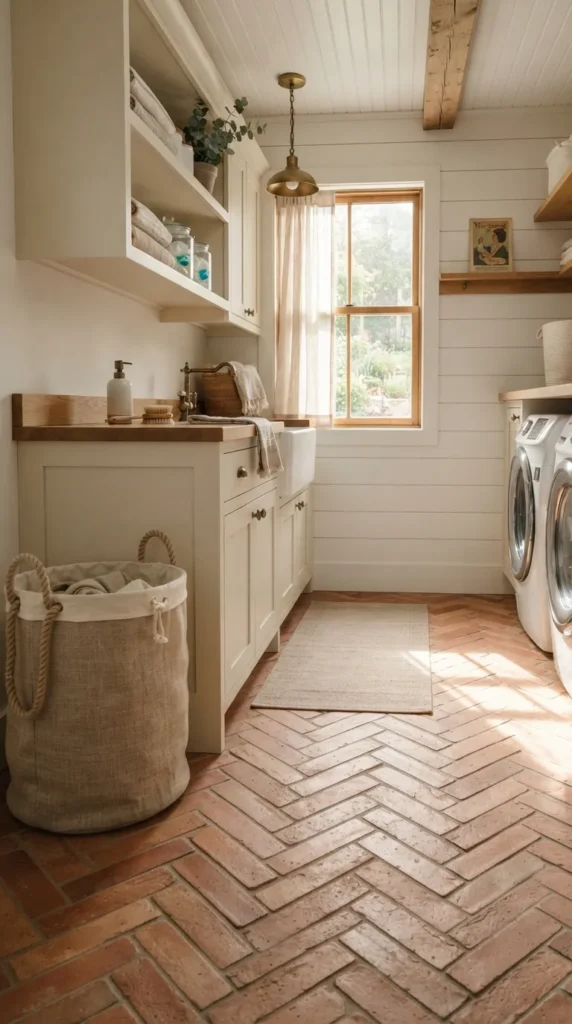
12. Soft Terracotta Herringbone Brick Floor
Introduction Flooring adds immediate character. Laying slim terracotta or tumbled brick pavers in a herringbone pattern creates an earthy foundation that conceals daily dust.
What This Idea Means Textured terracotta tiles lend warmth, durability, and slip resistance to areas prone to water spills. The herringbone orientation draws the eye outward, making narrow utility rooms feel wider.
How to Make It
- Ensure the subfloor is rigid and level, installing an uncoupling membrane to prevent tile cracking.
- Lay slim rectangular terracotta tiles in a classic 45-degree or 90-degree interlocking herringbone pattern.
- Set tiles into medium-bed mortar, keeping joint spacing uniform.
- Seal the porous terracotta pavers with a penetrating sealer before applying sand-colored grout, then finish with a top coat of matte protective floor wax.
Tips and Variations
- Tip: Seal the tiles thoroughly to keep laundry detergents and bleach splashes from staining the porous clay.
- Variation: Use grey porcelain slate planks instead of terracotta for a cooler, modern farmhouse palette.
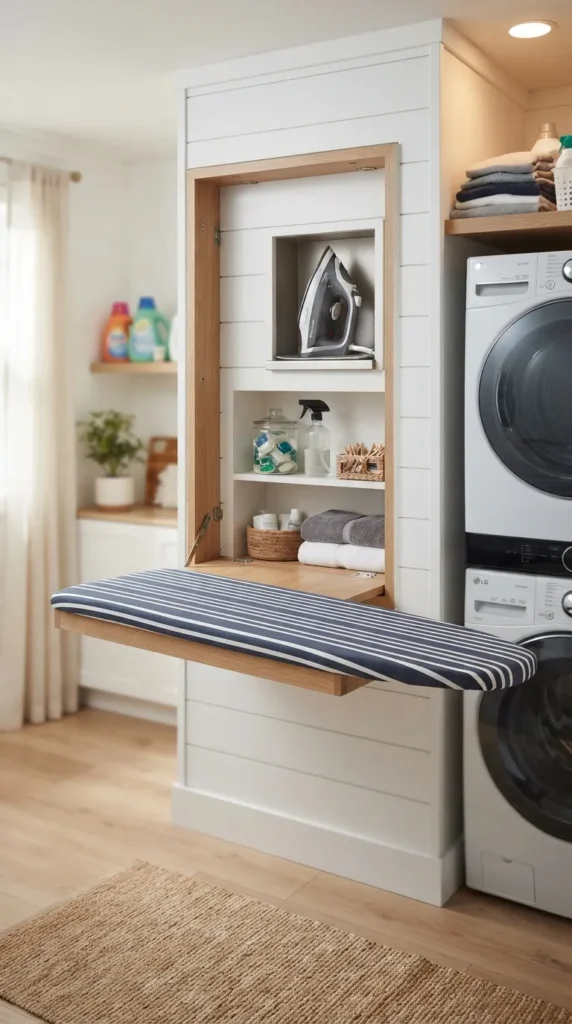
13. Fold-Down Wall-Mounted Murphy Ironing Board
Introduction Bulky, freestanding ironing boards are awkward to store in tight closets. A built-in, drop-down wall unit folds completely flat against the wall when not in use.
What This Idea Means A fold-down ironing board tucks into a shallow recessed wall cabinet. The exterior door can be mirrored or paneled, disappearing into the wall architecture when closed.
How to Make It
- Cut a shallow recess between two wall studs (approx. 14 inches wide and 4 inches deep).
- Build a thin timber frame insert fitted with a folding ironing board hinge mechanism.
- Attach a custom fabric-padded board that unfolds horizontally onto a fold-out support leg.
- Hang a framed canvas print or full-length mirror as the exterior cabinet face door.
Tips and Variations
- Tip: Add a small heat-resistant silicone resting plate inside the cabinet to store your iron safely while it cools.
- Variation: Install a magnetic latch to ensure the drop-down board stays locked flush against the wall.
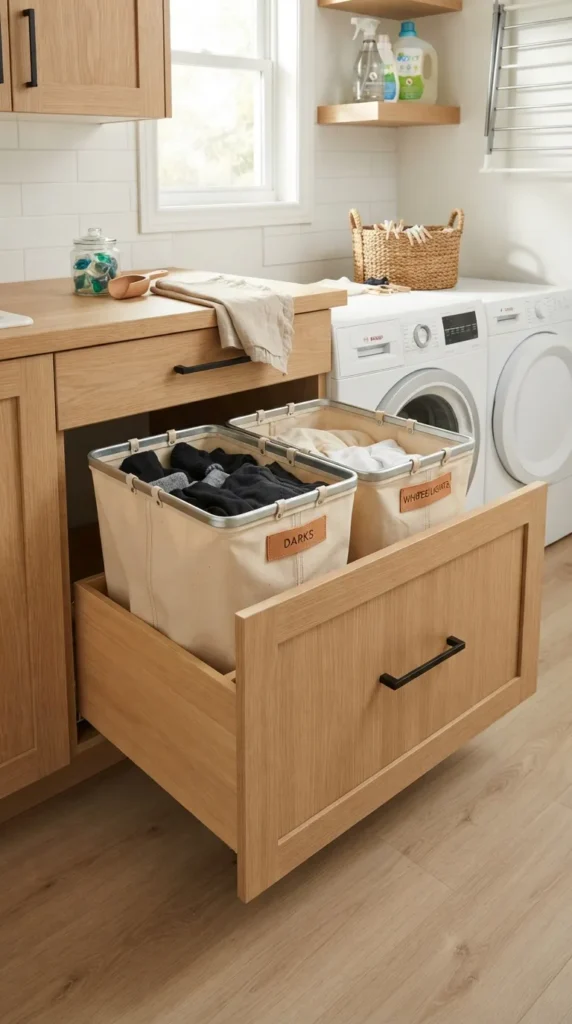
14. Integrated Pull-Out Canvas Laundry Hampers
Introduction Scattered plastic laundry baskets quickly clutter compact floor plans. Concealing sorting bins inside base cabinetry keeps dirty clothes out of sight.
What This Idea Means Standard cabinet depth can easily house dual-compartment pull-out wire frames fitted with removable canvas bags, letting you sort whites and darks automatically without taking up room.
How to Make It
- Install heavy-duty bottom-mount soft-close drawer slides inside an 18-to-24-inch wide base cabinet.
- Construct a slide-out wooden drawer box or buy an adjustable metal pull-out hamper frame.
- Drop in two machine-washable heavy canvas tote bags with reinforced carry handles.
- Fasten a matching cabinet door panel directly to the front of the slide mechanism.
Tips and Variations
- Tip: Label the canvas bags with subtle stamped leather tags for “Lights” and “Darks”.
- Variation: Add a third narrow sorting section for delicate hand-wash fabrics.


15. Botanical Wallpaper with Tongue-and-Groove Wainscoting
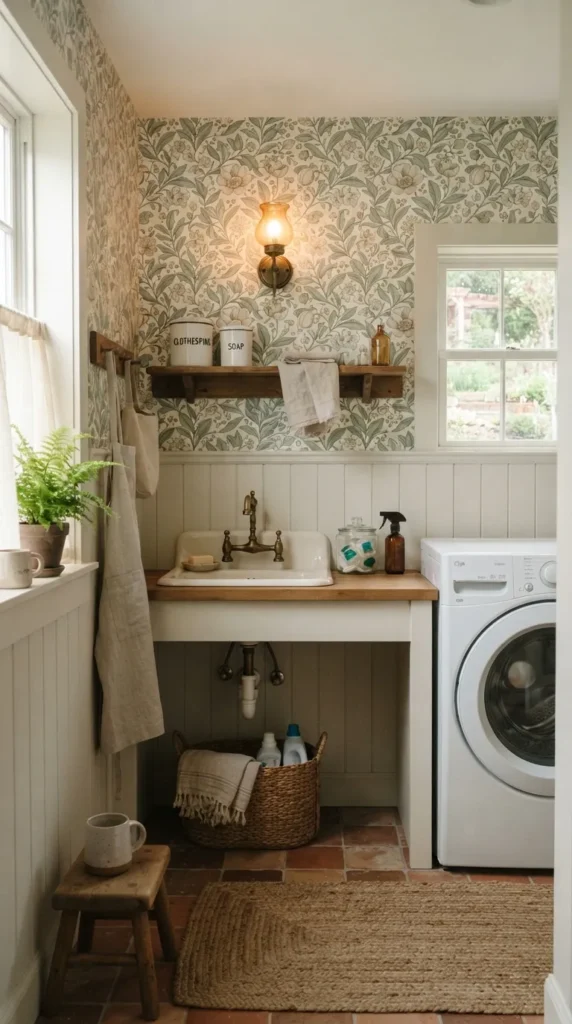
Introduction Small utility spaces are ideal for bold, playful design choices. Combining classic tongue-and-groove wainscoting with vintage botanical wallpaper creates an inviting, cottage-inspired utility nook.
What This Idea Means Using vertically grooved wainscoting on the bottom third of the wall protects high-traffic zones from knocks and scuffs, while lush botanical or vintage floral wallpaper above draws the eye upward.
How to Make It
- Install beadboard or tongue-and-groove planks to a height of 36 to 48 inches from the floor, finishing with a flat chair rail cap.
- Paint the lower paneling with a durable, scrubbable satin trim paint.
- Prep the upper wall with smoothing primer, then hang moisture-resistant peel-and-stick or vinyl-coated wallpaper featuring floral or leafy prints.
- Smooth out air bubbles carefully using a felt-edged vinyl squeegee.
Tips and Variations
- Tip: Match the wainscoting paint color to a subtle accent tone pulled directly from the wallpaper pattern.
- Variation: Use subtle striped ticking wallpaper instead of florals for a tailored coastal aesthetic.
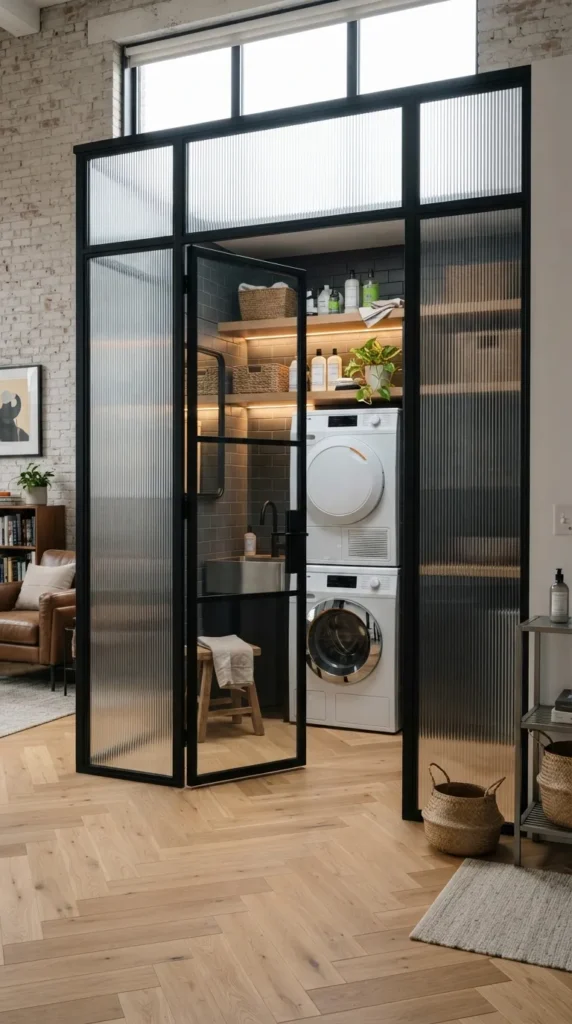
16. Industrial Glass Partition and Steel Frame Room Divider
Introduction Dividing a laundry area from an open-concept kitchen or mudroom without sacrificing light is simple with a custom Crittall-style glass screen.
What This Idea Means Black steel or dark aluminium frames inset with clear or fluted glass panes maintain an airy, open feeling while dampening appliance spin noise and defining the workspace.
How to Make It
- Frame the opening using slim rectangular black metal channel profiles or matte-black painted hardwood framing.
- Install panels of tempered clear glass or textured ribbed/fluted glass for added privacy.
- Seal glass panes securely within the frame using black glazing rubber gaskets or tinted silicone.
- Add a slim swing or sliding pivot door on matching black hardware.
Tips and Variations
- Tip: Fluted or reeded glass obscures the view of dirty laundry baskets while letting natural light pass through.
- Variation: Build the partition with natural white oak framing instead of black steel for a softer Scandinavian look.
17. Integrated Pet Washing Station and Mudroom Corner
Introduction Combining a small laundry room with a pet washing bath maximizes plumbing efficiency in compact family homes.
What This Idea Means A raised tiled shower basin next to the washing machine provides an ergonomic washing station for dogs, muddy boots, or oversized gardening tools without bending down to standard floor level.
How to Make It
- Frame a raised 30×36-inch platform plumbed with a dedicated floor drain and hot/cold water supply lines.
- Install a waterproof shower pan membrane and cement board backer around the surround.
- Tile the interior with durable subway tile or penny rounds, finishing the curb with solid stone.
- Mount a multi-spray handheld shower wand with an extra-long, flexible stainless steel hose.
Tips and Variations
- Tip: Include a built-in recessed tiled niche inside the dog wash to store pet shampoos and brushes.
- Variation: Install a pull-out wooden step underneath the base so smaller pets can walk up into the basin easily.
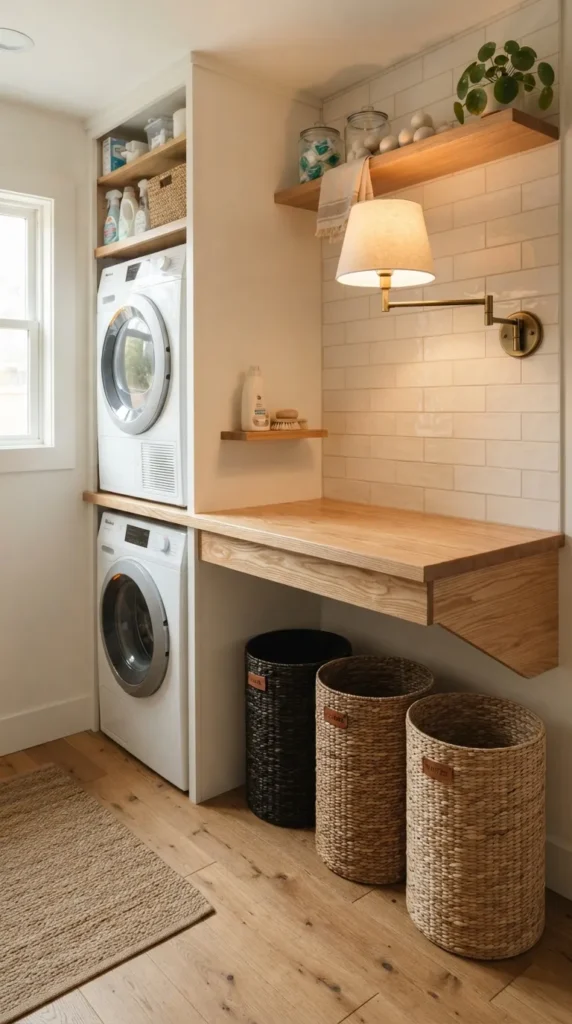
18. Compact Corner Floating L-Shaped Utility Desk
Introduction Awkward room corners often sit unused. Building an L-shaped floating desk configuration turns forgotten corners into organized sorting and mending stations.
What This Idea Means Wrapping a work surface around a 90-degree corner expands usable folding space while leaving the open floor below clear for rolling hampers or robotic vacuums.
How to Make It
- Install heavy-duty steel angle brackets into corner wall studs on both adjoining walls at a 36-inch working height.
- Join two solid hardwood boards with a mitered corner joint and pocket screws underneath.
- Mount the joined tabletop onto the wall brackets without front legs, creating a clean floating profile.
- Caulk seams along the wall with paintable silicone.
Tips and Variations
- Tip: Position a warm LED swing-arm sconce light on the corner wall to illuminate sorting tasks.
- Variation: Place low wicker storage baskets underneath the floating desk to house extra towels or seasonal linens.
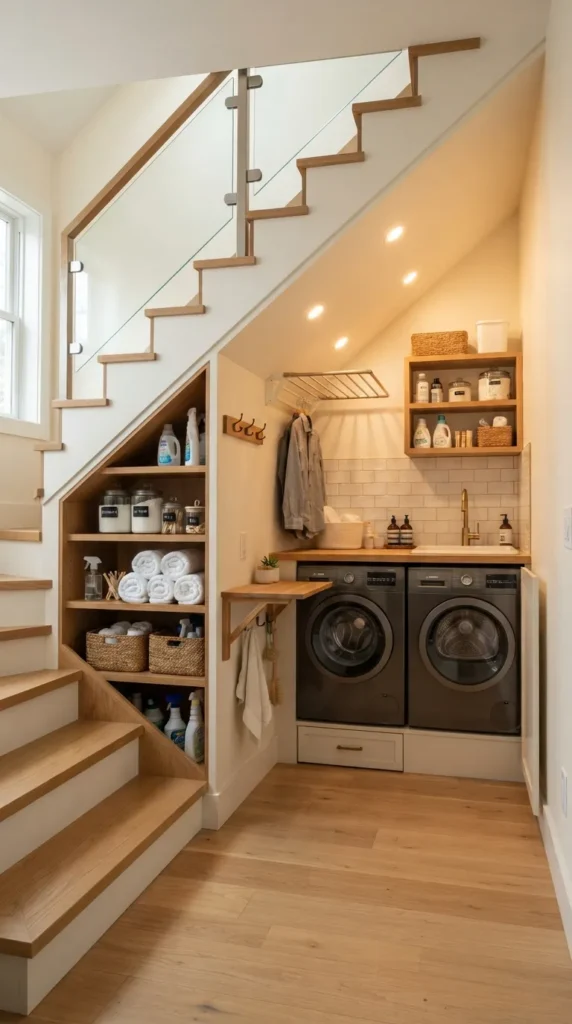
19. Under-Stairs Hidden Laundry Alcove
Introduction Unused space beneath an interior staircase can be transformed into a fully functional micro-laundry hub.
What This Idea Means The sloping ceiling cavity under stairs often turns into wasted storage. Fitting stacked or side-by-side appliances beneath the staircase slope utilizes existing architectural dead zones efficiently.
How to Make It
- Clear the under-stair cavity, rerouting non-load-bearing framing as necessary with structural guidance.
- Run a 240V/120V electrical run, water supply lines, and a direct dryer exhaust duct through the exterior wall.
- Install moisture-resistant drywall and add task lighting fixtures along the angled ceiling.
- Fit custom stepped-height shelving above the appliances to follow the staircase angle.
Tips and Variations
- Tip: Add acoustic insulation batts inside the stair framing cavity to dampen machine vibrations throughout the upper floor.
- Variation: Conceal the alcove using a velvet portière curtain hung from a brass ceiling track for an easy, tactile closure.
20. Apothecary Glass Dispenser Shelf with Brass Accents
Introduction Ditching commercial plastic detergent bottles creates a clutter-free, elevated look. A curated apothecary display shelf brings an organized, spa-like aesthetic to daily chores.
What This Idea Means Decanting liquids, powders, and clothes pegs into matching amber or clear glass apothecary jars transforms basic supplies into decorative focal points across open shelves.
How to Make It
- Mount a slim solid walnut or white marble floating shelf directly above your appliances or washbasin.
- Fill heavy-base glass beverage dispensers (fitted with stainless steel or brass spigots) with liquid detergent and fabric softener.
- Fill wide-mouth glass jars with wooden scoop spoons for powdered soaps, oxygen bleaches, and wool dryer balls.
- Label each jar with water-resistant minimalist linen or embossed dymo-style labels.
Tips and Variations
- Tip: Place small marble or ceramic coasters under the dispenser spigots to catch any stray drips.
- Variation: Use amber-tinted glass bottles with brass pump heads for a rich, warm apothecary look.