Woodworking is one of the most rewarding creative outlets, allowing you to transform raw, tactile materials into functional art pieces that elevate your living space. Whether you are drawn to the minimalist warmth of Japandi design, the rustic charm of modern farmhouse aesthetics, or the sleek lines of contemporary Scandinavian interiors, incorporating handmade wooden accents instantly grounds a room. Creating your own home decor not only saves you money but also infuses your living environment with a personal, soulful touch that mass-produced retail items simply cannot replicate.
In this comprehensive guide, we explore 20 stunning, Pinterest-friendly DIY wood projects ranging from beginner-friendly accent pieces to more intricate statement furniture. Each project includes detailed material lists, step-by-step assembly instructions, professional styling tips, and custom variations to help you tailor the build to your unique home aesthetic.
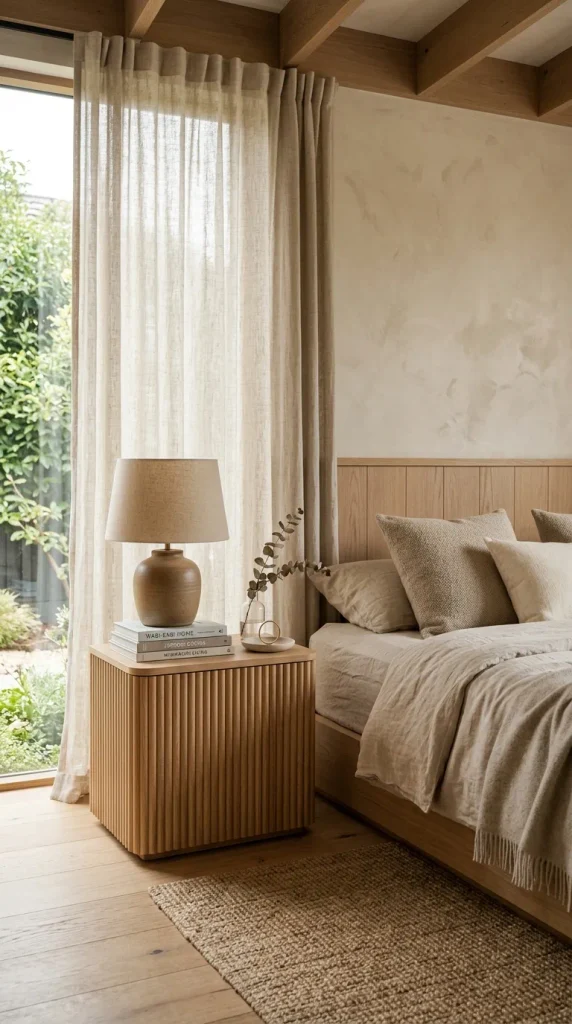
1. Minimalist Fluted Bedside Table
Fluted wood detailing adds incredible texture and architectural depth to modern interiors. This sleek bedside table features a clean box silhouette wrapped in half-round wood moldings, making it a sophisticated addition to any neutral or Japandi-inspired bedroom.
Materials & Tools Needed
- 1×2 pine boards for the frame and legs
- 3/4-inch MDF or plywood for the cabinet box (cut to size: two side panels, top, bottom, and back)
- Half-round wood moldings (dowels cut in half or pre-made decorative trim)
- Wood glue and 1 1/4-inch brad nails
- Miter saw and brad nailer
- Wood filler, fine-grit sandpaper (120 and 220 grit)
- Interior wood stain or matte water-based polyurethane sealer
Step-by-Step Instructions
- Build the Cabinet Box: Assemble the plywood side panels, top, and bottom using wood glue and brad nails to form a clean rectangular carcass. Attach the back panel square to ensure structural integrity.
- Attach the Legs: Construct a simple square frame from your 1×2 pine boards and secure it to the bottom of the cabinet box. For a mid-century modern flair, angle the legs slightly outward before fastening.
- Apply Fluted Trim: Measure the height of the cabinet body and cut your half-round wood moldings to size. Carefully apply wood glue to the back of each piece and press them side-by-side along the exterior front and sides of the box. Secure with pin nails if necessary.
- Sand and Finish: Fill any visible nail holes or minor gaps with matching wood filler. Once dry, sand the entire piece smooth using 120-grit followed by 220-grit sandpaper. Wipe clean and apply your preferred natural wood stain or protective clear matte sealer.
Styling Tips & Variations
Style with a minimalist ceramic table lamp, a stack of neutral-toned coffee table books, and a trailing pothos plant in a concrete planter. Variation: Substitute the fluted exterior with vertical tambour panels or wrap the doors in woven rattan webbing for a boho-chic texture.
2. Japandi-Inspired Floating Ledge Shelf
Floating shelves provide functional vertical storage while keeping floor space open and airy. This extra-thick ledge shelf features clean mitered corners and concealed heavy-duty brackets for a seamless, architectural look.
Materials & Tools Needed
- 1×6 and 1×2 select pine or white oak boards
- Heavy-duty blind shelf supports / floating bracket hardware
- Wood glue and finish nails
- Miter saw and drill
- Wood stain and polyurethane
Step-by-Step Instructions
- Prepare the Box Structure: Cut your 1×6 board to your desired shelf length. Cut top and bottom facade pieces using 45-degree miter cuts on your saw so they wrap cleanly around the core board.
- Assemble the Ledge: Glue and nail the mitered front and side trim pieces to the main board, creating a hollow, open-back rectangular box designed to slip directly over your mounting hardware.
- Install Mounting Brackets: Locate wall studs using a stud finder, level your heavy-duty steel mounting rods, and securely anchor them directly into the wall studs.
- Mount the Shelf: Slide the hollow wooden shelf assembly over the protruding steel rods. Secure the shelf from the underside with small screws driven into pre-drilled pilot holes.
Styling Tips & Variations
Style with monochromatic ceramic vases, a framed abstract line drawing, and an amber glass diffuser bottle. Variation: Incorporate a shallow routed groove along the top surface to safely lean picture frames without sliding.

3. Curved Arch Wooden Vanity Mirror
Arched silhouettes soften angular room layouts and bring a touch of classic Mediterranean or modern organic elegance to entryways, bathrooms, and dressing rooms.
Materials & Tools Needed
- 3/4-inch thick plywood or solid hardwood boards (wide enough for your mirror base)
- Custom-cut arched mirror glass
- Jigsaw or band saw
- Wood router with a round-over bit
- Heavy-duty mirror adhesive and mounting clips
Step-by-Step Instructions
- Draft the Template: Draw your desired arch template onto a large piece of heavy paper or cardboard. Trace the outer dimensions onto your wood panel, adding a 2-inch border around the intended mirror opening.
- Cut the Frame: Carefully cut out the outer arch shape and the inner window opening using a jigsaw with a fine-tooth scroll blade. Keep your cuts steady for smooth edges.
- Route the Edges: Use a handheld wood router fitted with a round-over or chamfer bit to soften the interior and exterior frame edges, giving it a high-end custom appearance.
- Assemble and Mount: Sand the wood thoroughly, apply a rich walnut or blonde oak stain, and secure the custom-cut glass securely into the routed backside using mirror mastic and retaining clips.
Styling Tips & Variations
Hang this mirror above a narrow entryway console table styled with a dried pampas grass arrangement in a ceramic urn. Variation: Add a thin brass inlay channel along the outer curve for an elevated luxury contrast.

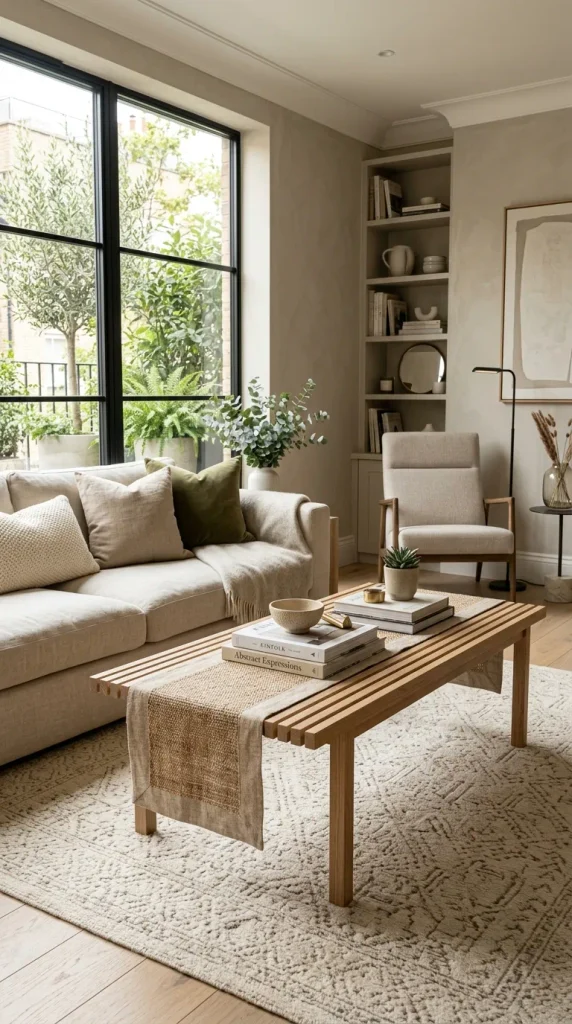
4. Modern Slatted Coffee Table
Clean lines, warm timber tones, and functional lower slatted shelving make this coffee table an effortless anchor for a contemporary living room seating arrangement.
Materials & Tools Needed
- 2×2 and 1×3 select hardwood boards (white oak or maple recommended)
- Pocket hole jig and 1 1/4-inch pocket hole screws
- Wood glue, clamps, and orbital sander
- Clear satin polyurethane finish
Step-by-Step Instructions
- Cut Frame Components: Cut your 2×2 lumber for the four table legs and upper/lower frame aprons. Drill pocket holes on the interior-facing sides of the aprons for hidden joinery.
- Assemble the Base: Join the legs with the top and bottom aprons using wood glue and pocket screws, ensuring the entire frame is completely square and level.
- Build the Slatted Shelf: Cut your 1×3 boards to fit snugly across the lower frame. Space them evenly using small spacers (approx. 1/2 inch apart) and secure them to the lower frame supports with finish nails or countersunk screws from below.
- Construct the Tabletop: Edge-glue multiple hardwood boards together using parallel clamps. Once dry and planed flat, attach the solid tabletop to the upper frame using figure-8 fasteners to allow for natural seasonal wood movement.
Styling Tips & Variations
Style with a woven jute table runner, a stack of art books, and a ceramic bowl filled with decorative stone spheres. Variation: Use contrasting walnut slats against a maple outer frame for a striking two-tone modern look.

5. Architectural Segmented Bookends
Turn scrap lumber into striking geometric art pieces that keep your favorite hardcovers organized with sculptural elegance.
Materials & Tools Needed
- Scraps of dimensional lumber (4×4 or 2×6 stacked)
- Miter saw or table saw
- Wood glue and heavy-duty felt pads
- Sandpaper and acrylic paint or wood stain
Step-by-Step Instructions
- Plan Geometric Angles: Set your miter saw to various compound angles (e.g., 30 and 45 degrees) and cut thick wood blocks into dynamic, multi-faceted geometric shapes.
- Glue and Stack: Arrange the cut wooden wedges together into balanced, interlocking abstract sculptures. Secure them permanently using high-strength wood glue and clamping pressure.
- Weight and Finish: Drill a hidden cavity into the base of each bookend and fill it with lead shot or heavy washers if extra weight is needed. Sand the exterior smooth and apply a matte black wash or natural wood oil.
Styling Tips & Variations
Group these bookends on open shelving holding architectural monographs and design magazines. Variation: Paint select facets in muted terracotta or sage green for an artistic color-blocked effect.
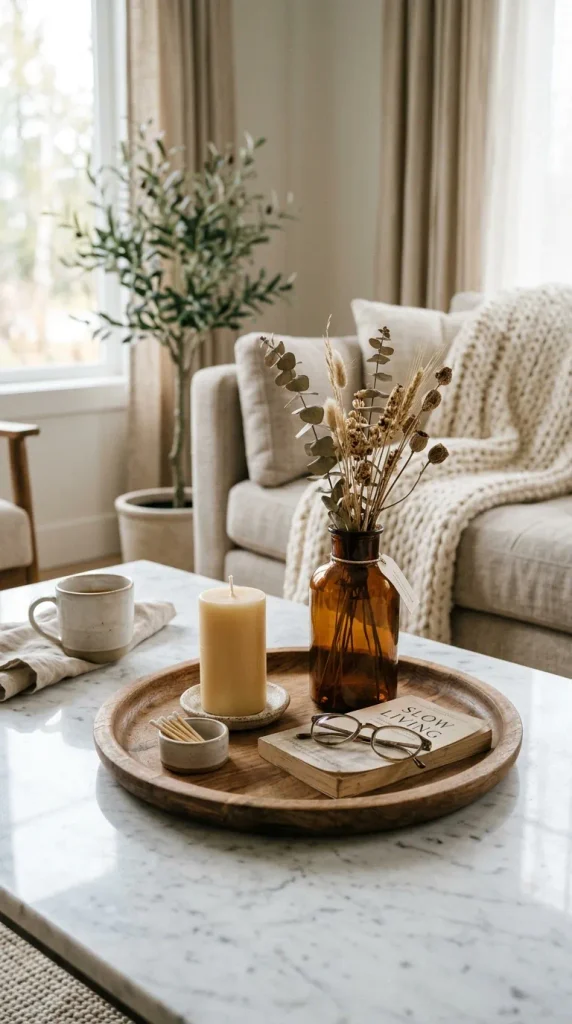
6. Organic Round Tray with Turned Handles
A versatile wooden tray adds warmth to coffee tables, kitchen counters, and bathroom vanities while corralling smaller everyday objects.
Materials & Tools Needed
- Edge-glued round wooden panel (pine, birch, or rubberwood, 12 to 16 inches in diameter)
- Two small wooden cabinet pulls or carved handles
- Forstner drill bit and spade bits
- Wood stain and food-safe mineral oil or polyurethane
Step-by-Step Instructions
- Prepare the Base: Sand your pre-cut round wooden panel thoroughly, starting with 120-grit and finishing with 320-grit for an ultra-smooth, tactile surface.
- Attach Handles: Mark two symmetrical points on opposite sides of the tray rim. Drill pilot holes and secure your wooden or brass handles tightly from the underside using countersunk screws.
- Seal the Wood: If using the tray in a kitchen or dining area, apply multiple coats of food-safe mineral oil or butcher block conditioner, buffing off excess oil with a clean microfiber cloth.
Styling Tips & Variations
Style with a pillar candle, a small amber glass spray bottle, and a stack of folded linen napkins. Variation: Carve shallow circular indents into the tray surface to function as an artisanal charcuterie and dipping bowl board.



7. Geometric Wall Art Panel
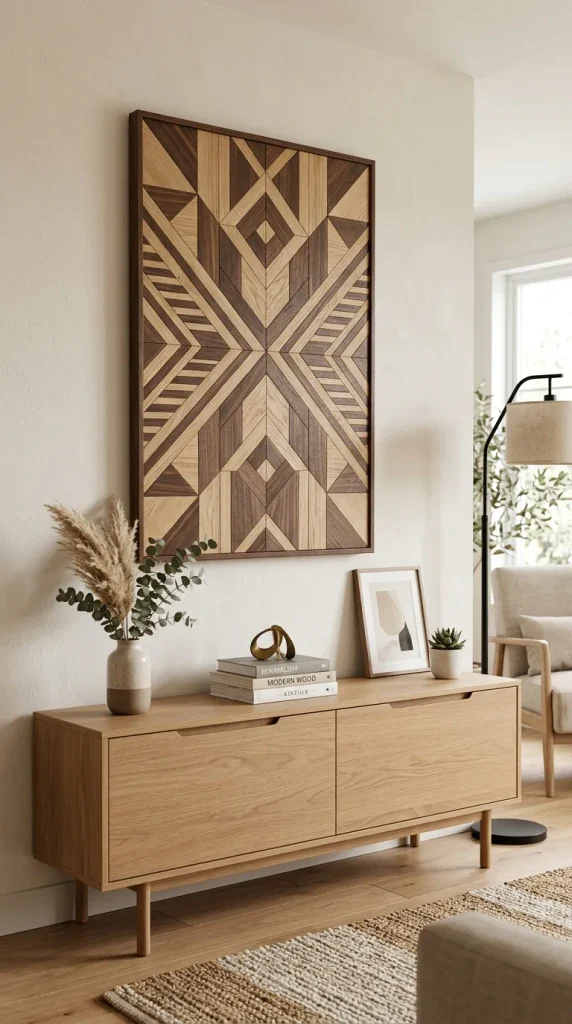
Create a stunning statement wall piece using contrasting wood grains arranged in intricate geometric mosaic patterns.
Materials & Tools Needed
- Thin lattice wood strips or various hardwood shims (walnut, oak, maple)
- 1/4-inch plywood backing board (cut to desired art size)
- Wood glue, miter shears, and a brad nailer
- Picture hanging hardware
Step-by-Step Instructions
- Design Your Pattern: Sketch a geometric herringbone or chevron pattern on paper. Lay out your thin wood strips across the plywood backing without glue first to test fit and grain variation.
- Cut and Secure: Using miter shears or a chop saw, cut each strip to precise angles. Apply wood glue to the back of each piece and press firmly onto the plywood backing, securing with micro-pin nails if necessary.
- Trim and Frame: Trim any overhang along the outer edges with a circular saw or table saw for a clean flush border. Build a simple outer frame from thin molding to enclose the mosaic artwork.
Styling Tips & Variations
Hang above a mid-century sideboard flanked by brass sconces. Variation: Use charred Shou Sugi Ban wood strips for alternating dark black and natural blonde geometric blocks.
8. Slatted Bath Mat
Bring spa-like luxury into your daily routine with a water-resistant slatted wooden bath mat crafted from durable teak or cedar.
Materials & Tools Needed
- Cedar or teak decking boards (rot-resistant woods)
- Stainless steel screws (countersunk)
- Rubber non-slip grip pads
- Orbital sander and waterproof exterior teak oil
Step-by-Step Instructions
- Cut Slats to Length: Cut your cedar boards into equal-length slats (approx. 24 inches long) and two thicker support runner rails.
- Assemble with Spacers: Lay the support rails flat and arrange the cedar slats across them, using uniform spacers (such as 1/4-inch tile spacers) between each slat for optimal drainage.
- Fasten Securely: Pre-drill pilot holes through the top slats into the bottom rails. Fasten securely using corrosion-resistant stainless steel screws, ensuring screw heads sit flush or slightly recessed.
- Apply Waterproof Finish: Sand all sharp edges smooth and apply two generous coats of exterior teak oil to protect the wood against moisture and mildew.
Styling Tips & Variations
Place outside a walk-in shower or bathtub alongside plush organic cotton waffle towels. Variation: Create a roll-up version by threading nylon marine cord through pre-drilled holes across the slats.
9. Minimalist Plant Stand with Dowel Legs
Elevate your indoor greenery with a sleek mid-century modern plant stand featuring tapered dowel legs and a clean circular top platform.
Materials & Tools Needed
- Round wooden tabletop blank (10 to 12 inches diameter)
- Four pre-shaped wooden tapered furniture legs and angled mounting plates
- Wood glue, drill, and drill press (optional)
- Matte black or natural wood stain
Step-by-Step Instructions
- Mark Leg Placement: On the underside of your round wooden top, measure an equal distance inward from the edge and mark four symmetrical points for your angled mounting plates.
- Install Mounting Plates: Screw the metal angled leg plates firmly into the underside of the tabletop using short wood screws, ensuring all angles point outward for stability.
- Attach Tapered Legs: Thread the wooden tapered legs securely into the mounting plates until tight. Test the stand on a flat surface to ensure all four legs touch evenly without wobbling.
- Finish: Apply a protective water-resistant topcoat to protect against accidental water spills during plant watering.
Styling Tips & Variations
Pair with a speckled ceramic pot housing a cascading trailing vine like a String of Pearls. Variation: Adjust the leg lengths to create a staggered set of three nesting plant stands of varying heights.
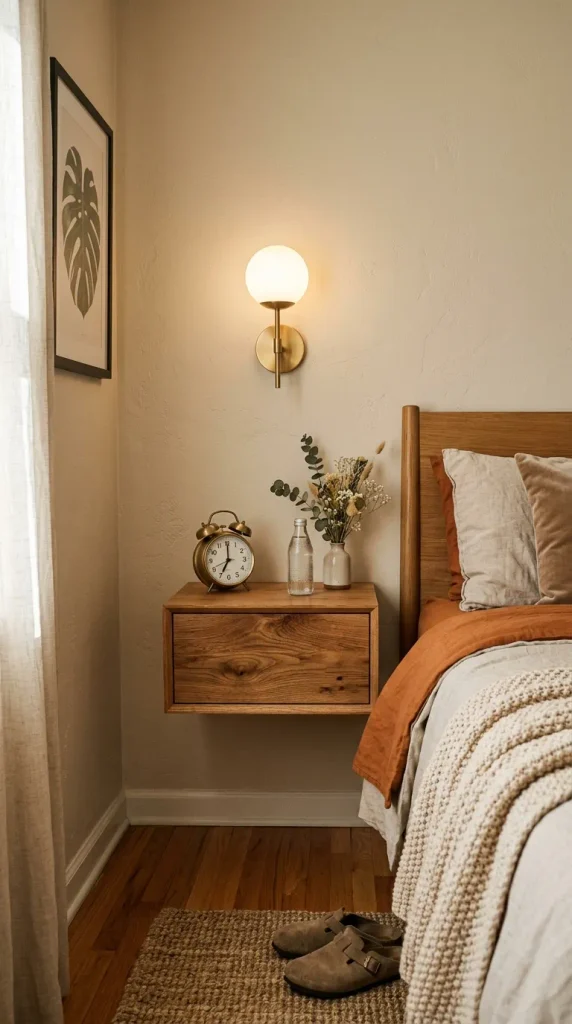
10. Floating Nightstand with Drawer Drawer Box
Maximize small bedroom footprints with a wall-mounted floating nightstand featuring a clean handleless drawer box.
Materials & Tools Needed
- 3/4-inch plywood or select pine boards for outer box
- 1/2-inch plywood for drawer construction
- Side-mount drawer slides (compact size)
- French cleat hanging hardware or heavy-duty wall anchors
- Edge banding and wood stain
Step-by-Step Instructions
- Build Outer Box: Cut your side, top, bottom, and back panels. Assemble using pocket holes or mitered corners for a seamless exterior appearance.
- Construct Drawer: Build a simple four-sided drawer box sized to fit neatly inside the cabinet cavity with clearance for drawer slides. Attach a matching front panel with a slight 1/8-inch shadow gap.
- Install Slides: Mount the drawer slides to the interior cabinet walls and the sides of the drawer box, ensuring smooth gliding action.
- Mount to Wall: Secure a heavy-duty French cleat to a wall stud and mount the floating nightstand securely in place.
Styling Tips & Variations
Style with an alarm clock, a ceramic jewelry dish, and a wall-mounted reading sconce above. Variation: Integrate a wireless charging pad flush-mortised into the wooden top surface.
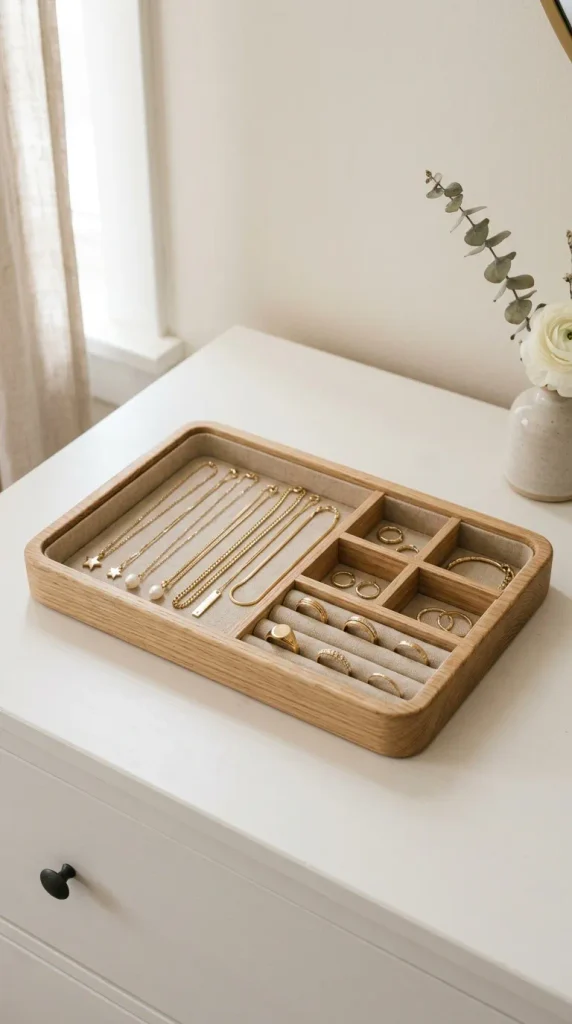
11. Custom Wooden Jewelry Organizer Tray
Keep delicate accessories neatly organized with a modular wooden valet tray featuring tiered compartments and soft felt inserts.
Materials & Tools Needed
- 1/2-inch and 1/4-inch hobby wood boards
- Scroll saw or miter saw
- Adhesive felt sheets (camel or charcoal grey)
- Wood glue and clamps
Step-by-Step Instructions
- Cut Base and Dividers: Cut a rectangular base board from your 1/2-inch wood. Cut smaller interior partition walls from 1/4-inch wood to create customized sections for rings, watches, and chains.
- Assemble Compartments: Glue the interior dividers securely onto the base board in a grid pattern. Allow the glue to cure completely.
- Line with Felt: Cut custom pieces of adhesive felt to fit snugly inside the bottom of each compartment. Peel and press firmly into place.
- Finish the Outer Rim: Sand the outer frame edges smooth and apply a clear protective oil finish.
Styling Tips & Variations
Place on top of a bedroom dresser or inside a walk-in closet island. Variation: Add a vertical notched wooden pillar in the center specifically designed for hanging hoop earrings and bracelets.
12. Modern Arched Tabletop Book Holder
Keep current reads neatly displayed on your desk or coffee table with a sculptural arched book rack crafted from solid oak.
Materials & Tools Needed
- Thick solid hardwood block or wide board
- Jigsaw or band saw
- Router or chisel for slot channels
- Sandpaper and natural beeswax polish
Step-by-Step Instructions
- Trace and Cut Arch Profile: Draw a dramatic architectural arch profile onto your thick wood stock. Cut out the main shape using a bandsaw or jigsaw.
- Route Book Slots: Cut angled vertical slots across the top curve of the arch using a table saw sled or router jig to securely hold open books or tablets at an ergonomic viewing angle.
- Sand and Polish: Sand all curves smooth, rounding over all sharp corners. Buff natural beeswax into the wood grain to bring out a rich, satin sheen.
Styling Tips & Variations
Display an open art photography book on your coffee table. Variation: Carve a pen resting groove along the front base edge for desk organization.
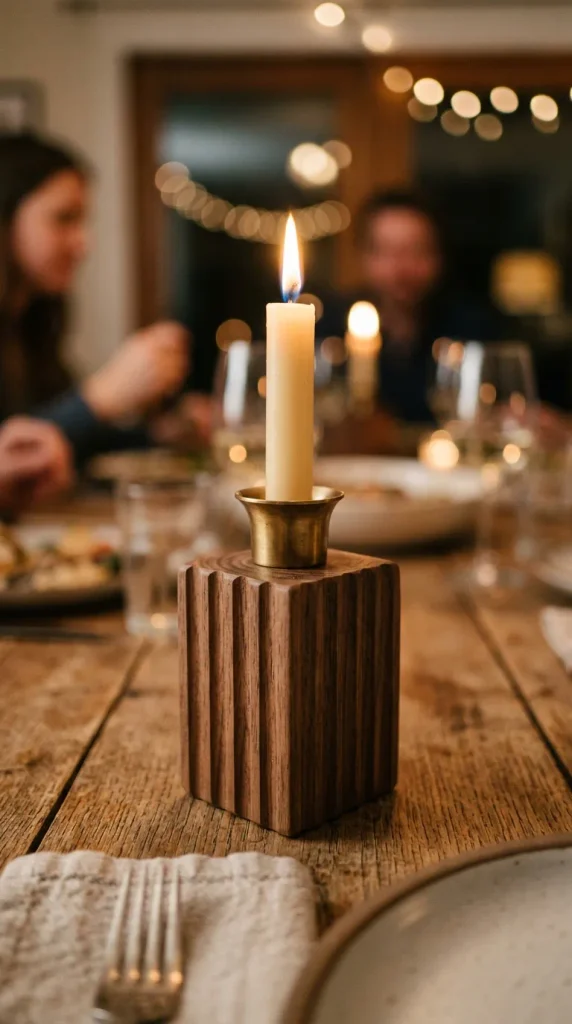
13. Fluted Candle Holder Block
Create warm ambient mood lighting with a solid wood block featuring architectural fluting and brass candle cup inserts.
Materials & Tools Needed
- 4×4 dimensional lumber cut into short square blocks
- Half-round wood trim moldings
- Brass candle cups (7/8-inch diameter standard taper size)
- Forstner drill bit and wood glue
Step-by-Step Instructions
- Cut Wood Block: Cut your 4×4 timber block to your desired height (e.g., 6 to 8 inches tall).
- Apply Fluting: Wrap all four vertical sides of the block with half-round wood moldings trimmed flush to the top and bottom edges.
- Drill Candle Cup Recess: Use a Forstner drill bit matching the outer diameter of your brass candle cup to drill a shallow recess centered in the top of the block.
- Insert and Finish: Drop the brass candle cup into the drilled recess with a dab of high-temp adhesive. Stain or paint the fluted exterior in a matte black or natural finish.
Styling Tips & Variations
Cluster three blocks of varying heights together on a dining room tablescape. Variation: Use pillar candle inserts instead of taper cups for a chunkier monolithic look.
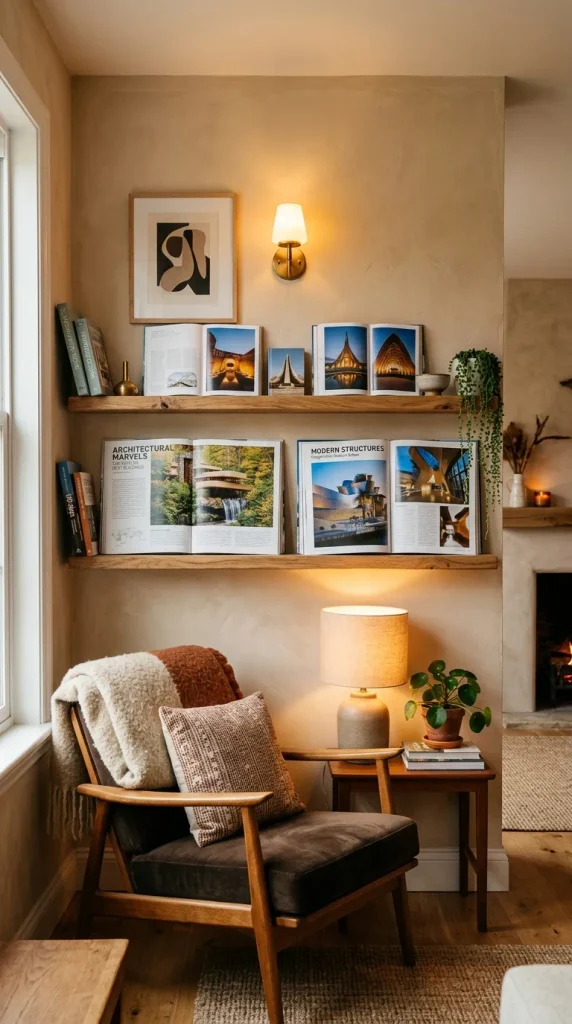
14. Wall-Mounted Magazine Display Ledge
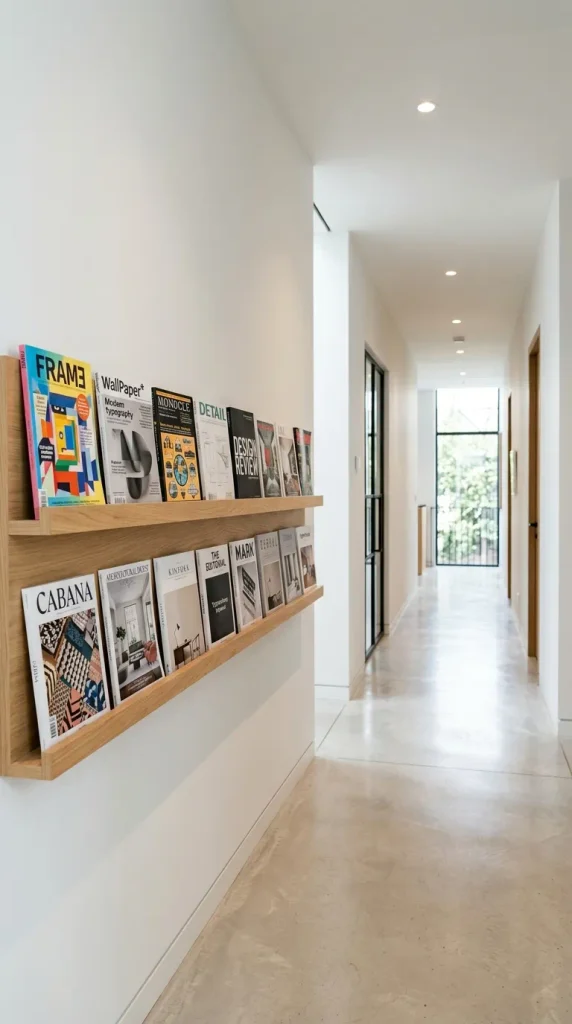
Showcase your favorite editorial magazines and art books like gallery prints with a minimalist solid wood display ledge.
Materials & Tools Needed
- 1×3 and 1×2 pine or oak boards
- Wood glue and finish nails
- Keyhole mounting hardware or pre-drilled screw holes
- Wood stain and polyurethane
Step-by-Step Instructions
- Assemble Ledge Base: Join a 1×3 backboard to a 1×3 bottom shelf board at a 90-degree angle using wood glue and pre-drilled countersunk screws.
- Attach Front Lip: Attach a thin 1×2 or quarter-round lip along the front edge of the bottom shelf to prevent books and magazines from sliding forward.
- Mount Securely: Install keyhole hangers flush into the back of the ledger board for secure, invisible wall mounting.
Styling Tips & Variations
Mount a series of three ledges vertically in a reading nook or home office. Variation: Add leather strap slings beneath the wooden ledge for extra blanket storage.

15. Geometric Wooden Trivet Set
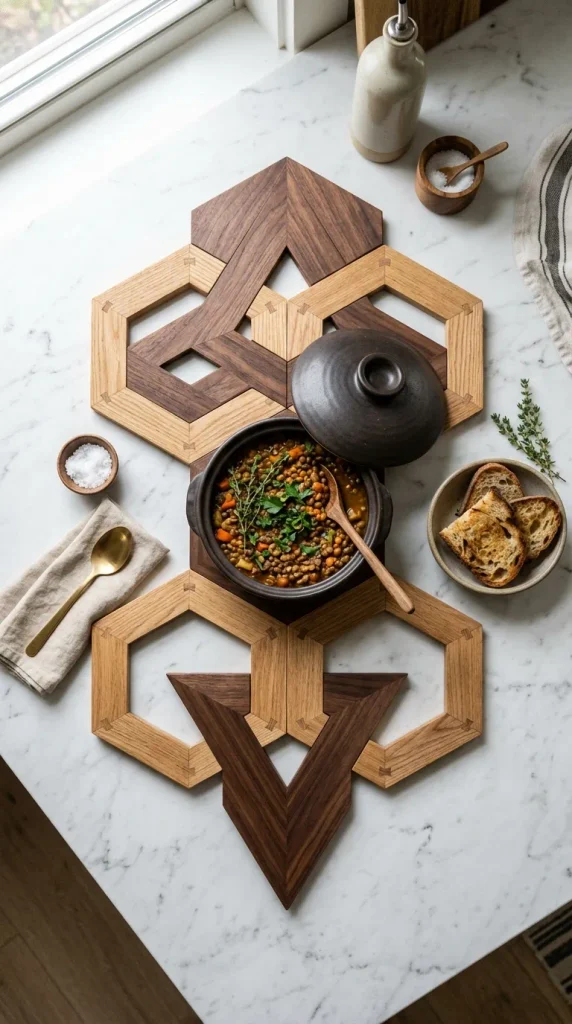
Protect your dining table and countertops in style with interlocking geometric wooden trivets made from contrasting oak and walnut slats.
Materials & Tools Needed
- Hardwood slats (oak and walnut, 3/4-inch thick by 1 1/2-inch wide)
- Table saw or miter saw
- Wood glue and food-safe mineral oil finish
Step-by-Step Instructions
- Cut Slats to Size: Cut your hardwood slats into equal lengths with 60-degree angled ends to form interlocking hexagonal or triangular geometric structures.
- Cut Half-Lap Joints: Cut central half-lap joint slots into intersecting slats so they slide together flush and flat.
- Assemble and Glue: Test fit the pieces together to form a cohesive geometric star or honeycomb trivet. Secure with waterproof wood glue.
- Oil Finish: Sand smooth and apply several coats of food-safe mineral oil.
Styling Tips & Variations
Leave out on the kitchen island as a sculptural decor element when not in use for hot pots. Variation: Scale up the dimensions to create a matching large floor mat for heavy Dutch ovens.
16. Minimalist Wooden Desk Organizer Caddy
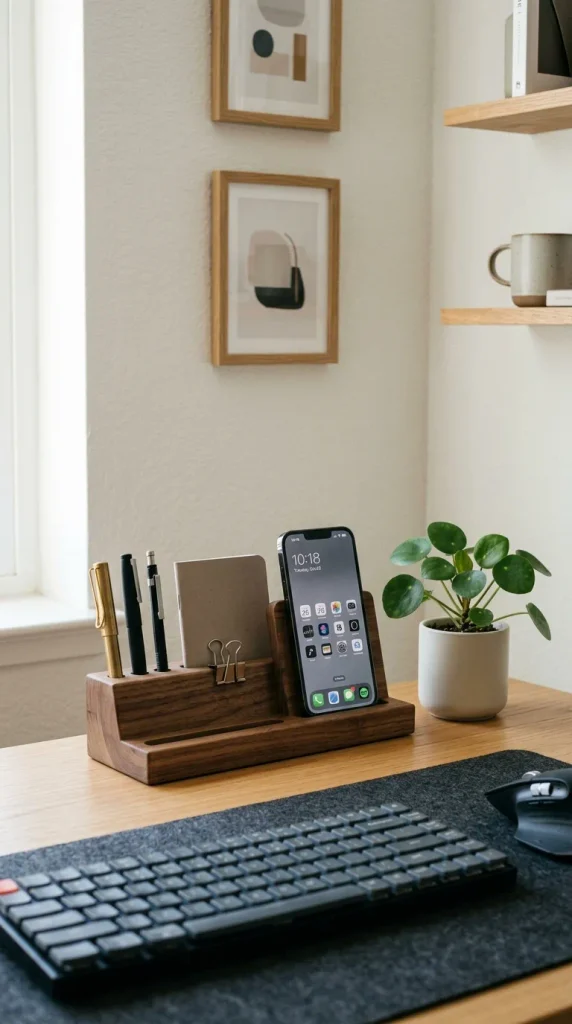
Declutter your workspace with a sleek wooden desk caddy featuring dedicated slots for pens, sticky notes, phones, and business cards.
Materials & Tools Needed
- Solid walnut or maple block (approx. 3×4 inches by 10 inches long)
- Forstner drill bits of various sizes
- Table saw or router
- Sandpaper and clear matte sealer
Step-by-Step Instructions
- Plan Compartments: Map out the layout on your wood block for a smartphone slot, pen cups, and a sticky note tray.
- Drill and Route: Use a drill press with various Forstner bit sizes to sink circular pen holes. Use a router table or chisel to carve out the rectangular phone and notepad recesses.
- Sand and Finish: Thoroughly sand inside all carved compartments to remove splinters and rough grain. Seal with a silky matte finish.
Styling Tips & Variations
Pair with a matching wooden laptop stand and mechanical keyboard. Variation: Inset a small magnetic strip along the front edge for paperclip storage.
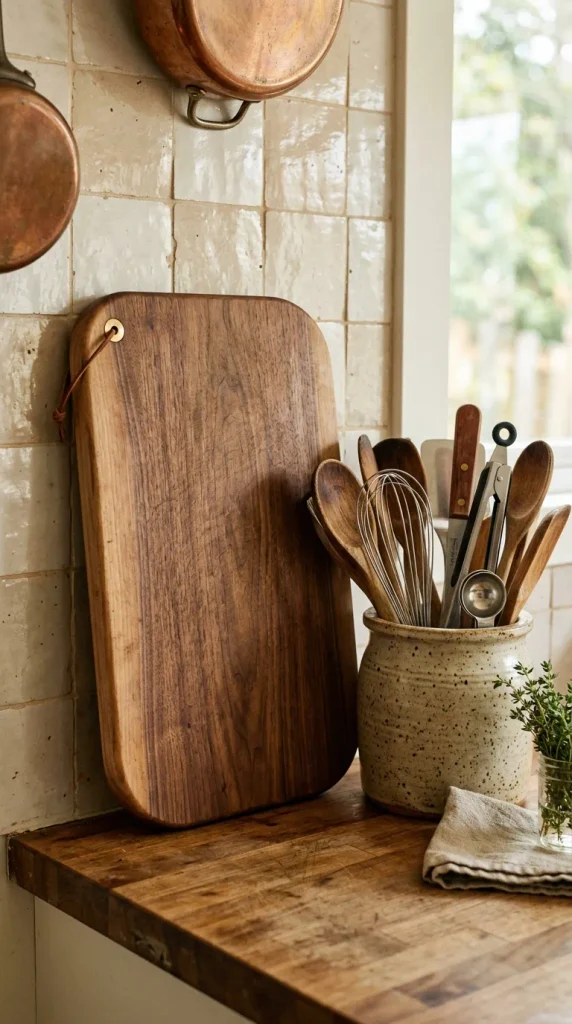
17. Rounded Corner Wooden Cutting Board
An heirloom-quality end-grain or edge-grain cutting board serves as both a functional kitchen tool and gorgeous countertop decor when propped upright.
Materials & Tools Needed
- Hardwood strips (maple, walnut, cherry)
- Waterproof food-safe wood glue (Titebond III)
- Bar clamps and orbital sander
- Mineral oil and beeswax conditioner
Step-by-Step Instructions
- Arrange and Glue Strips: Arrange alternating strips of maple and walnut. Apply a generous amount of waterproof food-safe wood glue between all surfaces and clamp tightly using parallel bar clamps.
- Square and Shape: Once cured, scrape off excess glue, square the edges on a table saw, and use a jigsaw to round the corners of the board for an organic silhouette.
- Route Juice Groove & Handles: Use a router with a core box bit to carve a juice groove around the perimeter, and route recessed finger grips on the underside edges.
- Condition: Sand progressively up to 320-grit. Submerge in food-safe mineral oil and finish with a protective beeswax paste.
Styling Tips & Variations
Prop upright against a kitchen backsplash next to a ceramic crock of wooden spoons. Variation: Create a round pizza peel style cutting board with an integrated hanging handle hole.
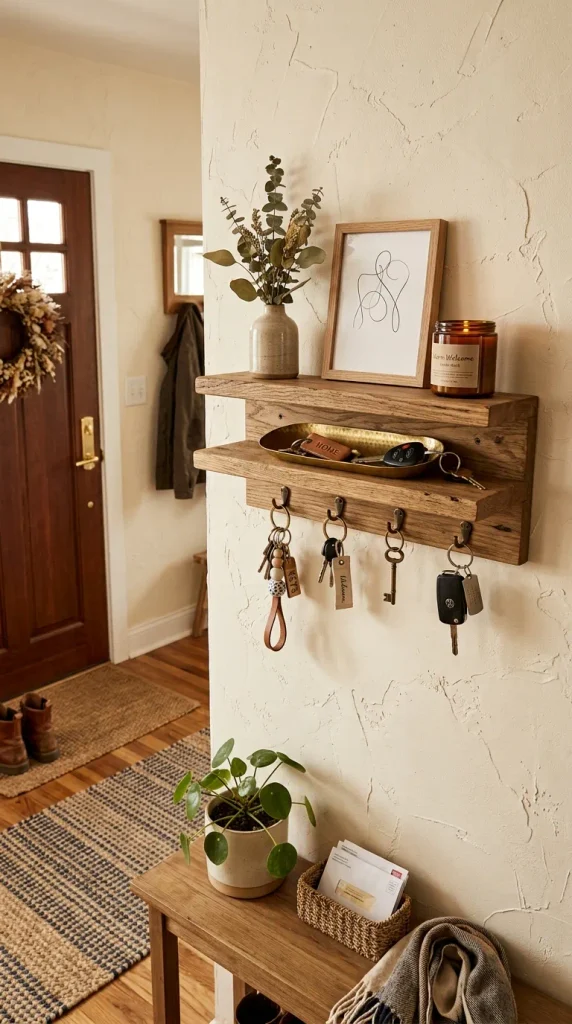
18. Floating Entryway Key Drop Shelf
Never lose your keys again with a compact wall-mounted entry shelf featuring a hidden mail slot and magnetic key hooks underneath.
Materials & Tools Needed
- Small pine or oak board for the shelf
- Neodymium rare-earth magnets
- Keyhole mounting hardware
- Forstner bit and drill
Step-by-Step Instructions
- Drill Magnet Recesses: On the underside of your wooden shelf, drill shallow blind holes using a Forstner bit, stopping just shy of the top surface.
- Install Magnets: Drop strong neodymium magnets into the recessed holes and secure them permanently with epoxy.
- Mount to Wall: Install flush keyhole brackets on the back of the shelf and mount securely near your front door at standing height.
Styling Tips & Variations
Place a small brass dish on top for sunglasses and loose change. Variation: Add a narrow vertical slot at the back of the shelf for incoming mail envelopes.
19. Scandinavian-Style Wooden Wall Peg Rail
Shaker-inspired peg rails offer timeless utility for hanging coats, bags, hats, and dried botanicals in mudrooms and hallways.
Materials & Tools Needed
- 1×4 pine or oak backboard board (cut to desired length)
- Shaker-style wooden peg dowels with tenons
- Wood glue, drill, and paddle bit
- Wall anchors and screws
Step-by-Step Instructions
- Mark Peg Spacing: Measure and mark evenly spaced points along the center line of your 1×4 backboard.
- Drill Holes: Drill snug holes into the backboard using a paddle bit matching the tenon diameter of your wooden pegs.
- Glue Pegs: Apply wood glue inside each hole and mallet your wooden pegs firmly into place, ensuring they stand perpendicular to the board.
- Mount to Wall: Pre-drill screw holes through the backboard into wall studs, countersinking screw heads and plugging them with matching wood buttons.
Styling Tips & Variations
Hang canvas tote bags, straw hats, and a eucalyptus bundle. Variation: Paint the backboard in a moody heritage color like olive green or charcoal while leaving the wooden pegs natural.
20. Architectural Book Display Ledge
Turn your favorite coffee table books into revolving wall art with a deep wooden display ledge designed with a slanted book rest.
Materials & Tools Needed
- 1×6 select pine boards for the back and base
- Table saw or miter saw for angle cuts
- Pocket hole jig, wood glue, and finish nails
- Matte polyurethane finish
Step-by-Step Instructions
- Cut Base and Backing: Cut your vertical back panel and horizontal base shelf to length.
- Create Slanted Display Base: Rip the base board at a slight 10-degree angle so books lean backward naturally against the wall when placed on the ledge.
- Assemble: Join the back and base using pocket holes and wood glue. Attach a small front retaining lip to keep book covers secure.
- Finish: Sand all surfaces smooth and apply a clear protective satin topcoat.
Styling Tips & Variations
Mount a pair of these ledges in a living room gallery wall setup. Variation: Incorporate integrated LED strip lighting along the underside for soft ambient wall washing.