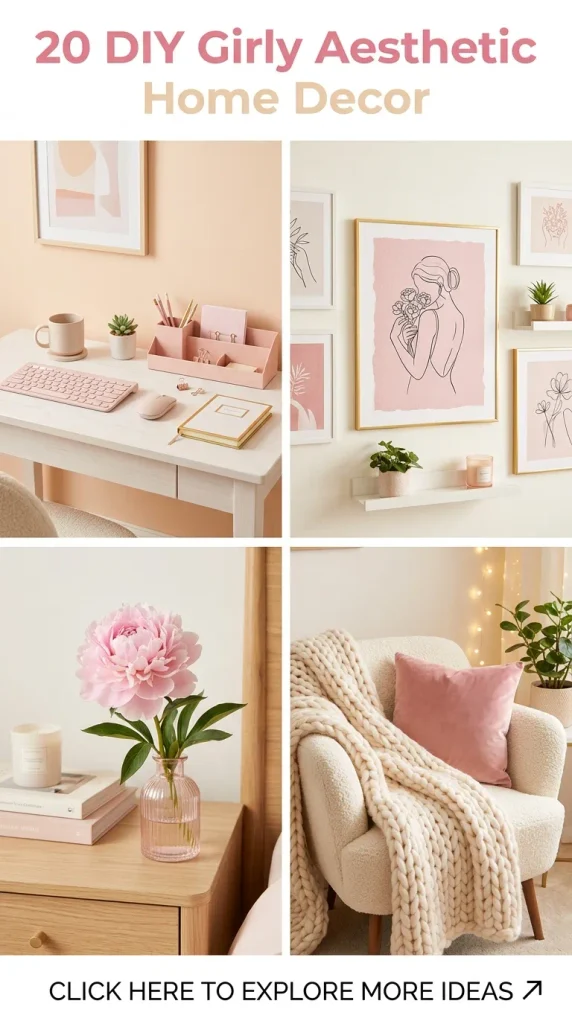
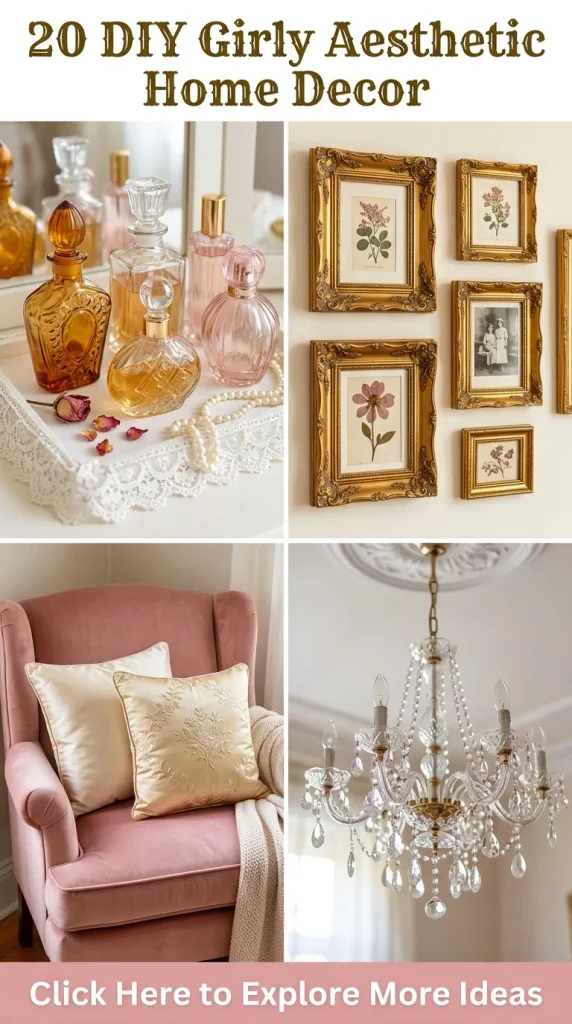
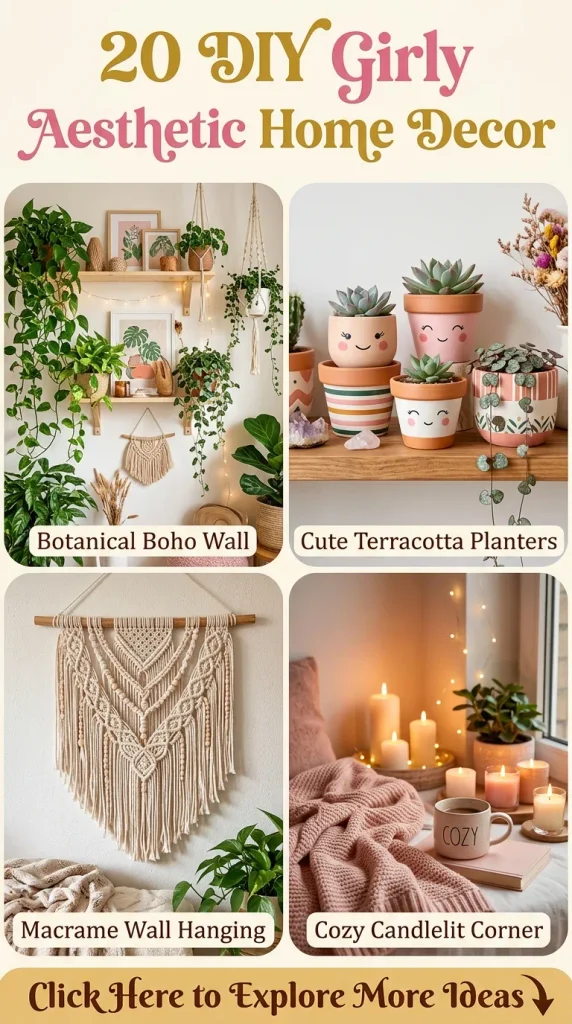
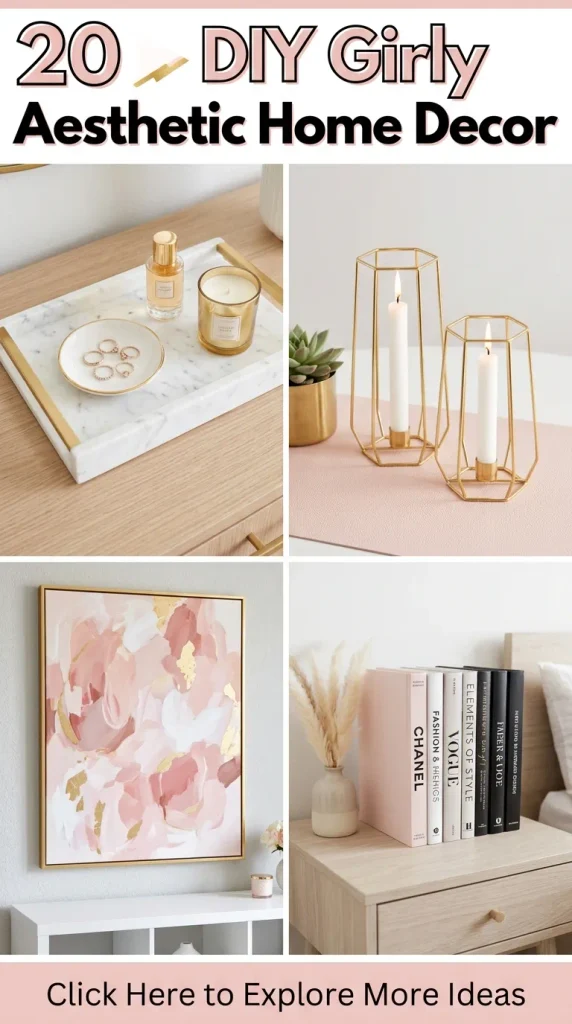
Transforming your living space into a dreamy, Pinterest-worthy sanctuary does not require a luxury budget or professional interior design expertise. A truly elevated feminine aesthetic blends soft textures, warm ambient lighting, delicate floral accents, gentle pastel palettes, vintage romanticism, and modern minimalism. By crafting your own decorative accents, you gain complete creative control over every texture, hue, and silhouette, ensuring your bedroom, vanity, living room, or studio reflects your unique personality.
Below is an extensive, step-by-step masterclass covering 20 stunning DIY decor projects designed to bring romantic, cozy, and effortlessly chic energy into every corner of your home.
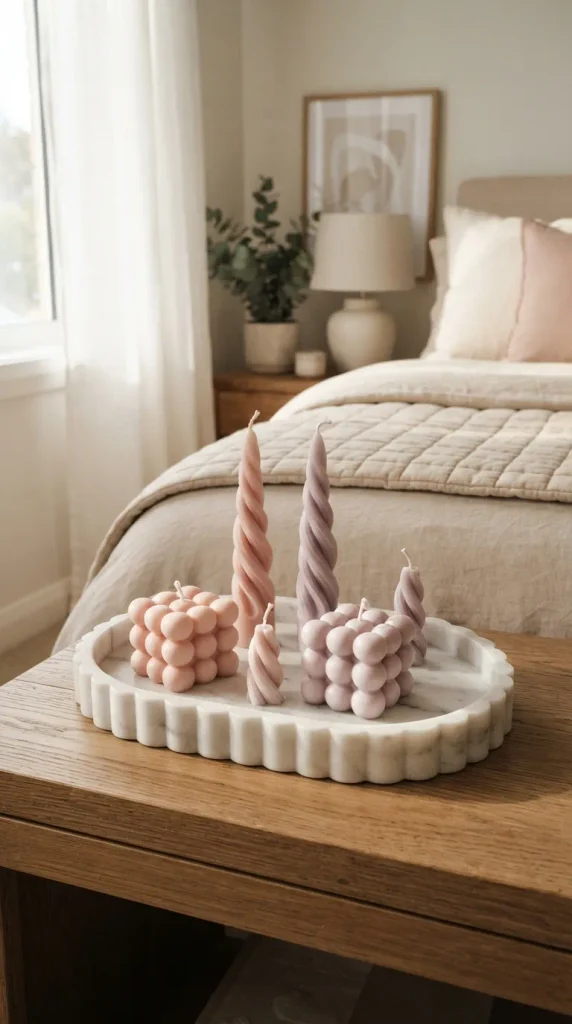
1. Sculptural Pastel Bubble & Swirl Taper Candles
Handmade sculptural candles instantly infuse warmth, playfulness, and sophisticated color into bedside tables, mantlepieces, and dining trays.
What This Idea Means
This project revolves around taking traditional candle-making and transforming it into functional sculpture. Rather than plain cylindrical pillars, you create tactile, geometric, or flowing organic shapes using pastel-tinted soy wax. It captures the modern Danish-pastel and Parisian-chic aesthetics, adding soft curves and delicate hues to your surfaces even when left unlit.
Materials Needed
- 100% natural soy pillar wax flakes (holds sculptural shapes better than container soy wax)
- High-grade silicone molds (bubble cubes, spiral pillars, arch ribbons)
- Pre-waxed cotton wicks with metal base clips
- Candle dye chips or concentrated liquid candle dye (blush pink, creamy lavender, mint, buttercream)
- Essential oils or candle fragrance oils (vanilla bean, peony, white tea)
- Heat-proof pouring pitcher and a digital kitchen thermometer
- Wooden wick centering sticks or clothespins
Step-by-Step Instructions
- Prepare the Molds: Thread the cotton wick through the bottom hole of your silicone mold. Seal any small gap with mold-sealing putty to prevent liquid wax from leaking, and secure the wick straight at the top opening using a wooden wick centering clip.
- Melt the Wax: Fill your pouring pitcher with soy wax flakes and set it over a double boiler. Melt slowly over medium heat until the wax reaches approximately 75°C to 80°C (167°F to 176°F).
- Color and Scent: Stir in tiny shavings of candle dye chips, blending thoroughly until completely dissolved. Let the wax cool slightly to 65°C (149°F), then stir in your chosen fragrance oil for two full minutes to ensure proper binding.
- Pour Smoothly: Pour the molten wax gently into the prepared silicone molds, tapping the mold lightly against the work surface to release trapped air bubbles.
- Cure and Demold: Allow the candles to set at room temperature for at least 24 hours. Carefully peel back the flexible silicone mold to reveal the finished sculptural shape. Trim the wick to 0.5 cm before display.
Tips & Styling Variations
- Marbled Effect: Divide your melted wax into two pitchers; tint one pastel pink and leave the other creamy white. Pour them simultaneously into the mold to create organic swirl patterns.
- Styling Tip: Arrange a trio of differing heights on a fluted marble or scalloped tray alongside your favorite perfume bottles.
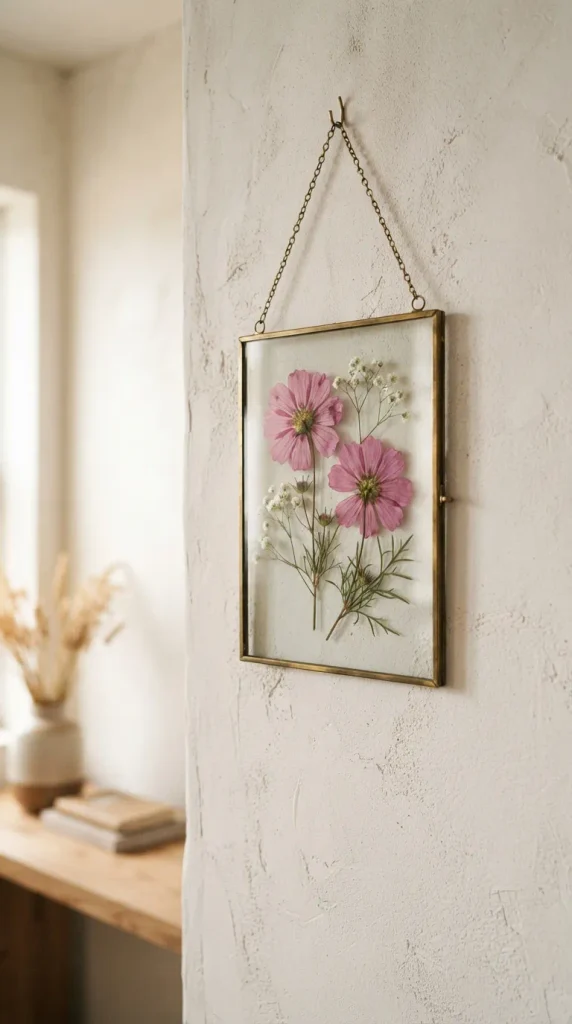
2. Floating Pressed Flower Glass Floating Frames
Preserving delicate botanical elements between transparent glass panes brings organic elegance, vintage charm, and tranquil romance to gallery walls.
What This Idea Means
Floating glass frames celebrate botanical beauty through transparency. By sandwiching real, delicately pressed flora between two sheets of clear glass, the wall color behind shows through, creating an airy, weightless aesthetic that brightens small spaces.
Materials Needed
- Fresh delicate flowers and foliage (baby’s breath, pansies, cosmos, mini ferns, larkspur)
- Heavy wooden flower press or thick hardcover books lined with watercolor paper
- Double-glass floating picture frames with brass or gold metal borders
- Clear quick-drying craft adhesive or silicone glue dots
- Fine-tip precision tweezers
Step-by-Step Instructions
- Harvest and Prep: Collect fresh, dry blooms with thin petals during mid-morning when morning dew has evaporated. Remove thick stems and bulky centers.
- Pressing: Arrange the blooms flat between sheets of absorbent parchment or watercolor paper inside a flower press or heavy book. Leave undisturbed under heavy weight for 2 to 3 weeks until completely dry and paper-thin.
- Design the Layout: Clean both glass panels thoroughly with rubbing alcohol. Using precision tweezers, carefully arrange your dried blooms on the bottom glass panel in balanced geometric clusters, cascading vines, or single minimalist stems.
- Fix and Secure: Apply an imperceptible dot of clear adhesive behind the sturdiest center part of each flower to prevent shifting.
- Frame Assembly: Gently lower the top glass pane into place and secure the frame latch or metal frame clips. Hang using a delicate brass chain.
Tips & Styling Variations
- Custom Typography: Write a poetic quote or meaningful date in metallic gold calligraphy ink directly onto the glass panel before arranging the florals around it.
- Styling Tip: Hang a grid of three frames directly above a vanity mirror or line them up along a minimalist picture ledge.
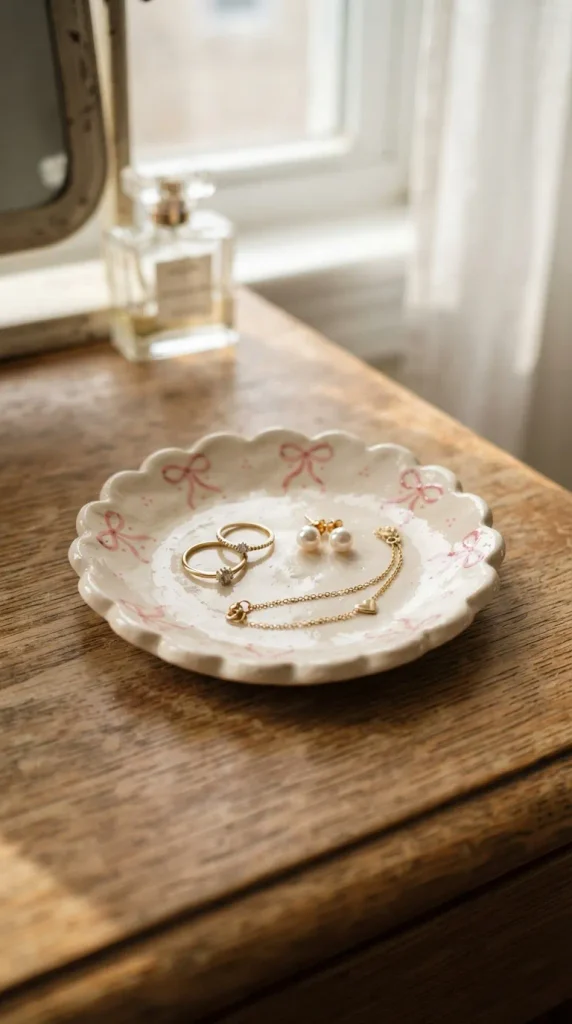
3. Scalloped Plaster & Textured Clay Trinket Dishes
Scalloped edges and tactile textures turn simple catch-all trays into artisanal statement pieces for jewelry and bedside essentials.
What This Idea Means
The scalloped edge trend represents timeless, whimsical luxury. Creating your own clay trinket dishes allows you to tailor dish sizes, border ruffles, and hand-painted finishes to complement your jewelry collection perfectly.
Materials Needed
- Premium air-dry clay (white)
- Rolling pin and smooth rolling guide sticks (approx. 5mm thickness)
- Scallop cookie cutters or a round glass with a round modeling tool
- Fine-grit sandpaper (320-grit)
- Pastel acrylic paints (powder blue, strawberry milk, sage green)
- High-gloss clear varnish or UV resin for a ceramic-like sheen
Step-by-Step Instructions
- Roll the Clay: Knead the air-dry clay until pliable and roll it out evenly to a 5mm thickness on parchment paper.
- Cut and Shape: Cut a clean circular base using a bowl or circle cutter. Use a small round cutter or clay loop tool along the perimeter to carve out rhythmic, repeating scalloped curves.
- Form the Dish Rim: Gently curve the scalloped outer edge upward by resting the clay piece inside a slightly concave bowl lined with plastic wrap. Smooth any rough edges with a slightly damp fingertip.
- Drying and Sanding: Allow the clay to air-dry completely for 48 to 72 hours. Once fully cured, lightly sand any imperfections until the surface feels satin-smooth.
- Paint and Glaze: Paint with your chosen pastel acrylic shade or add delicate hand-painted cherries, bows, or gingham patterns. Once dry, seal with two generous coats of high-gloss clear varnish or UV resin.
Tips & Styling Variations
- Gilded Rim: Paint the wavy outer edge with metallic gold leaf or liquid gold paint for an antique vintage finish.
- Styling Tip: Place your dish on an entryway console table for keys, or beside your bathroom sink for rings.
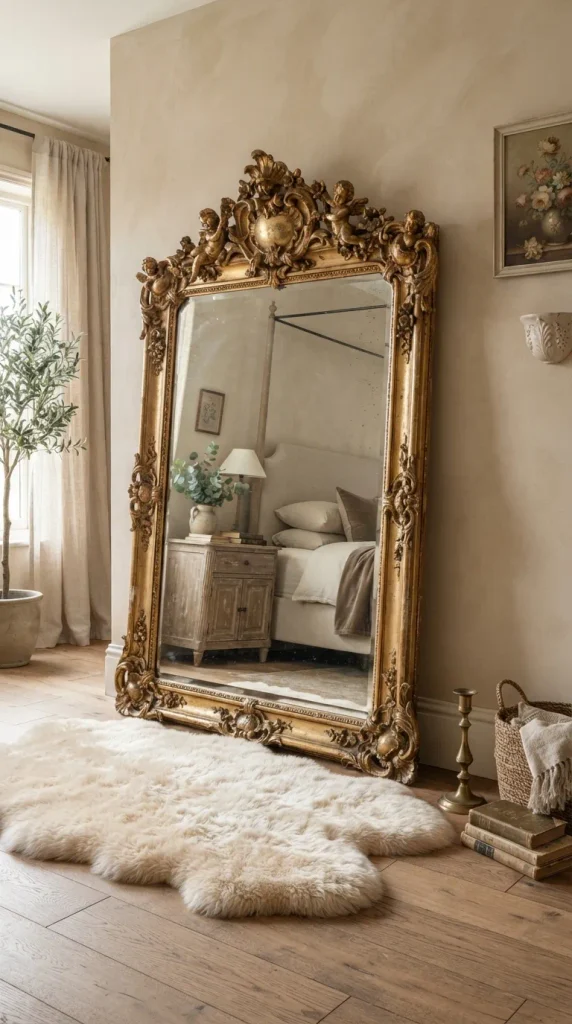
4. Vintage-Inspired French Gilded Mirror Makeover
Transform ordinary, thrifted, or plastic mirrors into opulent, antique French baroque statement mirrors with textured ornamentation and warm gold leafing.
What This Idea Means
This project channels classic French boudoir aesthetics. By using ornate resin appliques and textured aging waxes, an inexpensive plain mirror is elevated into an heirloom-style architectural centerpiece.
Materials Needed
- Plain wooden or high-density plastic framed mirror
- Silicone baroque scroll/filigree molds and fast-curing casting resin (or air-dry clay)
- Heavy-duty craft glue or epoxy adhesive
- Chalk paint in warm white or dusky rose
- Antique gold gilding wax and metal leaf sizing with gold foil sheets
- Soft round wax brushes and painter’s masking tape
Step-by-Step Instructions
- Mask the Mirror: Carefully apply painter’s tape along the inside borders of the mirror glass to protect it from paint and adhesive.
- Cast the Appliques: Mix your two-part casting resin and pour it into silicone ornate filigree and crown molds. Once cured (about 15–20 minutes), demold the flexible ornaments.
- Affix the Detailing: Glue the cast baroque ornaments to the top crest, corners, and side centers of the mirror frame using strong epoxy adhesive. Let set firmly.
- Base Coat Painting: Paint the entire frame, including the new ornaments, with two coats of chalk paint to create a uniform, matte texture.
- Gilding and Antiquing: Apply gold sizing adhesive to raised highlights and apply gold leaf sheets, burnishing gently with a dry brush. Finish by buffing antique dark gold or brown wax into the deep crevices to accentuate shadows and depth.
Tips & Styling Variations
- Soft Shabby Chic: Instead of deep gold, paint the mirror creamy ivory and lightly sand back the high points of the scrolls to expose a warm wood base.
- Styling Tip: Lean a full-length gilded mirror casually against a bedroom corner accompanied by a plush faux-fur rug.
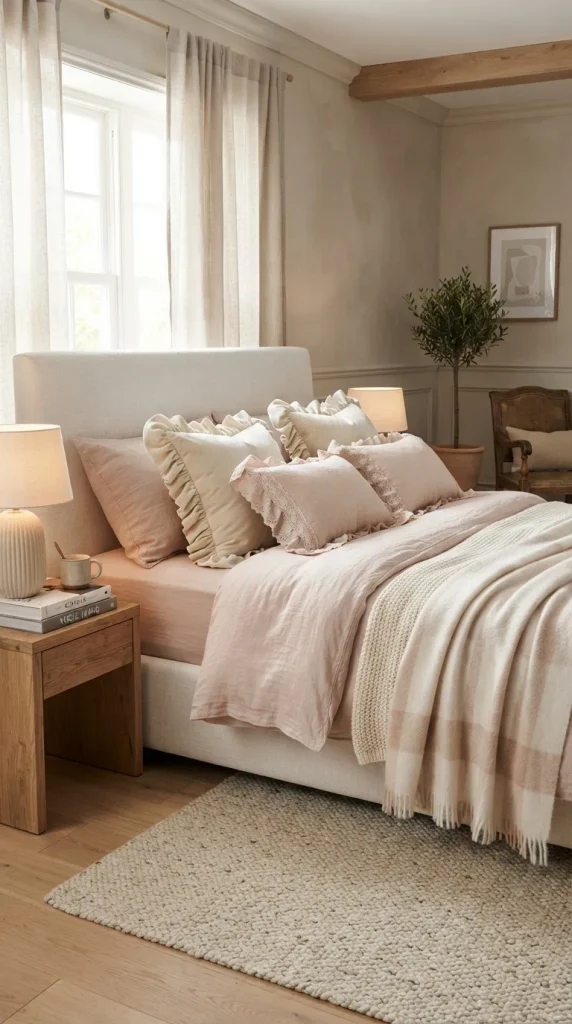
5. Romantic Ruffled Linen & Velvet Throw Pillows
Ruffles bring soft movement, vintage romance, and cozy layering to beds, daybeds, and reading nooks.
What This Idea Means
Cozy textures make any room feel instantly welcoming. DIY ruffled throw pillows marry tactile fabrics like washed Belgian linen and plush velvet with feminine, cascading gathers, transforming basic pillow forms into bespoke luxury accents.
Materials Needed
- 100% washed linen or velvet fabric in tones of blush, cream, or sage
- Matching high-strength sewing thread
- Sewing machine, fabric shears, measuring tape, and iron
- Gathering foot (optional, but speeds up ruffling)
- Feather-down or hypoallergenic pillow inserts (18×18 inches or 20×20 inches)
Step-by-Step Instructions
- Cut the Fabric Panels: For an 18×18 inch pillow, cut one front square (19×19 inches) and two back envelope panels (19×14 inches each). Cut long strips of fabric totaling 3 times the perimeter of the pillow (approx. 220 inches total length) at a 4-inch width for the ruffle.
- Hem the Ruffle Strip: Join the long strips end-to-end to form one continuous loop. Fold one long outer edge over twice by 1/4 inch, press with an iron, and stitch down with a neat straight hem.
- Gather the Ruffle: Sew two parallel basting stitch lines along the unhemmed long edge. Pull the bobbin threads gently to gather the fabric evenly until the ruffle length matches the 76-inch perimeter of the front pillow square.
- Assemble the Pillow: Pin the gathered raw edge of the ruffle to the raw edges of the front panel, right sides facing together, with ruffles pointing toward the center. Layer the two back envelope pieces on top, right sides facing down.
- Stitch and Turn: Sew around all four outer edges with a 1/2-inch seam allowance. Backstitch securely over corners. Turn the cover right side out through the envelope opening, press, and insert your pillow form.
Tips & Styling Variations
- Pleated Border: Instead of soft gathers, fold the strip into crisp 1-inch knife pleats for a more tailored, high-fashion aesthetic.
- Styling Tip: Mix a square ruffled linen pillow with a smaller, circular velvet button-tufted cushion for varied shapes.
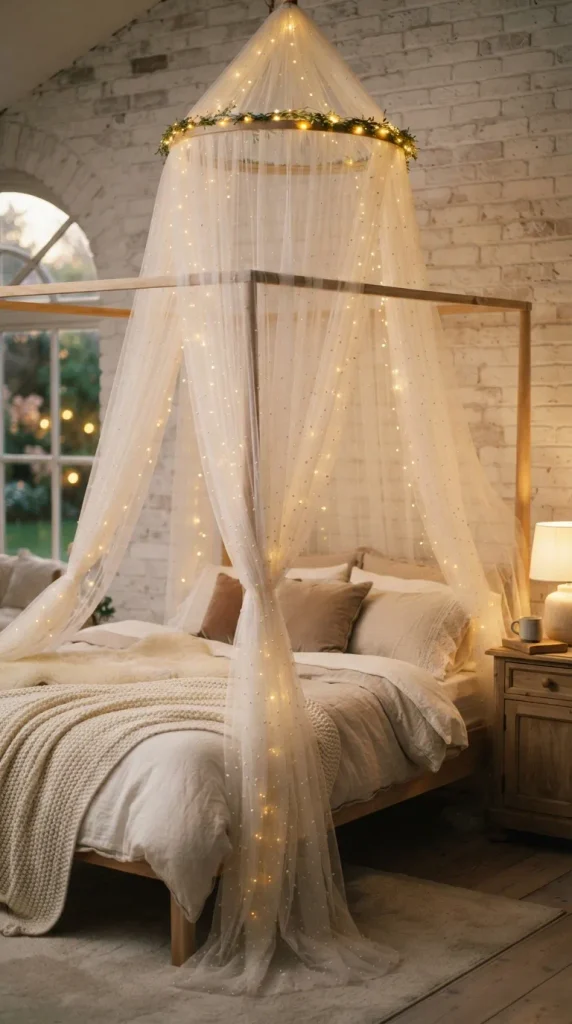
6. Whimsical Tulle & Pearl Bed Canopy
A suspended flowing canopy creates a cozy, dreamy focal point that turns any bed into a peaceful sanctuary.
What This Idea Means
This project uses lightweight textiles and soft embellishments to frame the sleeping area. Translucent sheer tulle or organza creates an ethereal ambiance, diffusing lighting and establishing an intimate space.
Materials Needed
- Large wooden embroidery hoop (14 to 18 inches) or lightweight round brass ceiling ring
- 15 to 20 yards of ultra-soft ivory or pale blush tulle or chiffon fabric
- Flat-back faux pearls or pearl beads with craft jewelry glue (E6000 or fabric adhesive)
- 2-inch wide silk satin ribbon for ceiling suspension
- Heavy-duty ceiling hook with appropriate wall anchor
Step-by-Step Instructions
- Prepare the Canopy Ring: Separate the wooden embroidery hoop. Wrap the inner hoop neatly in satin ribbon, securing the ends with hot glue.
- Cut Fabric Panels: Measure the distance from your ceiling to the floor, adding approximately 12 inches for puddle-drape pooling. Cut 4 to 6 panels of tulle to this length.
- Attach Tulle to Hoop: Fold the top edge of each tulle panel over the wrapped hoop, securing it with neat hand stitches or decorative ribbon ties evenly around the ring.
- Embellish with Pearls: Lay the suspended tulle out flat along a clean surface. Using jewelry glue, attach individual faux pearls at staggered intervals down the upper two-thirds of the panels.
- Mount to Ceiling: Secure three balanced lengths of satin ribbon to three equidistant points on the hoop. Knot them together at the top, loop through the ceiling hook, and let the fabric drape softly around the bedposts.
Tips & Styling Variations
- Warm Fairy Glow: Weave a set of battery-operated micro-LED copper fairy lights through the inside of the tulle hoop to act as a soft, ambient nightlight.
- Styling Tip: Keep the fabric gathered gently behind the headboard during the day with vintage silk ribbon tiebacks.
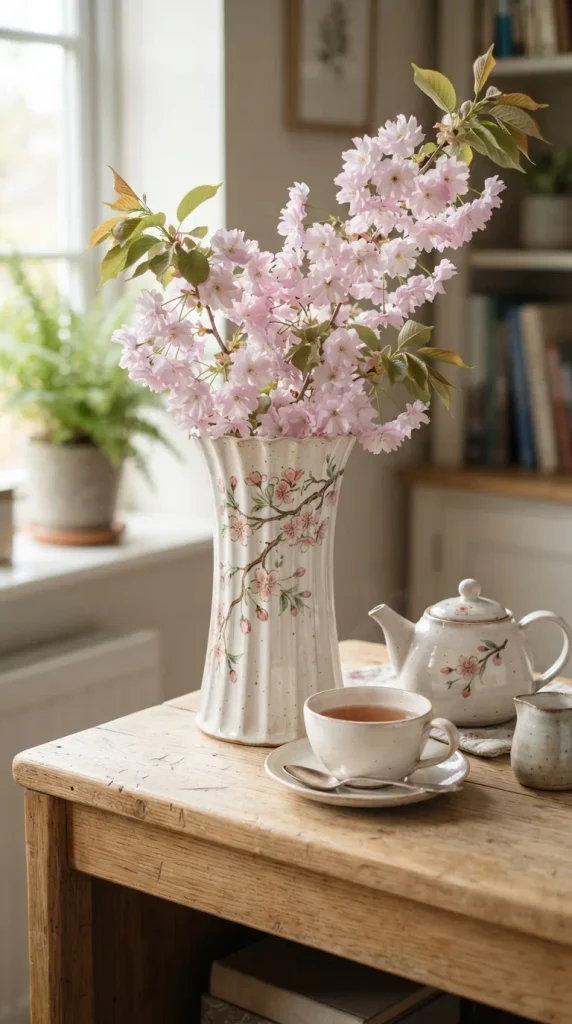
7. Hand-Painted Cherry Blossom & Bow Ceramic Mugs & Vases
Custom hand-painted ceramics allow you to add bespoke motifs, like dainty coquette bows and cherry blossoms, to daily functional items.
What This Idea Means
Personalized ceramics combine artistic expression with everyday utility. By hand-decorating plain ceramic or porcelain blanks with specialized baking paints, you produce durable, glossy pieces that showcase micro-florals and pastel themes.
Materials Needed
- Plain white porcelain mugs, fluted ceramic vases, or water carafes
- High-grade porcelain ceramic paints or enamel paint markers (soft pink, deep cherry, sage green, dusty blue)
- Fine-detail liner brushes (Size 00 and Size 1)
- Rubbing alcohol and cotton lint-free pads
- Home oven for heat-curing
Step-by-Step Instructions
- Clean Surfaces Thoroughly: Wipe down the entire ceramic surface with rubbing alcohol to remove grease, fingerprints, and dust. Let dry completely.
- Map the Pattern: Plan your design spacing. For coquette ribbons, lightly sketch tiny bow outlines with a graphite pencil (pencil marks burn off in the oven).
- Paint Delicate Motifs: Dip your fine-liner brush into ceramic paint. Paint simple, delicate ribbon loops with trailing tails, or paint five soft petal strokes in pale pink around a tiny gold center dot for blossoms.
- Air-Dry: Allow the painted ceramic to dry untouched in a dust-free environment for 24 hours.
- Oven Cure: Place the painted ceramic into a cold home oven. Turn the heat to 150°C (300°F) and bake for 30 to 35 minutes. Turn the oven off and allow the piece to cool down completely inside the oven before handling.
Tips & Styling Variations
- Gingham Base: Paint a soft pastel gingham check band around the lower rim of the vase before layering delicate floral stems over the top.
- Styling Tip: Display painted mugs on an open wooden shelf next to matching glass tea canisters and pastel saucers.
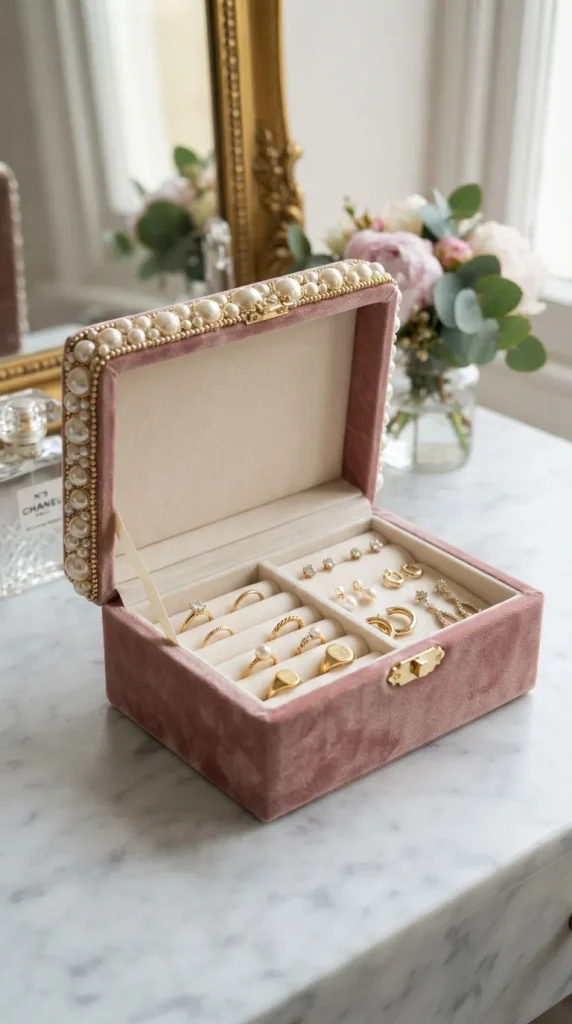
8. Pearl-Embellished Velvet Jewelry Box & Display Tray
Upgrade plain storage into a luxurious boutique-style display box for your everyday rings, necklaces, and hair accessories.
What This Idea Means
Elevated organization protects accessories while functioning as standalone vanity art. Wrapping wood or acrylic boxes in plush velvet and rimming them with graduated pearls turns functional storage into an elegant decor piece.
Materials Needed
- Unfinished wooden jewelry box or clear glass shadow box with brass edging
- Rich plush velvet fabric (blush pink, champagne, or lavender)
- High-density foam sheets or pre-cut foam jewelry roll cylinders
- Half-pearl cabochons in mixed sizes (4mm, 6mm, 8mm)
- Fast-bonding fabric glue and precision tweezers
Step-by-Step Instructions
- Box Preparation: If using wood, paint the exterior with a complementary pastel acrylic paint or wrap the exterior with pressed velvet fabric glued tautly over the sides.
- Construct Ring Rolls: Cut high-density foam into strips that match the interior width of your box. Wrap each cylinder in velvet, securing the fabric edge tightly along the bottom with fabric glue.
- Install Compartments: Press the wrapped foam rolls firmly side-by-side into the base of the box until snug, creating velvety channels to hold rings and earrings.
- Apply Pearl Trim: Using a fine-tip glue applicator, lay down a thin line of adhesive along the outer lid perimeter. Place half-pearl cabochons in an alternating small-medium-large pattern with precision tweezers.
- Final Polish: Let the glue cure undisturbed for 12 hours before organizing your jewelry collection inside.
Tips & Styling Variations
- Vintage Ribbon Tabs: Attach small grosgrain or silk ribbon loops between the compartments to easily lift modular lower storage trays.
- Styling Tip: Keep the box open on your dressing table to let delicate earrings and necklaces catch morning sunlight.
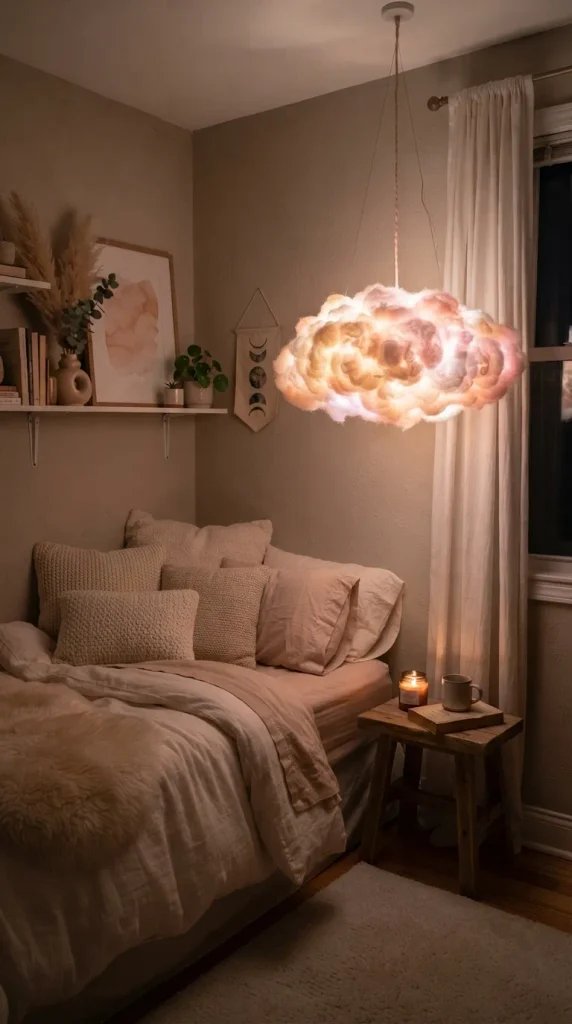
9. Soft Cloud Ambient Floor or Pendant Lamp
Ethereal, sculptural cloud lamps diffuse harsh light bulbs into an organic, dreamy ambient glow.
What This Idea Means
Inspired by whimsical dreamscapes, the cloud lamp uses multi-density polyfill fibers to scatter light softly. The result is a relaxing, cloud-like fixture that brings warm, serene illumination to cozy corners.
Materials Needed
- Paper globe lantern (12 to 18 inches diameter)
- High-loft polyester fiberfill (stuffing used for pillows)
- Low-temperature hot glue gun and plenty of glue sticks
- Smart RGB LED light bulb or battery-powered cool-running LED puck light
- Pendant lamp cord set or transparent nylon hanging string
Step-by-Step Instructions
- Assemble Paper Lantern: Expand the paper globe lantern using its internal wire expander frame.
- Fluff the Fiberfill: Pull the polyester fiberfill apart into light, cloud-like clumps of varying sizes. Avoid tightly packed balls so light diffuses evenly.
- Adhere the Clouds: Apply dots of low-temperature hot glue directly onto the paper lantern surface. Gently press the fluffed fiberfill clumps onto the glue, working systematically from bottom to top.
- Sculpt the Silhouette: Vary the thickness of the fiberfill around the sides to create organic, asymmetrical billows rather than a uniform sphere.
- Install Light Source: Insert a strictly cool-running LED bulb (never use hot incandescent bulbs) inside the lantern. Suspend from the ceiling or set atop an unobtrusive acrylic stand.
Tips & Styling Variations
- Color Customization: Use a smart LED bulb to shift the cloud’s color from warm sunset orange and dusty rose to cool starry twilight purple via smartphone apps.
- Styling Tip: Cluster two or three different sized cloud lanterns at slightly varying heights in the corner of a reading nook.
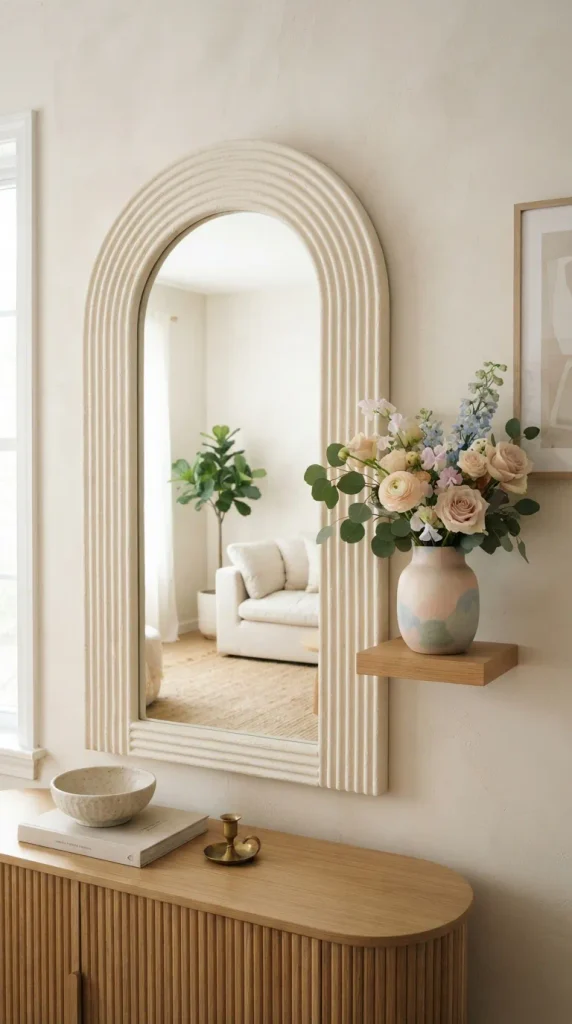
10. Ribbed Arch Foam Mirror & Textured Wall Sconce
Arch silhouettes combined with ribbed foam textures yield a playful, ultra-modern aesthetic that adds soft architectural interest to flat walls.
What This Idea Means
Geometric arches soften room angles. By framing a frameless arch mirror with ribbed foam piping and coating it in custom matte textural paint, you create high-impact, trendy room architecture with minimal weight.
Materials Needed
- Arch-topped frameless glass mirror (or rectangular mirror cut with arched backing board)
- High-density polyethylene foam pipe insulation tubes (slit open or ribbed backer rods)
- Heavy backing board (MDF or sturdy foam core board)
- Joint compound or plaster of Paris mixed with acrylic paint
- Strong silicone adhesive or construction adhesive
Step-by-Step Instructions
- Backing Preparation: Cut the backing board to the exact silhouette of your arch mirror, adding a 2-to-3-inch extended border around the perimeter.
- Mount the Mirror: Adhere the mirror securely to the center of the backing board using non-corrosive mirror mastic or heavy-duty mounting tape.
- Affix the Ribbed Piping: Cut the foam insulation tubes to length. Glue them tightly side-by-side around the exposed border of the backing board to create a dimensional, ribbed tubular frame.
- Apply Plaster Texture: Brush a mixture of joint compound and pale pastel chalk paint over the foam tubes to eliminate any plastic shine and impart an artisanal, stone-like ceramic texture.
- Seal and Mount: Once the plaster cures fully, apply a matte spray sealant and mount the finished mirror to the wall with heavy-duty picture hanging brackets.
Tips & Styling Variations
- Monochrome Terracotta: Tint the joint compound with dusty terracotta or peachy blush paint to create a Mediterranean stucco vibe.
- Styling Tip: Position this mirror opposite a window to bounce natural daylight throughout the room.
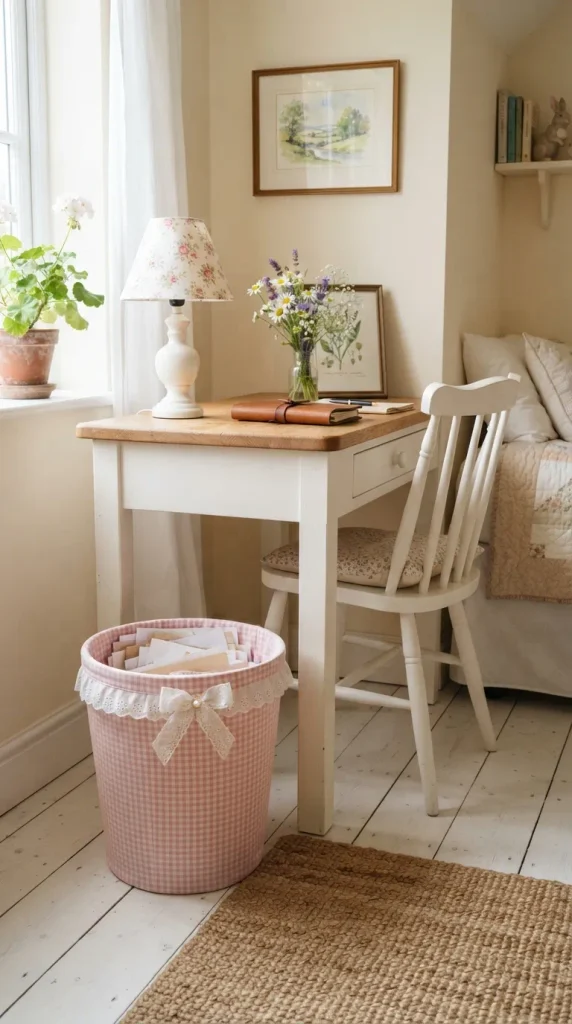
11. Coquette Gingham & Lace Waste Basket Upcycle
Transform everyday plastic or wire utility bins into lovely cottagecore-inspired accents with fabric wraps and lace trims.
What This Idea Means
Everyday functional items do not have to be purely utilitarian. Wrapping practical wastebaskets or small storage hampers in pastel gingham fabrics and gathered broderie anglaise lace turns an ordinary object into a charming visual detail.
Materials Needed
- Inexpensive cylindrical or oval plastic/metal wastebasket
- 100% cotton gingham fabric (blush pink, soft lilac, or buttercup yellow)
- Cotton eyelet lace or embroidered lace trim (2 to 3 inches wide)
- Heavy spray adhesive or fabric glue
- Thin decorative satin ribbon
Step-by-Step Instructions
- Pattern the Bin: Measure the height and circumference of your wastebasket. Add 2 inches to the height (for tucking under) and 1 inch to the circumference.
- Wrap the Fabric: Spray the exterior of the wastebasket evenly with spray adhesive. Carefully roll the bin over the wrong side of the gingham fabric, smoothing out wrinkles as you go.
- Neaten the Edges: Fold the extra fabric allowance cleanly over the top lip into the interior and glue flat. Fold the bottom excess neatly like wrapping a gift against the base and secure.
- Apply Lace Accents: Glue the cotton eyelet lace around the top outer rim of the basket, letting the ruffled edge hang downward.
- Add Ribbon Detail: Thread a slim satin ribbon along the lace header line and tie a neat decorative bow at the front center.
Tips & Styling Variations
- Removable Liner: Instead of gluing directly to the bin, sew an elasticized fabric liner that slips effortlessly inside and out for easy machine washing.
- Styling Tip: Pair beside a matching fabric-covered desk organizer or magazine holder on your workstation.
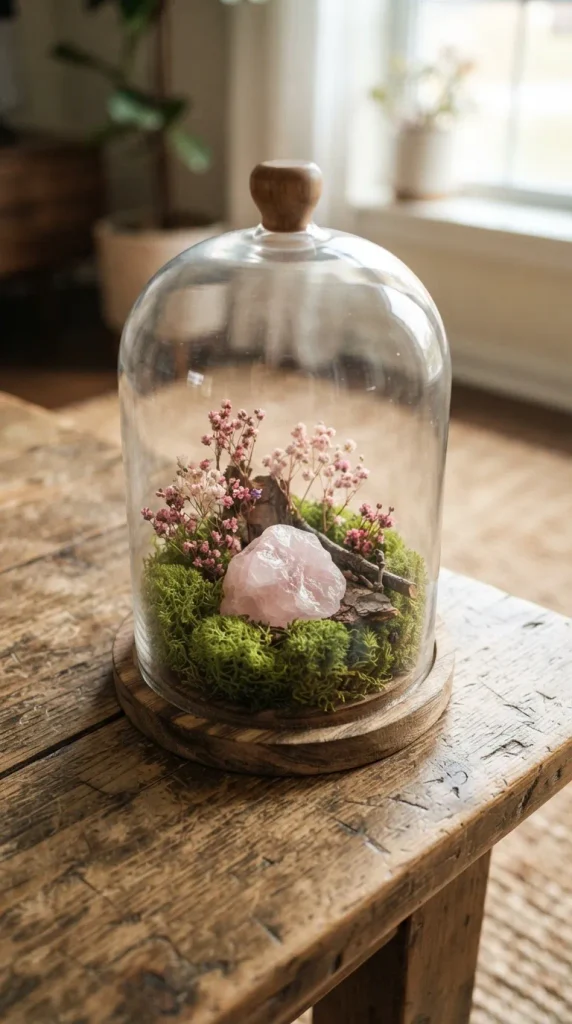
12. Gilded Cloche Preserved Moss & Botanical Terrarium
Under-glass botanical cloches present a magical, miniature woodland vignette that stays vibrant without any daily watering.
What This Idea Means
A preserved terrarium brings calm, natural greenery indoors in an organized, dust-free showcase. Using preserved mosses, dried florals, and crystals under a glass bell jar creates a long-lasting, Victorian naturalist-inspired centerpiece.
Materials Needed
- Glass cloche bell jar with a natural wood or brass base
- Preserved reindeer moss, sheet moss, and cushion moss in varying shades of green
- Dried mini florals (bunny tails, gomphrena, dried rosebuds, star flowers)
- Raw rose quartz chunks, mini natural twigs, or polished crystals
- Hot glue gun and fine tweezers
Step-by-Step Instructions
- Prepare the Base: Clean the wooden base and apply a light coat of clear wax or gilding paste along the outer rim.
- Build the Moss Foundation: Hot-glue mounds of preserved cushion moss and flat sheet moss onto the base to create rolling, organic terrain.
- Anchor Structural Elements: Embed mini vertical driftwood pieces or raw rose quartz crystals into the moss crevices using small dabs of hot glue.
- Insert Delicate Florals: Use fine tweezers to push small stems of dried bunny tails, mini globe amaranths, and preserved baby’s breath into the moss, creating a balanced, fairy-like garden scene.
- Seal with Glass: Carefully wipe the inside of the glass bell jar with a microfiber cloth until clear, then lower it over the finished botanical display.
Tips & Styling Variations
- Mini Fairy Lights: Wrap a string of micro copper fairy lights around the base of the moss before putting the glass cloche on for an ambient evening glow.
- Styling Tip: Use as a dining table centerpiece or place on a bedside shelf alongside leather-bound books.
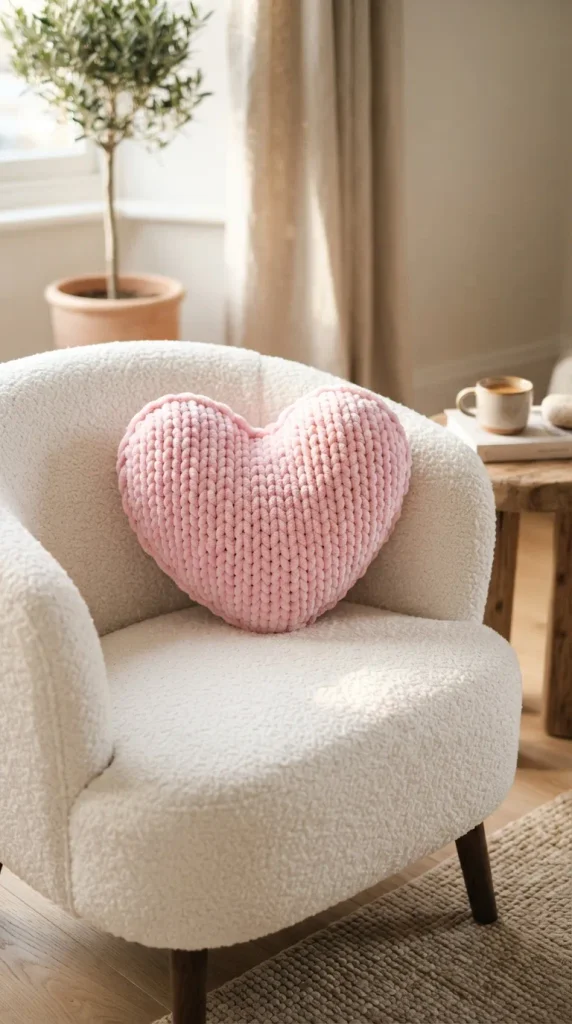
13. Chunky Chenille Hand-Knitted Heart & Bow Accent Pillow
No needles required—hand-knitting chunky chenille yarn yields plush, sculptural cushions that add cozy texture to chairs and couches.
What This Idea Means
Textural warmth is essential to a cozy interior. Hand-knitting oversized chunky yarn into custom shapes like hearts or bows delivers modern tactile comfort without complex knitting machinery.
Materials Needed
- 1 to 2 skeins of Jumbo (Weight 7) chunky chenille yarn in pastel pink, cream, or dove gray
- Polyester fiberfill pillow stuffing
- Tapestry needle or small scissors for finishing
- Your hands (no knitting needles needed)
Step-by-Step Instructions
- Cast On: Form a slipknot with the chunky yarn. Using your fingers, pull working loops through to create a base chain of 8 to 10 stitches on a flat table.
- Hand-Knit the Base: Work back and forth across the row by pulling loops of working yarn up through each chain loop, maintaining an even 1.5-inch loop height.
- Shape the Contours: To shape a heart, increase one loop on the outer edges for three rows, then split the work into two halves to knit the rounded top humps individually before casting off.
- Knit the Matching Panel: Repeat the process to create an identical second piece for the back of the cushion.
- Join and Stuff: Use working yarn to hand-stitch the perimeter of the two panels together, inserting soft fiberfill stuffing before closing the final gap securely.
Tips & Styling Variations
- Bow Pillow Variation: Hand-knit a long wide rectangle, fold it into a loop, gather the center tightly with a separate wrapped band of chunky yarn, and secure it as an oversized bow.
- Styling Tip: Toss on a minimalist boucle accent chair to create an inviting focal point.
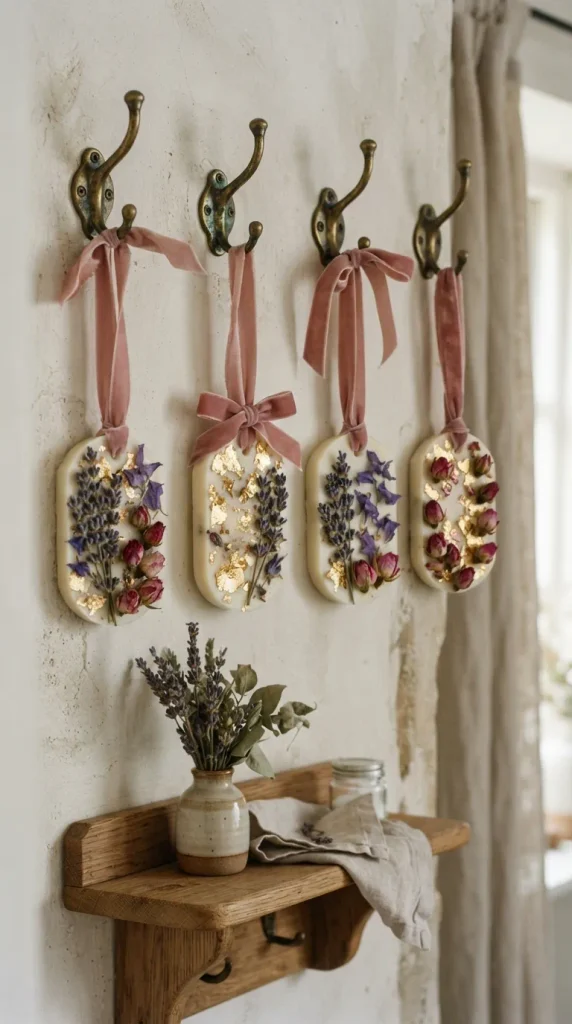
14. Pressed Flora Botanical Wax Melts & Scented Sachets
Naturally scented soy wax sachets adorned with dried petals offer a flame-free way to fragrance wardrobes, drawers, and open rooms.
What This Idea Means
Botanical wax sachets combine aromatherapy with visual floral art. Hardened soy wax holds potent essential oils, while the top surface displays carefully composed dried flowers, acting as both an ornament and an air freshener.
Materials Needed
- Soy pillar wax flakes or beeswax pellets
- Silicone sachet molds (oval, rectangular, or hexagon with built-in hanging holes)
- Premium fragrance oils (lavender fields, sweet pea, clean linen, wild rose)
- Dried botanical accents (mini rosebuds, dried lavender sprigs, calendula, gold leaf flakes)
- 3/8-inch silk velvet or grosgrain hanging ribbon
- Brass eyelets (optional, for reinforcing the hole)
Step-by-Step Instructions
- Melt and Scent: Melt the wax over a double boiler to 75°C (167°F). Remove from heat, stir in fragrance oil at an 8-10% scent load, and let the wax cool to around 60°C (140°F).
- Pour into Molds: Pour the warm wax carefully into your silicone sachet molds, filling each about three-quarters full.
- Arrange Botanicals: Wait 2 to 3 minutes until the surface begins to form a very thin, translucent skin. Using tweezers, quickly arrange dried flower petals, mini stems, and gold leaf flakes onto the wax surface.
- Cool Completely: Allow the wax sachets to solidify fully at room temperature for 3 to 4 hours.
- Demold and Thread: Gently pop the sachets out from the silicone molds. Insert a brass eyelet into the hole if desired, and thread a luxurious velvet ribbon through for hanging.
Tips & Styling Variations
- Wardrobe Freshness: Hang sachets in your clothing closet, place them inside lingerie drawers, or suspend them from brass door handles.
- Styling Tip: Display three sachets hanging from decorative antique hooks on a bedroom wooden peg rail.
15. Tufted Gingham & Floral Mug Rug Coasters
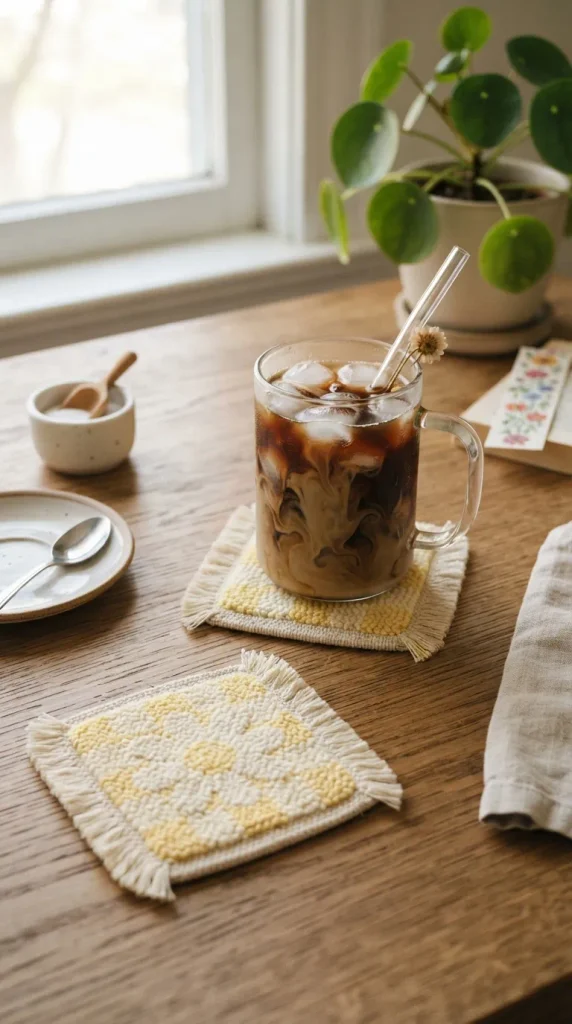
Punch needle and tufting techniques bring cozy, tactile fiber art directly to your coffee table and vanity surfaces.
What This Idea Means
Mug rugs are miniature fiber tapestries designed to cushion mugs, candles, and perfumes. Using punch needle embroidery, you create plush, loop-pile textures featuring playful checkered patterns and floral icons.
Materials Needed
- Punch needle tool (adjustable loop height)
- Monk’s cloth foundation fabric stretched drum-tight on an embroidery hoop or wooden frame
- Worsted weight acrylic or cotton yarns (pastel yellow, cream, blush pink, sage)
- Fabric scissors, craft glue or latex carpet adhesive
- Felt backing sheets
Step-by-Step Instructions
- Transfer the Design: Draw your favorite pattern (e.g., mini 1-inch checkerboards or a daisy silhouette) directly onto the stretched monk’s cloth using a fabric marker.
- Punch Needle Technique: Thread your punch needle with yarn. Hold the needle perpendicular to the fabric and punch downward fully, moving forward stitch-by-stitch to create uniform loops on the back side.
- Complete Color Blocks: Fill in the distinct color zones, keeping tension consistent so loops sit evenly across the front surface.
- Secure the Back: Brush a thin layer of craft glue over the flat flat stitches on the back side of the fabric to lock the loops permanently in place. Let dry.
- Trim and Back: Cut the excess monk’s cloth leaving a 1-inch border, fold the border over to the back, glue down, and cover neatly with a matching circle or square of soft felt.
Tips & Styling Variations
- Sheared Velvet Finish: Use curved embroidery scissors to clip open the yarn loops on the front, creating a plush, velvety tufted pile.
- Styling Tip: Use under cold drink tumblers, small plant pots, or as soft bases for table clocks.
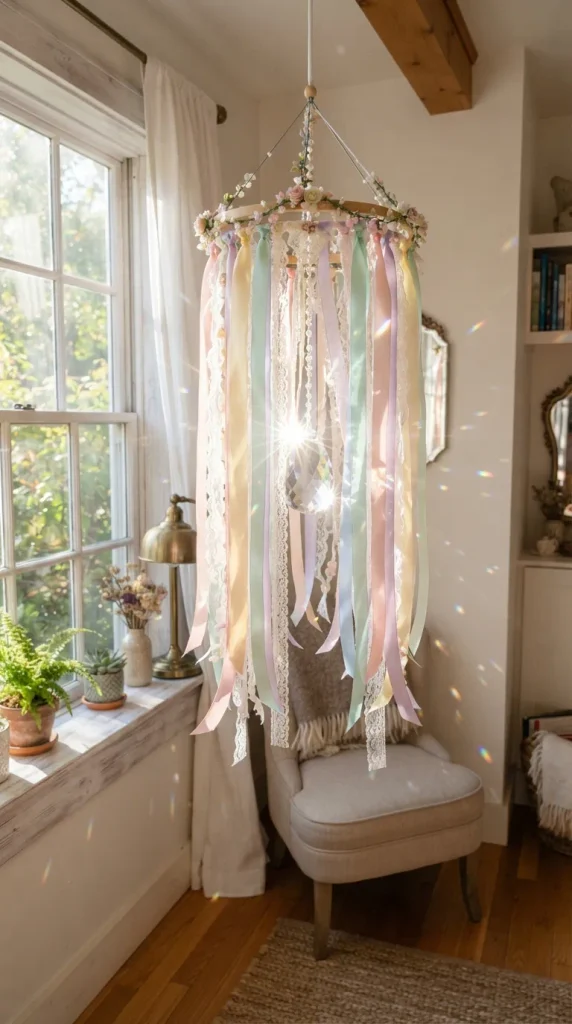
16. Pastel Ribbon Chandelier & Tassel Windchime
A delicate ribbon mobile adds gentle movement, soft color, and romantic texture to high ceiling corners and window bays.
What This Idea Means
This hanging mobile project incorporates cascading ribbons, textured yarns, and subtle lace to catch gentle indoor air currents. It introduces vertical interest to empty corners without requiring complex electrical work.
Materials Needed
- Lightweight metal or wooden ring (8 to 12 inches diameter)
- Assorted lengths of satin ribbon, chiffon ribbon, and velvet ribbon in coordinating pastel shades
- Cotton crochet lace trim and metallic gold thread
- Crystal glass chandelier teardrop prisms
- Clear fishing line or strong sewing thread
Step-by-Step Instructions
- Wrap the Hoop: Wrap the foundational ring completely with a smooth cream satin ribbon, gluing the start and finish points securely.
- Cut Ribbon Streamers: Cut your various ribbons and lace trims into lengths varying between 20 to 36 inches for a cascading, organic hemline.
- Attach with Lark’s Head Knots: Fold each ribbon length in half and secure it over the wrapped hoop using a simple lark’s head knot. Alternate textures (velvet next to sheer chiffon, followed by lace) all the way around the ring.
- Suspend Crystal Prisms: Tie sparkling glass chandelier prisms to clear nylon threads and suspend them from the hoop center so they hang nestled among the cascading ribbons.
- Create Hanging Suspension: Tie three balanced ribbon strands to the hoop perimeter, bring them together above the hoop, and tie to an O-ring for easy ceiling hook mounting.
Tips & Styling Variations
- Sunlight Refractor: Hang the ribbon mobile near a sunny window so the central crystal prisms cast dancing rainbows across your bedroom walls.
- Styling Tip: Pair in an empty corner directly above a cozy reading floor cushion.
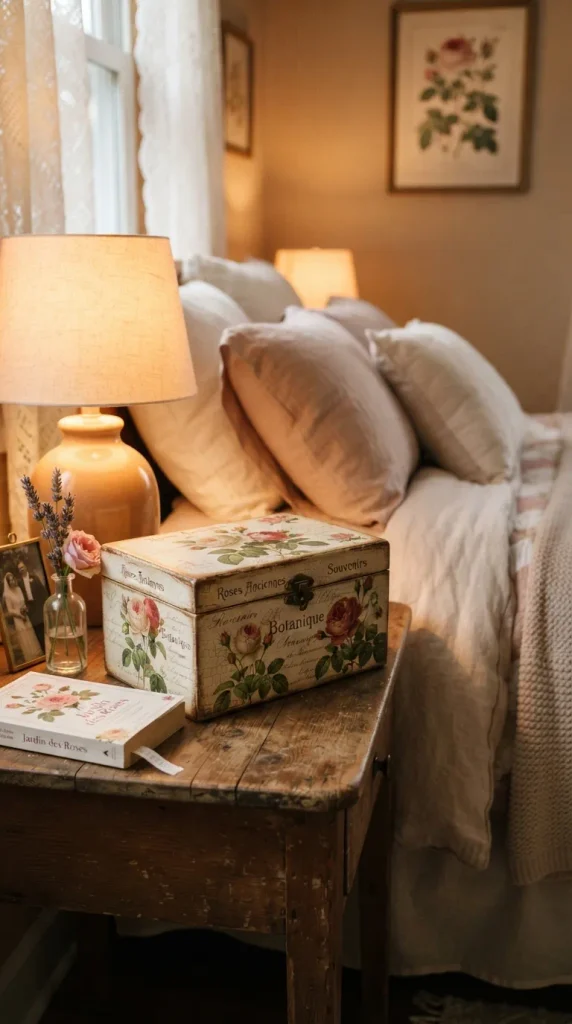
17. Victorian Shabby Chic Decoupage Jewelry & Keepsake Box
Bring antique oil paintings, vintage roses, and baroque elegance to plain wooden keepsake boxes through refined decoupage techniques.
What This Idea Means
Decoupage is the classic art of decorating surfaces with paper cutouts and protective gloss layers. Using botanical prints and crackle glazes, you can transform simple wooden boxes into cherished antique treasures.
Materials Needed
- Plain unfinished wooden memory box with metal hinges
- Decoupage rice paper or fine floral paper napkins with vintage botanical illustrations
- Mod Podge (matte or satin finish) and soft flat decoupage brushes
- White and antique cream chalk paint
- Antique distressing ink or brown wax and fine-grit sandpaper
Step-by-Step Instructions
- Base Preparation: Sand the wooden box smooth and paint it entirely with two coats of white chalk paint. Let dry completely.
- Prepare Paper Motifs: If using decorative paper napkins, separate and discard the two white back plies, keeping only the ultra-thin printed top layer. Tear (rather than cut) around the floral motifs to create soft, feather-like edges that blend seamlessly.
- Apply Mod Podge: Brush a smooth, even layer of Mod Podge onto the box lid. Carefully lay down the floral paper, smoothing gently from the center outward using a soft dry brush to eliminate bubbles.
- Seal Layers: Once dry, apply two to three thin coats of Mod Podge over the entire box, allowing 30 minutes of drying time between each coat.
- Vintage Distressing: Lightly sand the corners and edges of the box to create natural wear. Buff a hint of antique brown wax into the sanded areas for an aged patina.
Tips & Styling Variations
- Velvet Lined Interior: Line the inside bottom of the wooden box with self-adhesive velvet flocking sheets for a luxurious interior finish.
- Styling Tip: Stack two different-sized keepsake boxes horizontally on a vanity to hold letters and hair ribbons.
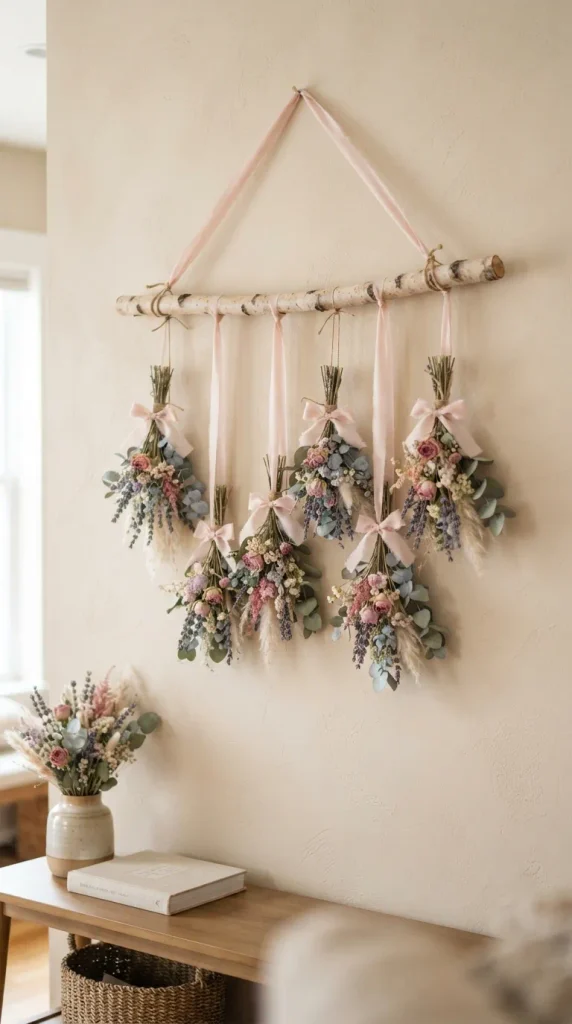
18. DIY Dried Floral & Satin Ribbon Wall Hanging
A horizontal branch or brass rod dressed with cascading dried botanicals provides an organic, tactile alternative to standard framed wall art.
What This Idea Means
This wall hanging turns dried botanicals into sculptural wall art. By suspending individual bouquets of preserved blooms from a natural branch using varying lengths of satin ribbon, you introduce vertical texture and nature-inspired beauty to blank walls.
Materials Needed
- Natural birch wood branch (18 to 24 inches long) or a slim polished brass rod
- Assorted dried botanicals (dried lavender, pink larkspur, eucalyptus, wheat stalks, baby’s breath)
- 1/2-inch wide silk satin ribbon in dusty rose, taupe, and cream
- Floral wire and craft shears
- Jute twine or brass wall mounts for hanging
Step-by-Step Instructions
- Prep the Branch: Clean and dry the birch branch. Tie a piece of jute twine or ribbon securely to both ends to create the main hanging loop.
- Assemble Mini Bouquets: Gather small, balanced bunches of dried florals (combining one focal flower with eucalyptus and airy baby’s breath). Bind the stems tightly with floral wire 2 inches from the bottom.
- Attach Ribbons: Cut lengths of silk satin ribbon ranging from 12 to 24 inches. Wrap one end of each ribbon around the stem base of a mini bouquet, covering the floral wire completely, and secure with a neat knot.
- Tie to the Branch: Tie the opposite ends of the ribbons to the branch at staggered intervals, allowing the bouquets to hang upside down at varied, organic heights.
- Finish with Bows: Tie dainty decorative bows at each attachment point along the branch to conceal the knots.
Tips & Styling Variations
- Scent Enhancement: Add sprigs of dried eucalyptus and lavender so the hanging naturally releases a relaxing, subtle herbal aroma in the room.
- Styling Tip: Mount above a headboard or centered over a low horizontal bookshelf.
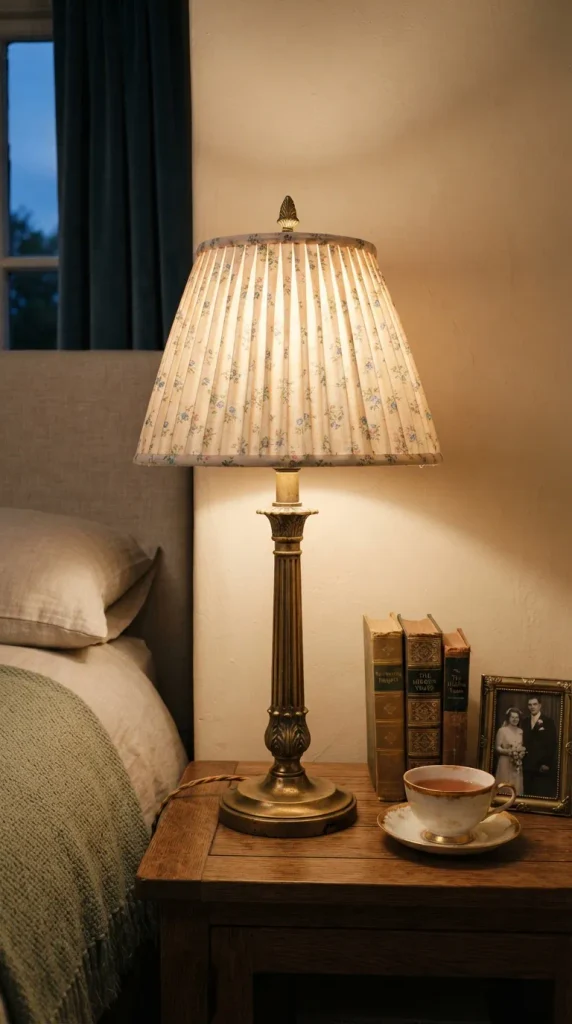
19. French Pleated Fabric Lampshade Makeover
Elevate plain, inexpensive drum lampshades into high-end, tailored French-pleated lighting pieces using lightweight cotton fabrics.
What This Idea Means
Lampshade transformations provide high visual impact with low material costs. Pleated fabric adds tailored charm, softening harsh bulb glare and casting a warm, romantic glow throughout the room.
Materials Needed
- Plain conical or drum lampshade
- 1 to 1.5 yards of lightweight cotton fabric (micro-floral print, pastel toile, or solid linen)
- Fabric glue or a high-temperature hot glue gun
- Matching cotton bias tape or folded grosgrain ribbon
- Sewing pins and iron
Step-by-Step Instructions
- Prep the Fabric Strip: Cut long fabric strips measuring 1.5 times the height of your lampshade and 3 times the circumference. Press a 1/4-inch hem along the top and bottom edges with an iron.
- Form the Pleats: Starting at the back seam of the lampshade, fold the fabric into neat 1/2-inch box or knife pleats. Pin and glue each pleat sequentially along the upper rim of the lampshade.
- Secure the Lower Edge: Pull the pleated fabric taut downward toward the bottom rim. Form matching pleats along the wider bottom edge, gluing them securely along the inside rim.
- Trim Excess: Carefully cut away any excess fabric overhang along both the top and bottom rims using sharp scissors.
- Apply Border Trim: Glue matching bias tape or grosgrain ribbon neatly over the raw edges on both the top and bottom rims for a clean, professional finish.
Tips & Styling Variations
- Ruffled Lower Border: Add a gathered mini-ruffle underneath the bottom ribbon trim to amplify the vintage cottagecore aesthetic.
- Styling Tip: Pair the pleated shade with a vintage ceramic or fluted brass bedside lamp base.
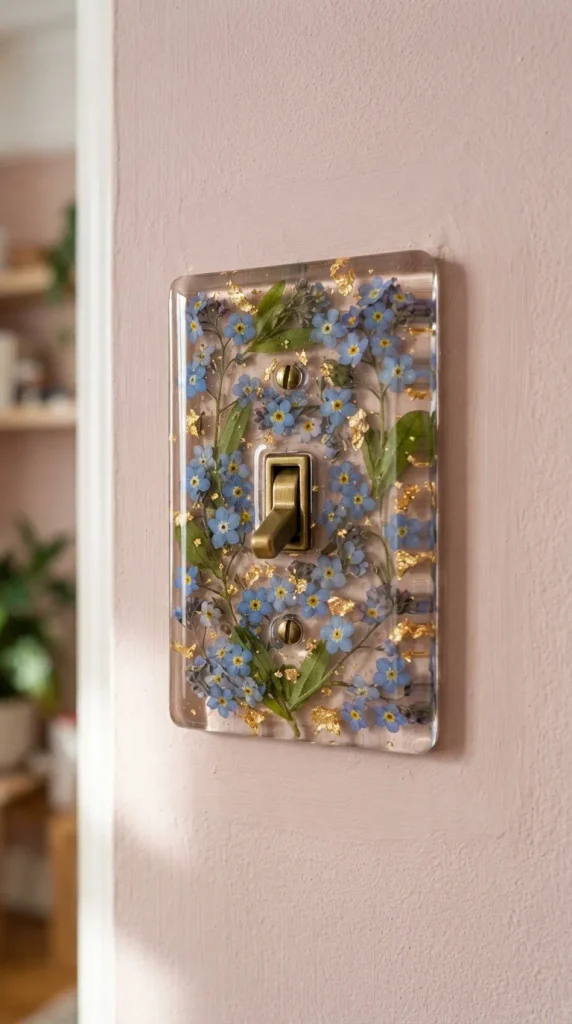
20. Pressed Botanical & Resin Light Switch Plates
Upgrade bland plastic switch plates into glossy, botanical art accents that bring cohesive charm to every doorway and wall outlet.
What This Idea Means
True room design focuses on cohesive micro-details. Plain plastic switch plates can break the immersion of a beautifully curated space. Encasing delicate pressed flowers and gold leaf inside clear resin transforms these utility covers into charming decorative accents.
Materials Needed
- Plain white or clear plastic standard light switch plates and outlet covers
- Clear two-part epoxy resin or UV resin with UV curing lamp
- Miniature pressed flowers and delicate greenery (forget-me-nots, mini pansies, sweet alyssum)
- Fine metallic gold leaf flakes
- Mixing cups, stir sticks, and fine-tip tweezers
Step-by-Step Instructions
- Clean the Plate: Wipe down the switch plate with isopropyl alcohol to remove dust and oils. Place the plate level on a silicone craft mat.
- Arrange the Botanicals: Using fine tweezers, compose a delicate arrangement of mini pressed flowers around the screw holes and central switch opening.
- Adhere the Florals: Apply an imperceptible dot of glue behind each flower to keep the botanical arrangement from shifting or floating when resin is poured.
- Pour the Resin: Mix your epoxy resin thoroughly according to instructions (or apply UV resin). Slowly pour a smooth, self-leveling layer over the top of the switch plate, guiding it gently to the edges with a stir stick.
- Cure and Install: Use a light heat source to pop any surface air bubbles. Allow the epoxy resin to cure completely in a dust-covered area for 24 to 48 hours (or cure under a UV lamp for 5 minutes). Reattach to your wall with screws.
Tips & Styling Variations
- Pearlescent Shimmer: Mix a microscopic dusting of pearlescent mica powder into the resin to give the plate a subtle opalescent glow when light hits it.
- Styling Tip: Coordinate the flower colors on your switch plates with your gallery wall art or bed linens.